In this blog, I’ll be posting links every day on various topics of interest to those who value truth over lies in this, the most wicked, godless and depraved of human generations since the Days of Noah.
Socialist Spain’s Migrant Disaster
In this blog, I’ll be posting links every day on various topics of interest to those who value truth over lies in this, the most wicked, godless and depraved of human generations since the Days of Noah.
Socialist Spain’s Migrant Disaster
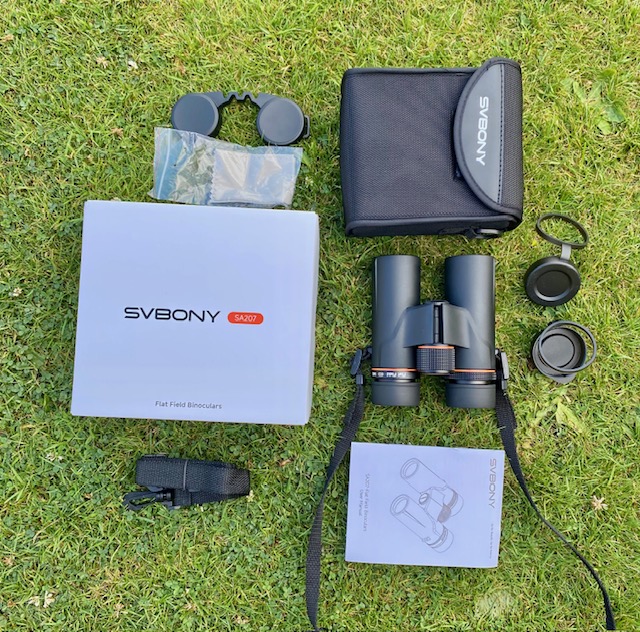
In this review I’ll be test driving SvBony’s latest and greatest compact binocular: the SA 207 8 x 32.
Tune in soon for full details….
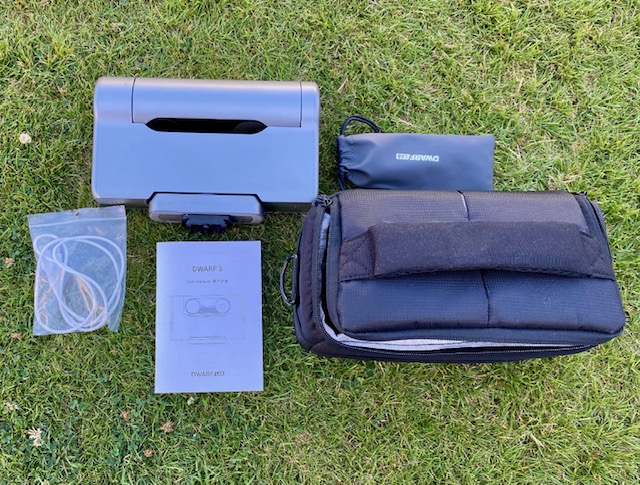
In this up-and-coming review I’ll be test driving the Dwarf Lab 3 Smart Telescope.
Tune on soon for full details………
A Work Commenced June 21 2025
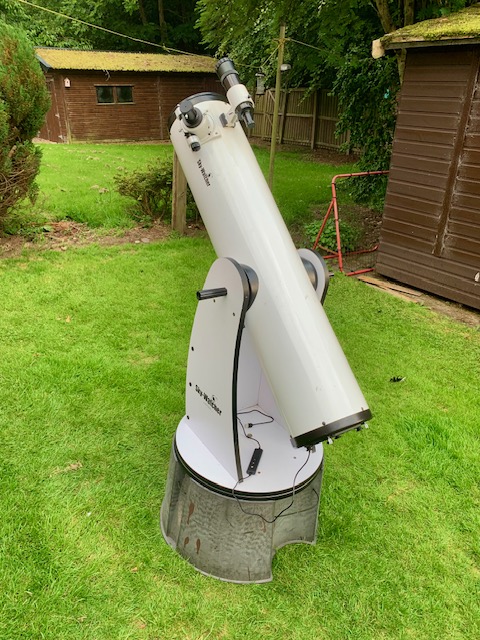
Back in 2015, I parted company with refractors as my main astronomical viewing instruments, having ‘seen the light,’ as it were, when I acquired a brilliantly simple 200mm F/5.9 Dobsonian from Skywatcher. Once properly collimated and acclimated under good seeing conditions, it significantly out-performed a top-rated 5 inch F/12 refractor on pretty much everything. The experience radically changed my perception of the true value of refractors, particularly when scaled up beyond 5 inches.
A year ago, I was delighted to see an astro imager had performed a shootout between a Skywatcher Explorer P 200mm F/5 Newtonian and a high-end 5 inch F/7.8 ED refractor on a high resolution lunar target, showing clearly the former’s superiority despite a nearly five-fold price differential.
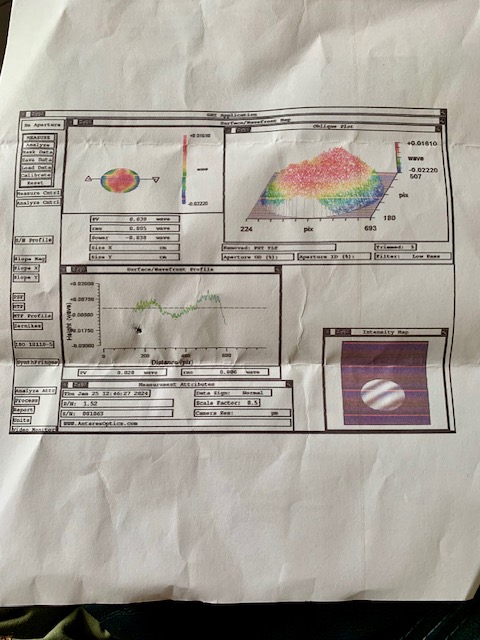
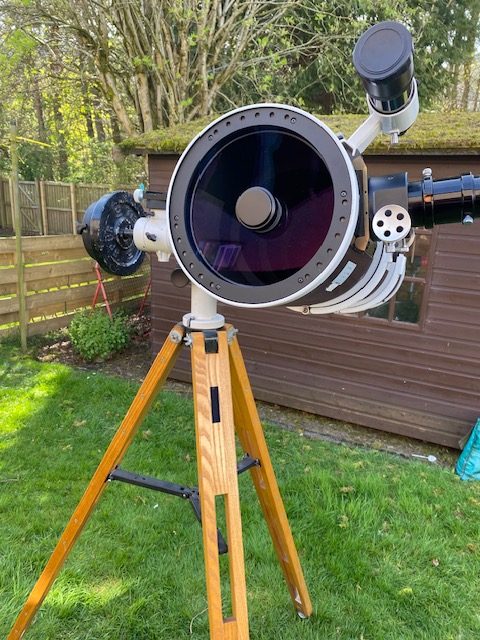
Over the last decade, I’ve made a series of modifications to this 200mm Newtonian, called Octavius, owing to its 8 inches of aperture. The primary mirror from Skywatcher was good but I decided to replace it with a true 8-inch (203mm) F/6 Ultra Grade mirror with an accuracy exceeding 1/10th wave PV from Orion Optics UK, which also came with state of the art reflective coatings – HiLux enhanced aluminium – increasing the mirror’s reflectivity from 85 per cent to over 97 percent across the visible spectrum.
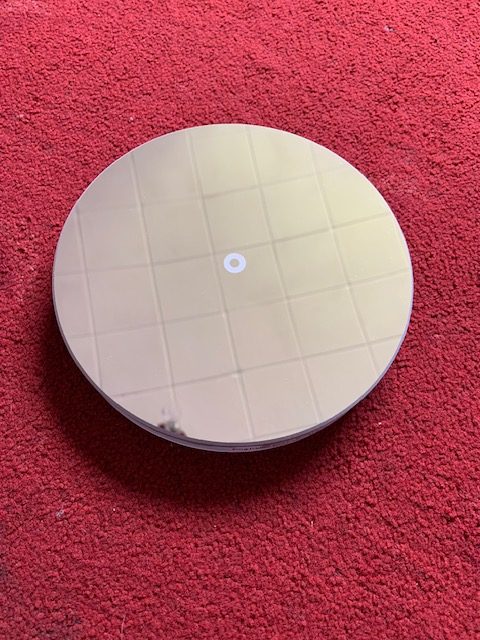
I then upgraded the secondary mirror by ordering up a smaller(1.52 inches) and more optically flat Antares unit with a 1/15th wave PV surface accuracy, whilst also reducing the central obstruction to less than 20 per cent by aperture.
Like the primary, the small secondary mirror came with enhanced aluminium coatings as standard, to maximise image brightness. Because it’s such a small and lightweight mirror, I could attach it to the stalk using double-sided tape.
My own personal experience with enhanced aluminium coatings is that they have much greater longevity compared with standard coatings. Indeed I have older mirrors treated with HiLux that are 10 years old and show no signs of deterioration despite regular use in my damp Scottish climate.
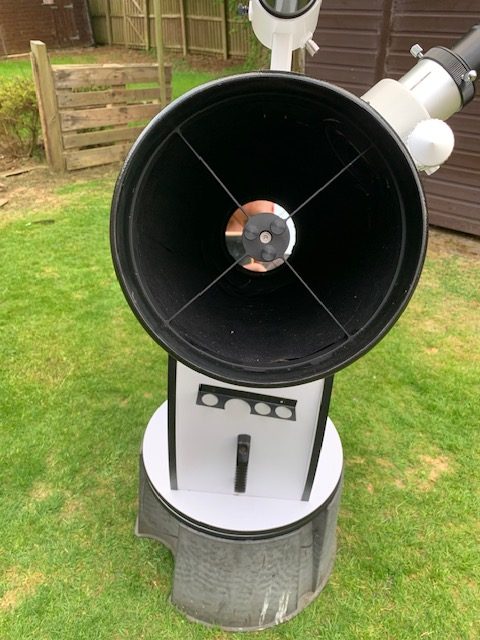
The somewhat flimsy secondary housing on the original SkyWatcher 200P was removed and replaced by a much more rigid and solidly-built structure manufactured by the German company, BackYard Universe.
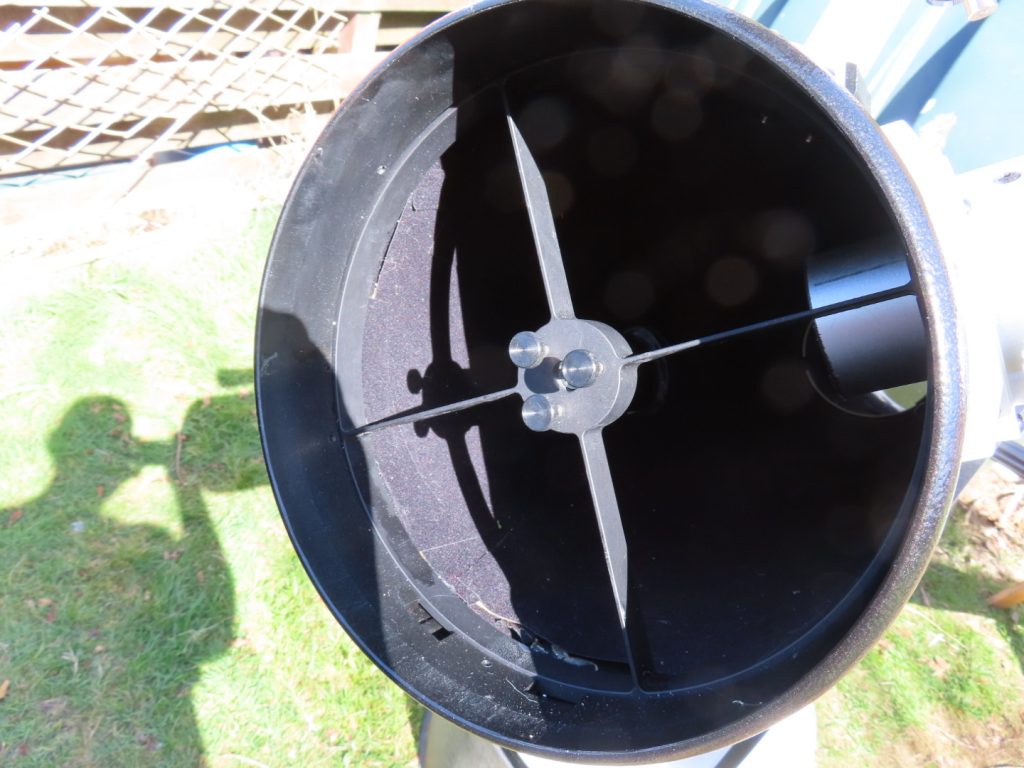
The secondary holder has a diameter of 40mm – slightly larger, in fact, than the 38.6mm elliptical flat mirror – giving a minimum central obstruction of 19.7 per cent.
Of course, If I so desired, I could have installed a low-profile focuser and decrease the secondary obstruction to just 10 per cent using a even smaller secondary, not to mention the need to redesign the spider structure. But in the end I decided against it, as I wanted to create a more all-purpose visual instrument rather than a specialised lunar and planet killer. And in any case, optical theory informs me that once the central obstruction falls below 20 per cent or so, the effects are almost indiscernible from a non obstructed optic of the same aperture.
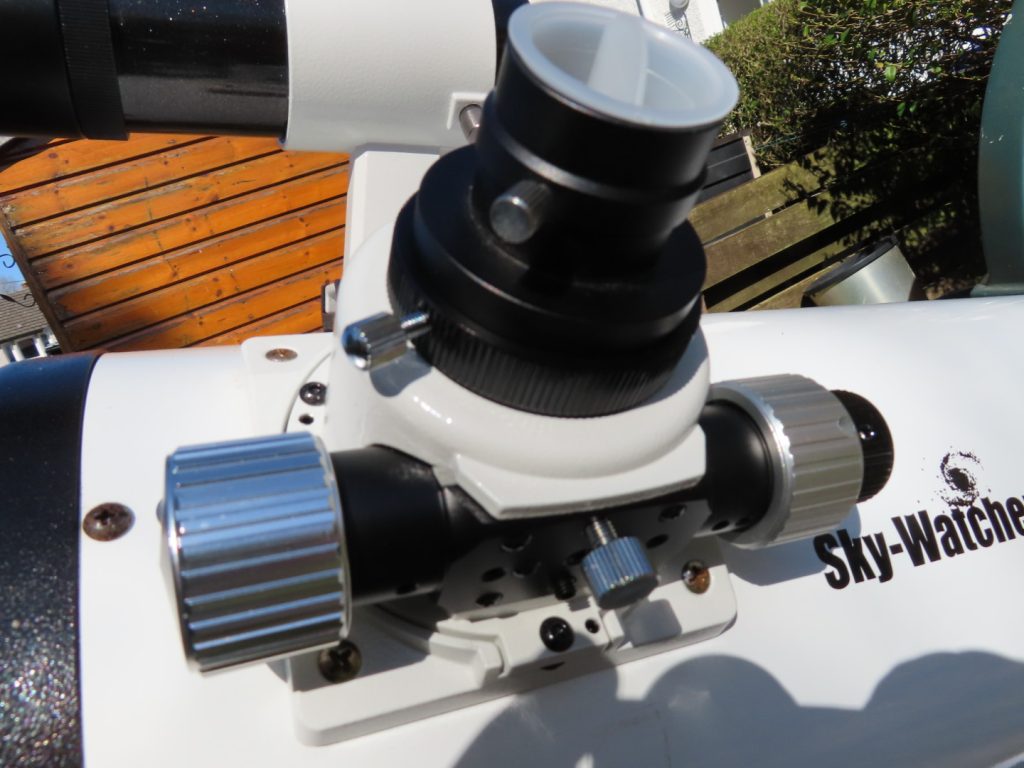
I did however replace the original single-speed rack and pinion focuser on the SkyWatcher Explorer P after ten years of heavy use, with SkyWatcher’s dual-speed Crayford focuser, which allows me to achieve smooth and precise micro-focusing on high resolution targets.
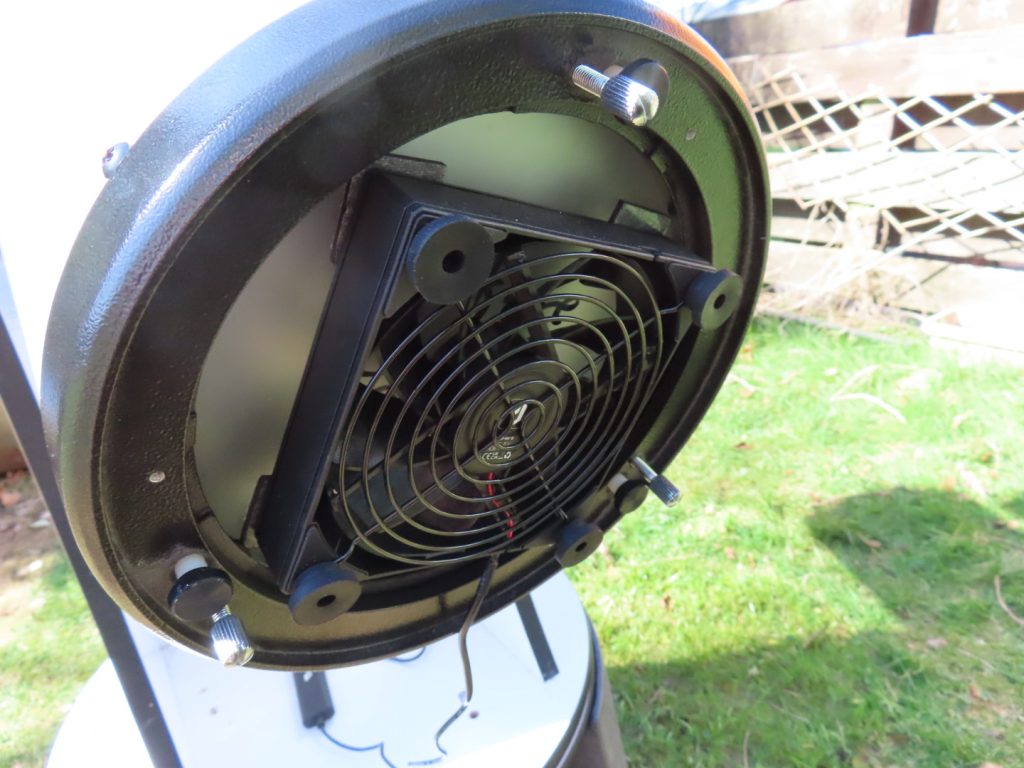
I also attached an inexpensive USB type cooling fan to the rear of the primary mirror which helps remove the boundary layer of warm air accumulating above the surface of the mirror, to help keep the images as crisp and detailed as possible.
The interior of the tube is lined with cork and overlaid by matt black flocking material to further enhance its thermal properties, as well as maximising image contrast.
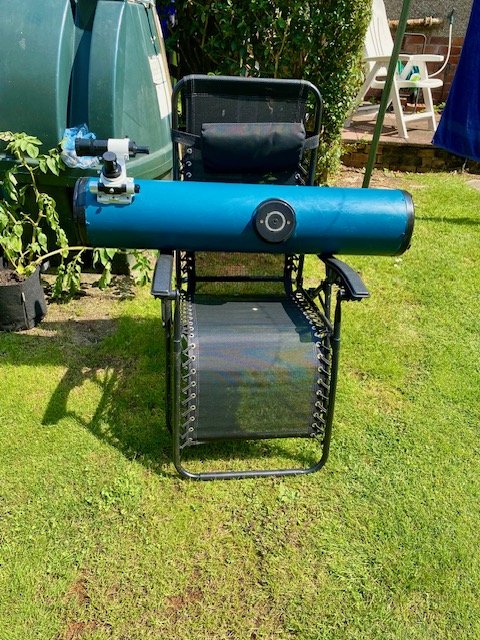
The telescope sits in the original lazy susan altazimuth mount with the stalks under its base fitting into some pre-cut holes I made in an inexpensive plastic water butt. This raises the height of the telescope further above the ground providing a supremely comfortable standing height – I’m a six footer – for all my astronomical observations. And that brings me to the second reason for abandoning refractors- I hate sitting down, huddling over an eyepiece, straining my back while trying to study a target located high in the sky. Those kinds of observations are much more comfortably executed while standing up. Indeed, I even use my travel scope- a high quality 130mm F/5 Newtonian placed on an altazimuth mount- in exactly the same way i.e. standing up. Once I got used to standing with my Newtonians, there was no going back to refractors.
Just as any fine musical instrument benefits from occasional tuning up, so too does Octavius. At F/6 collimation is very easy, so easy in fact that it only requires a simple collimation cap to get you 90 per cent of the way there, and quite often better. The final tweaking is done manually by performing a star test at high power and making those final adjustments using the collimation screws on the primary mirror. It’s quick and easy, taking only a couple of minutes to get perfect alignment of the optics.
The more rigid secondary structure has greatly helped to maintain precise collimation from night to night, so much so that the instrument only needs occasional tweaking when moved from its indoor storage space to the outside air. That’s how it should be!
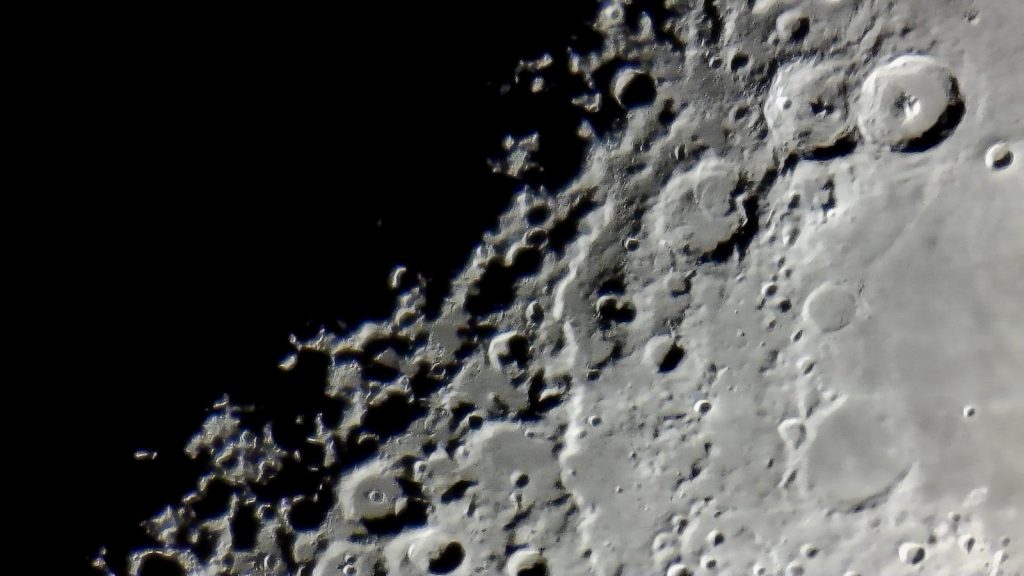
So how good are the optics? In a word- superb! But to elaborate: star testing at 200x under good conditions shows identical diffraction patterns inside and outside focus. Stars focus down to tiny, round Airy disks. By far the biggest benefit has come from the primary mirror. On the night the new primary arrived back in January, I was immediately able to discern the improvement on Jupiter. The new mirror snapped to focus better, showed more contrast and routinely revealed subtle details on the Giant planet that I had only vaguely discerned using the original mirror. Magnifying the first quarter Moon up to well beyond 400x showed no image breakdown whatsoever. The image below is a single shot image of the first quarter Moon taken with the Svbony SC001 2 Megapixel imaging camera, on the evening of May 3 2025, showing some very fine details.
Know Thy Telescope
Modern Newtonian primary mirrors are figured into the shape of a parabola. But why a parabola? Some analytical geometry can help us understand why:


In contrast, a spherical mirror has no fixed focal point but can approximate a parabolic shape if the focal ratio is made very large. Unfortunately, as the aperture increases, the focal lengths needed for spherical mirrors to work well very quickly
become impractical.
Optimum Aperture for Resolving Binary Stars.
Octavius is used mainly as a lunar, planetary and double star scope, although I also use it for deep sky observing too. One of my passions is double star observing, at which Octavius excels. Indeed, with a decade of experience with this telescope, I’ve come to accept that it’s very close to ideal for observing tricky binary systems reaching pairs less than 1” separation.
The following analysis is based on the work of Michael Greaney from chapter 25 of the book, Observing and Measuring Double Stars(2nd edition) which was incorrectly printed( the errors from which were reported by yours truly ,to the editor, Bob Argyle, at the Institute of Astronomy, Cambridge, UK).
According to Sidgwick, the maximum useful magnification of a telescope is approximately 28D^0.5 where D is the aperture of the telescope in millimetres. This was empirically derived, so has taken the effects of atmospheric seeing under British skies into account.
On the other hand, according to the work of the late professional double star astronomer, Dr Paul Couteau, the minimum useful magnification for resolving close binary stars is twice the resolving magnification of the telescope, which turns out to be D in millimetres.
There must exist an optimum value of D between the maximum useful magnification and the minimum useful magnification. If we express this as f(D) = 28D^0.5 – D
Then differentiating with respect to D gives:
f’(D) =14D^-0.5 -1 = 0 for the optimum, which turns out to be D =14^2 =196mm.
This result is just shy of 8 inches, the same aperture as Octavius.
Octavius, Optimus!
A Mid-Summer Night’s Dream

I’ve noted the efficiency of the 8-inch F/6 Newtonian many times over the years, but as a case in point, I used the instrument on two nights just after the summer solstice to resolve some tricky double stars at high power. First on the night of June 24-25 and again on June 28-29 2025. My workhorse eyepiece for this kind of project is my trusty Svbony SV 215 3-8mm planetary zoom eyepiece yielding magnifications of 152x – 406x. As the experienced observer, Alan Dyer, of Sky & Telescope concluded in his review, this is an excellent eyepiece, fully the equal of the Nagler zooms but offered at a much more attractive price. Additionally, I usually have 1.6x, 2x and 3x Barlow lenses handy to boost the magnification as high as 1218x.

This time of year, the twilight limits my observations to a short period of time between 11:30pm and about 1:00am local time, as any later and the sky begins to brighten again. I usually ‘warm up,’ starting with easier pairs such as Epsilon 1 & 2 Lyrae, all four components of which are easily split at 152x in the 8-inch. Moving on to Delta Cygni, which has a faint close companion, Octavius made light work of resolving this system at powers upward of 300x. One invaluable tool I use to enhance the detection of these close, unequal magnitude pairs is a polarising filter, which helps to cut off some of the diffraction ‘gunk’ between the components, in much the same way as an apodising filter works.
From there, I moved over to Aquila, low in the east, and tracked down the sixth magnitude star Pi Aquilae, centered it in my 8 x 50 finder scope and then cranked up the power to 406x, which is sufficient to tease both components – a pair of white sixth magnitude stars separated by just 1.4 arc seconds – and orientated roughly east-to-west.

Confident of good, steady skies, I next trained the instrument on Lambda Cygni – by now high in the eastern sky. Starting at 406x, I leave the star drift through the field, watching with intensity what the image might show me. Sure enough, I began to glimpse the secondary star (magnitude 6.3) almost precisely north of the primary(magnitude 4.7) and separated by a sliver of twilit space merely 0.9 arc seconds apart. Checking Stelledoppie afterwards, I was delighted to see its estimated position angle to be 01 degree, so almost immediately due north of its primary! Cranking up the power to 812x using a 2x Barlow lens gave an even more impressive view: the two stars cleanly resolved, and racing through the field of my un-driven telescope at breakneck speed! How swiftly the Earth moves! Time waits for no one.
At their distance from the solar system, the pair orbit their common centre of gravity every 391 years.

The above was recorded after midnight on June 25 but I was able to repeat the split just a few nights later on June 29. So, two clear nights just after the solstice when the telescope was able to resolve this sub arc-second pair! This might sound unusual, but it’s actually quite typical of our summer sky seeing – and, truth be told, all over the British Isles(having surveyed its suitability across Ireland as well),- here in rural central Scotland!
Unequal Pairs
The Dawes Limit has long remained the empirical limit on the resolution of double stars. Formulated in the 19th century by the celebrated Victorian observer, William Rutter Dawes, it states that the resolution limit for a telescope in arc seconds is given by 4.56/D where D is the aperture in inches. The formula Dawes arrived at was for equal brightness 6th magnitude stars. Thus, Octavius ought to be able to resolve equal magnitude pairs as close as 0.57 arc seconds. But things get more challenging for pairs of unequal brightness. In short the bigger the brightness differential between the stars the harder they are to tease apart.
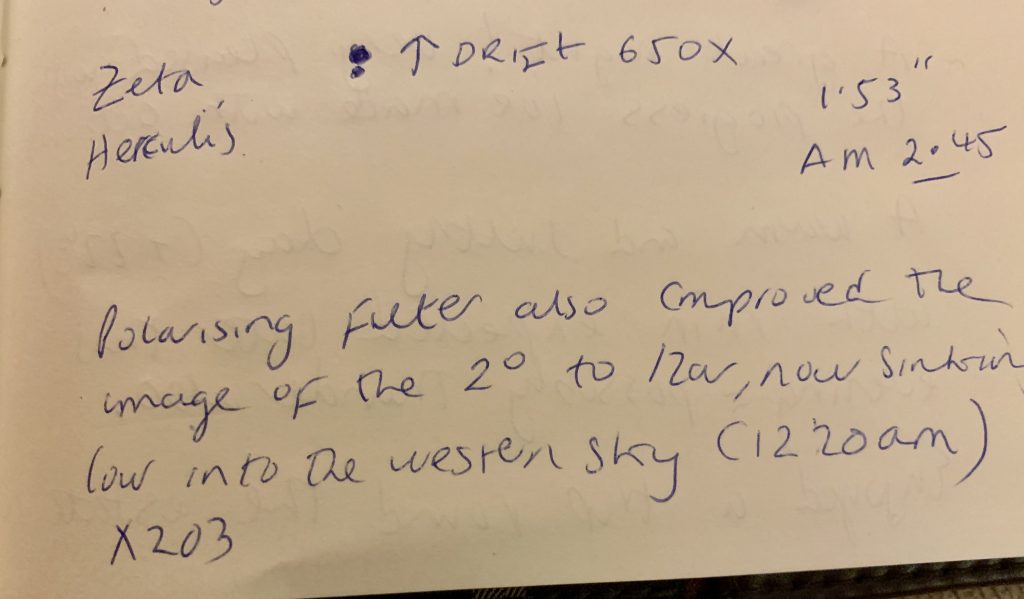
Of the closer pairs already discussed, the easiest is Pi Aquilae(1.4”), since they only differ in brightness by 0.41 stellar magnitudes. More challenging yet is Lambda Cygni (0.9”) with a brightness differential of 1.53 stellar magnitudes. But at 00.02h on the night of July 17, during a spell of excellent astronomical seeing, I trained Octavius on Zeta Herculis, a yellow-white sun-like star still high in the summer sky just past meridian passage. The secondary is separated from its primary by 1.53” but the magnitude differential is 2.45. Charging the telescope with a power of 650x using my polarising filter, the 8-inch Newtonian was easily able to resolve the secondary immediately due east of its primary( confirmed by consulting Stelledoppie). Another similar test of this kind can be conducted on Propus(Eta Geminorum)during the winter months. With a separation of 1.83” but a magnitude differential of 2.63, this is considerably easier to tease apart.
Why mention close, unequal pairs like these? Well, commonly accepted wisdom holds that Newtonians work best for equal magnitude pairs, but I’ve found this to be another myth promulgated by some members of the amateur community. After studying the work of Christopher Taylor, a theoretical physicist by training, and keen double star observer with a particular interest in resolving sub-arc second pairs using a 12.5 inch F/7 Calver reflector erected on a massive, un-driven altazimuth mount down at Oxford(discussed in Chapter 11 of Argyle’s book previously mentioned), it became clear to me why Octavius does so well on unequal double stars like Zeta Herculis. It has a small central obstruction and vanishingly low spherical aberration- both of which result in transferring substantially less energy from the Airy disk into the diffraction rings, thereby making a faint companion more easily resolvable from its primary. Indeed, Taylor admits as much in his book chapter, by making the point that his century-old Calver mirror was deliberately left under-corrected to help keep track with falling temperatures.
Examining the Airy disks of second and third magnitude stars in Octavius on nights of good seeing, reveals tiny pinpoint stars with a singular ring of moderate size and brightness. In other words: the images are very refractor-like.
Perhaps most fascinating of all is the sheer dynamism of pairs like Zeta Herculis. Located a few tens of light years away, the companion to Zeta Herculis orbits its primary in just 34.5 years. That means that its position angle relative to its primary changes significantly in just a few years! Having carried out observations of this system regularly over the last decade I’ve witnessed its rapid movements from one year to the next. How cool is that?
For the record, Tau Cygni, easy to pick up even in summer twilight, and currently separated from its primary by 1.1” but with a 2.75 magnitude difference, presents a similar type of challenge.
A New and Improved Primary Mirror Fan

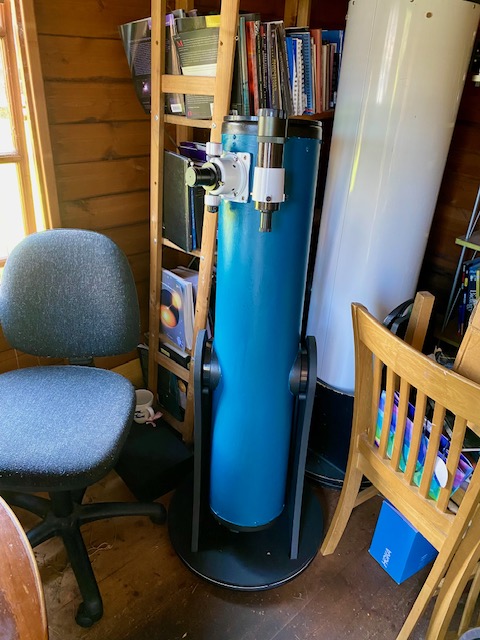
I’ve dithered for years about whether a primary mirror cooling fan would be worth installing. I’ve generally not encountered much in the way of thermal issues using Octavius, as we experience only small diurnal temperature swings for much of the year, though April and May have brought their problems, with warm sunny days and chilly nights. I generally store the telescope in a dry, unheated shed, just a few degrees warmer than the outside air. However, during the cold winter of 2024-25, I bought a small USB desk fan and affixed it to the rear of my primary mirror using a few layers of double-sided tape. It was powered by a small portable power pack and after several trials,I became convinced that it did clean up the images of Jupiter and Mars in a subtle but consistent way. However, I did perceive some vibrations at the high powers I use for close double stars. I attributed this to the direct attachment of the fan to the mirror.
So I decided to splash out on a dedicated mirror fan manufactured by Austral Solutions, based in Spain. This new fan attaches to the outer tube of the telescope in such a way that it doesn’t touch the primary directly, but blows ambient air onto to the centre of the primary mirror. It’s powered by a 12v DC step-down transformer (user provided)powered from a mains (AC) source. Although this requirement necessitates having a constant supply of electricity, it’s more reliable than the portable power pack I had used with the original fan, which often cut out, especially on colder evenings, over the winter and spring. My results this summer, examining high-resolution double stars, testing various permutations (turning the fan off and on and critically examining the seeing disks) has convinced me that keeping the fan running constantly significantly increases the stability of the Newtonian image.
Finding Fainter Pairs
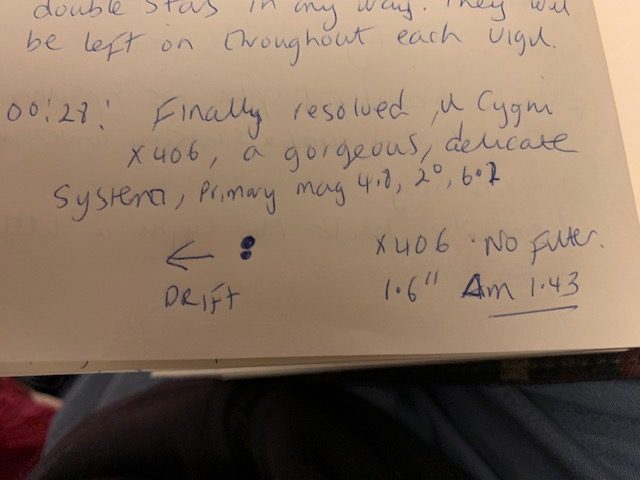
By late July, the skies above me become noticeably darker, allowing me to better track down fainter binary star systems. One example is Mu Cygni, which can now be tracked down using my finder scope on the eastern flank of this large, summer constellation. My notes show that I had not visited this system for about six years, so I was excited to pay a visit to this old friend. On the night of July 23-24, I trained Octavius on Mu, which is easily identified by virtue of a wide, unrelated 7th magnitude star off to the east of it in the finder telescope. Charging Octavius with a power of 406x(fan running), I was greeted by a beautiful sight: a pair of white suns separated by 1.6”, the primary having a magnitude of 4.8 and the secondary- 6.2-roughly due north of it. I don’t remember this system to be much of a challenge for a good 4- or 5-inch refractor employing high powers back in the day. Clearly the secondary is closing in on the primary, making it more challenging than I remember.
In addition, on the same night, I trained Octavius on Iota Cassiopeiae, now at a decent altitude off to my northeast, and cranked the power up to about 200x to reveal this beautiful triple system for the first time this season. A nice way to end my vigil on this rather cool July night!
A Return to Dark Nights
By the last week of July, the skies are turning noticeably darker after sunset here in rural central Scotland. On the night of July 29-30, I enjoyed a reasonably calm, clear sky and by half past midnight local time, I could once again see the faint glow of the summer Milky Way coursing its way through Cygnus and Cassiopeia. Seeing was only average though, so no high-resolution double star observing was conducted. Instead I turned Octavius on some familiar summer deep sky objects. To view some of the larger objects on display, I employ longer focal length 1.25” eyepieces like my 22mm (70 degree AFOV) yielding a low power of 55x in a true field of 1.26 degrees and a medium power from my 15mm (68-degree AFOV) which yields a power of 81x in a 0.84 degree field. The reader will note that I do not employ 2” eyepieces for lower power wider FOV viewing for two principal reasons: I strongly dislike having to switch between the 1.25” and 2” formats, and the lower powers of these longer local length oculars shows up the astigmatism in my right observing eye which I find distracting when used without eye glasses. That said a 1.26 degree field is more than enough to enjoy pretty much all of the objects I visit with Octavius. If I want larger fields, I turn to my large, 15 x 56 binoculars.
I first turned Octavius on the Ring Nebula(M57) in Lyra, its ghostly glow coming through nicely at 152x. Then moving into Hercules, I quickly located both M13 and M92, both globular clusters located far out in the halo of our galaxy. Although these are best resolved at powers of 150x to 200x, tonight I was happy to admire these beautiful baubles of ancient starlight at 81x using my 15mm eyepiece.
After having quick looks at easy double stars such as Gamma Delphini and the colourful, O1 and O2 Cygni and the famous 61 Cygni, I trained the telescope on the wide but rich open cluster M39 at the head of Cygnus, enjoying the dozens of pinpoint stars strewn across the field of the 22mm eyepiece, and set against a rich Milky Way hinterland. By 1:00 AM local time, Cassiopeia was just clearing my rooftop and I had hoped to catch a glimpse of the famous Double Cluster in Perseus. Alas it was still too low for me to access it. It will have to wait a wee while longer before I can view this spectacular object in my trusty 8 inch Newtonian.
The Assault on Tau Cygni
The night of August 9-10 was cool and breezy, but the sky was clear, with relatively calm twinkling stars..The full Moon culminating low in the south. I fielded Octavius at around 10:30pm local time and tested sky conditions by looking at a few binary systems of increasing difficulty. First I targeted Delta Cygni and was delighted to get a very clean split at 244x. Then I moved over to Lambda Cygni, cranked the power up to 650x and once again managed to split this system with relative ease. Confident that this would be a good night to try my hand at Tau Cygni, I began by observing the star at powers up to 406x but with not a lot of success. Patience is a virtue, however. The system had a few hours to go before it reached its highest altitude crossing the meridian. Leaving the fan running continuously, I covered the optics and ventured inside for a while before returning to the telescope every half hour or so. With each attempt, I could see that the appearance of the Airy disk of the 4th magnitude yellow white primary looked better and better as I was looking through less atmosphere. After midnight, using a power of 812x , I got my first glimpse of the secondary with a current separation of about 1” off to the SSE of the primary but it was only tentative at this stage. By about 1.00AM local time, I ventured out again, charging the instrument with a power of 812x and positioned the star on the east side of the telescopic field. In moments of superior seeing, I could make out a faint disk in the same position I had glimpsed earlier, but now it was more steadily held. Reaching for my 3x Barlow and switching it out with my 2x Barlow, the telescope could now deliver a power of 1218x – crazy I know! To see this system at such high power on an un-driven mount, you start at the lowest zoom setting (8mm with a 3x magnification boost), placing the star at the eastern edge of the field, focus as finely as possible and then crank the power upwards toward 1218x. The strategy paid off! At these extremely high powers, I was better able to tease the components apart and record its position relative to the direction of drift. After I had made a sketch, I consulted Stelledoppie and was delighted to see that the companion was in just the right position it should be in August 2025. I note the last measure was made back in 2017 when the estimated position angle was 190 degrees. Since then the 7th magnitude companion had moved eastward in its orbit round the primary. Back in 2017, it was located off to the SSW but now it was in a SSE direction.
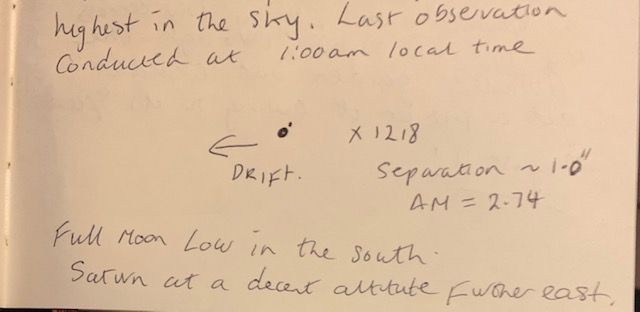
This was a thrilling observation: one of the most difficult I’ve tried in quite some time: a companion separated by just 1” of sky but fully 2.74 magnitudes fainter! This would be a severe challenge for a 6-or 7-inch refractor but it was quite doable on a good night here in rural central Scotland, using a fine-tuned 8-inch Newtonian with a sub-20% central obstruction. The sun-like star Tau Cygni B, orbits its primary every 49.5 years.
A Visit to 61 Cygni:
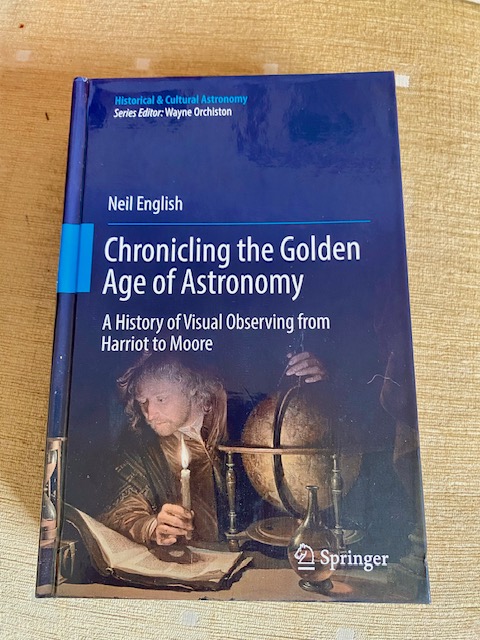
In the same telescopic field as Tau Cygni my 8 x 50 finder scope picks up the lovely pair of orange stars known as 61 Cygni. Even the smallest telescope is capable of resolving these stars and even steadily held 10x binoculars should tease these apart. At 153x Octavius frames these stars perfectly with a nice Milky Way background. The brighter of the two has a magnitude of 5.2 and its companion nearly a full visual magnitude fainter. To my eye both stars exhibit the same orange hue and that’s not surprising as they are both K spectral class dwarf stars with temperatures a little over 4000K. 61 Cygni was all the rage in the first few decades of the 19th century, when astronomers noted their large proper motion, a good sign that these stars were relatively close to the solar system. As recounted in great detail in Chapter 11 of my large historical work, Chronicling the Golden Age of Astronomy, it was the great German astronomer, Friedrich Wilhelm Bessel, who, by 1840, first measured their distance from the solar system to be 10.3 light years away: only 10 percent lower than the modern accepted value. 61 Cygni represents a true binary star system, the components of which orbiting their common centre of gravity every 680 years.
Astronomers have yet to identify planets orbiting these cool, long-lived stars, but in general, unless their planets orbit very close to their parent stars, the chaotic orbital motions of close binary star systems like this generally cause their planets to be ejected from their system over time. Still, in the mind’s eye, I can imagine being on the surface of one such world, watching two golden suns rising and setting in a clear sky. How wonderful it would be to witness such a sight!
Two Golden Binary Stars in Draco:
On the lovely evening of August 26, a light southerly wind kept the dew at bay and the sky above was glorious, with the Milky Way snaking its way from southwest to northeast. I trained Octavius on Eta Draconis: a lovely golden sun easily visible to the eye at magnitude 2.7. This was my third observation of this system in as many weeks. Seeing was excellent tonight as is often the case in August, so I cranked the power up to 406x and watched it drift through the field. It wasn’t long before I glimpsed its very faint secondary close in at 4.7” from the primary, and off to the southeast. The challenge here, once again, is not the angular separation per se, but rather the magnitude differential. The companion is 5.4 magnitudes fainter but still quite easy for Octavius.

Returning to the lowest power setting on my zoom eyepiece yielding 152x, brought another star of the 6th magnitude of glory into the same field of view as Eta. Indeed it is quite easily seen in my 8 x 50 finder. This star, known prosaically as STF 2054, also took on a golden hue but after I increased the power to 406x I could easily resolve its companion just 0.93” away from the primary and orientated north-south( the companion is due north). The fainter star is about a magnitude dimmer than its primary. Using my 2x Barlow lens provided 812x which made seeing the components that little bit easier again. Intriguingly, after consulting the astrophysical data on both Eta Draconis and STF 2054, I discovered that both stars have exactly the same spectral class – G8III – making them about 700 degrees cooler than our Sun but also explaining why their colours looked similar in the eyepiece.These two stars visible in the same field will make for an excellent test of resolution for moderate-aperture backyard telescopes under good seeing conditions.

The Joyous Return of Jupiter:
Throughout the autumn I’ve enjoyed many nights doing double star observing. But in recent weeks, the mighty planet Jupiter has returned to the eastern sky later in the night. Jupiter is, by a country mile, my favourite planet to study, its constantly changing atmosphere over timescales of days and weeks enthrals me. From the beginning of November, I fielded Octavius to observe the planet, but didn’t meet with much success, as the seeing conditions were not up to scratch for performing high- resolution planetary studies. But in the wee small hours of November 21, my perseverance finally paid off.
Though we’ve enjoyed quite a few clear nights in November, they’ve been accompanied by a northerly airflow, which always brings turbulent seeing conditions. You don’t need a telescope to verify these unfavourable conditions either: when the stars are scintillating wildly, even over head, there is no chance of obtaining fine planetary images. And contrary to what some observers claim, smaller telescopes don’t really help to alleviate this problem. For example, my portable travel scope – a high-spec 130mm F/5 Newtonian – is no better at ‘beating the seeing’ than my 8-inch is, at least at this location. Years of experience has taught me that.
The night of Nov 20-21 was clear and steady, with the stars twinkling much more calmly than any of the other clear nights in November. Temperatures had plummeted to -4C. At about 00:45 local time(UT): I trained Octavius on Jupiter and was delighted to see a beautifully sharp image of the Giant Planet with the Great Red Spot(GRS) near the central meridian. I made a quick sketch (see below)of the planet at 244x using a Baader Moon & Skyglow filter which helps bring out more subtle, low-contrast details.
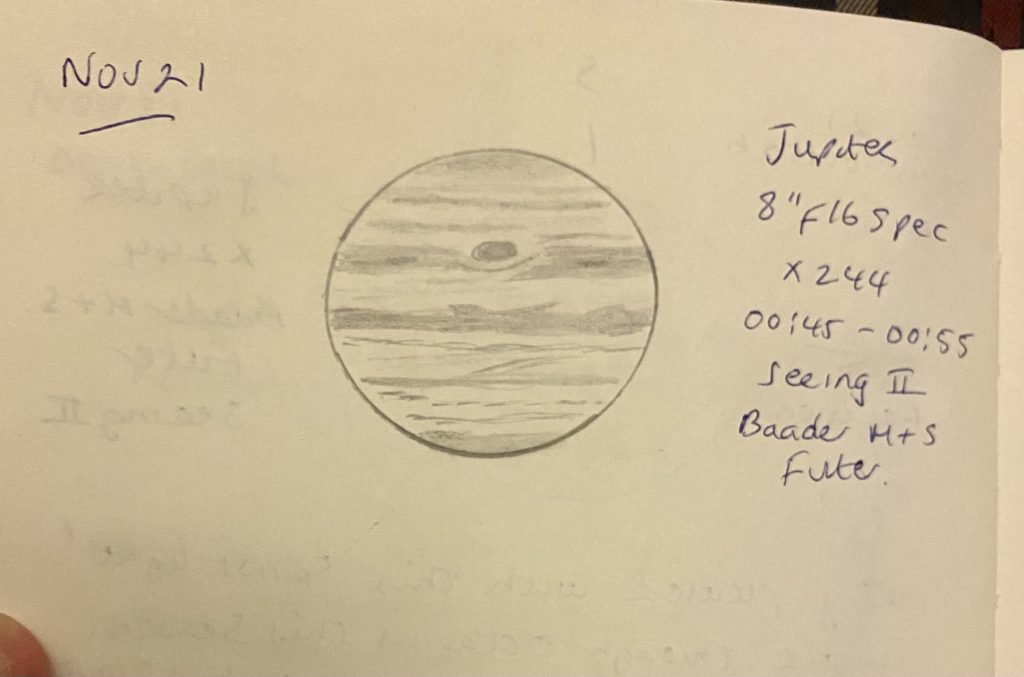
The planet was quite a bit away from meridian passage when I made the sketch. I continued to watch the planet until 1:30 UT noting the increase in detail as it climbed in altitude. Pushing the power up as far as 406x produced really promising results, with little breakdown in the image: something I couldn’t do with the original SkyWatcher optics- a testimony to the optical quality of this 8-inch F/6 Newtonian which renders planetary images as good or slightly exceeding a top-rated 6-inch refractor.
This is only the beginning: as the days and weeks go by, Jupiter will be available for observation at earlier, more convenient times, as it heads toward opposition in January 2026. Watch this space!
The Promise of a Misty Night
It’s now December: deepest darkest winter in the northern hemisphere. We’re now just three weeks out from Jupiter’s opposition in early January. Checking the weather forecast on December 15 2025, I noted partially overcast conditions with the likelihood of mist forming later in the night. Mist is a very reliable indicator of good, steady atmospheric conditions and sure enough after leaving Octavius cool off for an hour, I began observations of mighty Jupiter about 11:30pm local time by which time the planet had reached a decent altitude in the eastern sky but still a few hours from meridian passage. Charging the telescope with a power of 152x, I could immediately see that the planet was rock steady and showing lots of fine detail. Cranking up the power to 244x and using both a Televue Bandmate planetary filter and a Baader Moon & Skyglow filter interchangeably, I enjoyed magnificent views of the Giant Planet. On the whole, I prefer the Baader filter to the Televue owing to its greater light transmission and neutral colour cast though the Televue is certainly no slouch. I made a sketch of the planet at about 11:45pm showing the features I was able to tease from the disk. Bear in mind, this is still not Jupiter at its best as it needs to climb even higher in the sky before culminating in the south but it certainly provided the inspiration for scrutinising this magnificent world beyond the snow line of the solar system.

hiems horribilis
March 20 2026: Spring has finally arrived in the Northern Hemisphere, and the landscape is rising to the occasion with warmer sunshine, and tender young leaves appearing on the trees. The Winter of 25/26 has been terrible for astronomy though, with many overcast nights and frequent rain persisting over night. Indeed my notes show that this last Winter has been the worse in living memory with considerably fewer nights with steady, clear skies. That said the first few days of Spring have more than made up for the Winter hiatus. On the evening of March 19 I enjoyed exquisite views of Jupiter culminating in the south with the Great Red Spot and a shadow transit of one of the Galilean satellites in full view. The whole family came out for a gander of this magnificent world. Later the same evening I tried my luck on some moderately challenging double stars like Theta Aurigae, which was easily and steadily split at 152x. Noticing that the constellation of Leo was fast approaching the meridian, I decided to visit an old friend – the yellow white 4th magnitude star, Iota Leonis. This star has a close companion some 2.7 magnitudes fainter and currently separated from its primary by 2.3”. The challenge here is the relatively low altitude this system culminates at from my far northern latitude, which renders it considerably more challenging than it appears on paper. But sure enough, I was able to glimpse the companion due east of the primary at 152x but was much better resolved at 406x and 650x in the 8” F/6 Newtonian. The companion completes one orbit of its primary every 186 years.

Hunting Down Jupiter in March Twilight

The end of March marks the beginning of British Summer Time(BST), which brings longer evenings in the lead up to the Summer Solstice. By now Jupiter is transiting the meridian in twilight, necessitating hunting it down at or shortly before sunset. Watching Jupiter in a fading blue sky is fascinating though. Indeed, I’ve been enjoying studying Jupiter in twilight now for several years. What’s more, some of the finest views I’ve garnered from Octavius has been at these times. On many of these evenings, the atmosphere appears to be especially stable allowing incredibly subtle details to be observed. Of course, for those of you who dislike the diffraction spikes generated by Newtonian optics, such times are ideal as they are rendered quite invisible.
Octavius Versus a Skywatcher MN 190
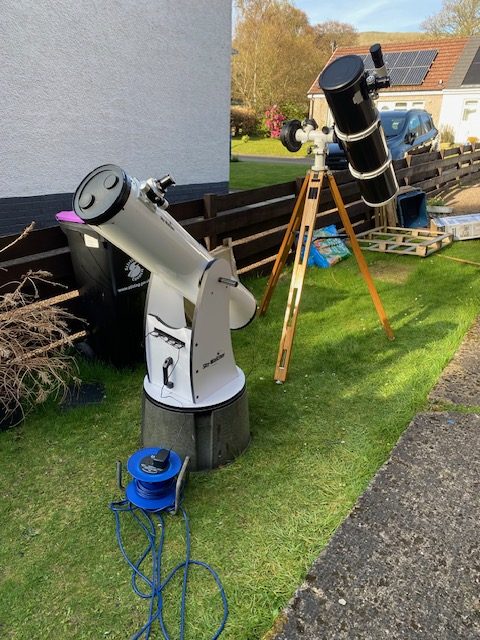
I recently bought in a Mark I version of the Skywatcher MN 190: a 7.5 inch Maksutov Newtonian with a focal length of 1000mm and with a central obstruction of 26.8 per cent. This telescope was highly lauded by several very experienced telescope testers, including one professional astronomer, who claimed that it delivers excellent images of the Moon, planets and deep sky objects, including double stars. With an F ratio of 5.3, it is also an excellent astrograph. This would be a great instrument to compare with Octavius but also with my 5-inch F/12 classical refractor, and so I set them up in my garden to look at a suite of objects like Jupiter, the Moon and a few tricky double stars.
I can confirm that the MN 190 is indeed an excellent telescope, delivering better views than my big refractor for sure on these targets under the same conditions. But when I compared and contrasted the views garnered by the MN 190 and Octavius, the winner was easy to pick: Octavius!
By far the most discriminating test was on Jupiter, now well past opposition and sinking in altitude into the western sky. Nonetheless, even after several evenings of direct A vs B testing, Octavius consistently delivered better images that were slightly sharper, higher contrast and more detailed than the 7.5 inch Maksutov Newtonian at the same magnification(about 200x). But to be honest, I fully anticipated this result, as the classical Newtonian has more aperture, a smaller central obstruction(under 20 per cent) and certified premium optics.
Notwithstanding this result, the MN 190 is considerably heavier than Octavius, with its large front meniscus necessitating a heavier mount. My classic 8-inch F/6 Dob is much lighter and easier to use, especially when viewing objects near the zenith when the MN 190’s eyepiece height was taller than yours truly, which I did eventually get round by placing a wooden crate at the side of the tripod, elevating my height by about 4 inches or so.
Having said all of that, I still highly recommend the Skywatcher MN 190 as an excellent all-round telescope. It delivers great views that could keep an experienced amateur happy for years. Thinking about it; the views of Jupiter through the MN 190 were very reminiscent of what I remember seeing in a TEC 140 under good seeing conditions: a very fine apochromatic refractor.
One Final Upgrade
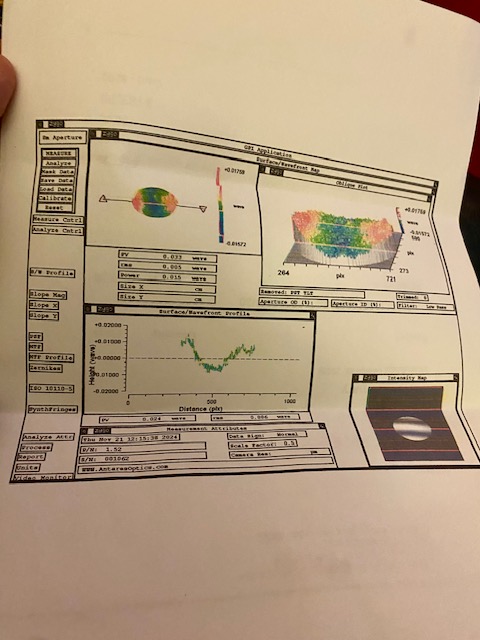
My experiences with the MN 190 got me thinking about making one final upgrade to Octavius. You’ll recall that I outfitted the instrument with a 1/15 wave PV elliptical secondary from Antares Optical with a 1.5 inch semi-major axis. Recently I bought a 1/30 wave PV elliptical flat from the same company with the intention of installing it on my 130mm F/5 Newtonian. But I asked myself, why use a lesser grade secondary on the telescope I use far more than any other? So I decided to replace the secondary on Octavius with the 1/30 wave PV elliptical flat. Would it provide better views? Probably not, but at least I would be reassured that I had the best 8-inch F/6 Newtonian money could buy. The 1/15 wave flat will find a home in my smaller, 130mm Newtonian.
A 1.4” Night
After a brief spell of warm weather at the end of May, June 2026 has been terrible here in central Scotland, with rain, high winds and cloudy nights. But on the eve of the summer solstice, the night sky was clear and cool(7C), so I fielded Octavius to conduct some double star observing. Seeing was not great though, unlike the summer solstice last year when I managed to split the sub-arc second pair, Lambda Cygni. That much was clear when I centred Vega in the telescope at 152x, which showed a considerable amount of turbulence. Nonetheless, Octavius managed to resolve Epsilon 1 & 2 Lyrae nearby. Moving to Delta Cygni, Octavius also managed to resolve the faint close-in secondary but it wasn’t pretty. Ditto for Epsilon Lyrae(Izar), now sinking lower in the western sky. Making the most of the short twilight night, I turned the telescope on the beautiful colour contrast pair, Albireo, which presented beautifully at 100x. Polaris A & B were also resolved well. Mizar and Alcor looked beautiful at 55x too. At about 00:25h on June 21st, I noticed that the brighter luminaries of Aquila had reached a decent height in the southeastern sky. Locating Pi Aquilae was quite challenging in the strong mid-summer twilight, but eventually I centred the 6th magnitude star system. Cranking the power up to 406x , I was able to just resolve this equal magnitude 6 pair at 1.4” separation but I sensed this was near the limit on this turbulent summer night. I did try Lambda Cygni at powers between 600x and 800x but the seeing just wouldn’t support these high powers. I shall have to wait for a better night of seeing to tackle this challenging pair.
Enjoying an Aberration Free Field of View

Shortly after midnight on July 1 2026, I had Octavius set up to compare the images with a Svbony MK127, a 5-inch Rumak telescope. It was mostly cloudy but with the forecast predicting some clear spells, and one such opportunity presented itself. This was just one of several comparisons between the 5-inch meniscus telescope and the 8-inch Newtonian I’ve been conducting over the last few weeks. Just two targets were studied: Delta Cygni and Lambda Cygni, both of which are tricky systems. Tonights results were typical. Both telescopes are capable of resolving these systems, but, as usual, the results were plain to see. While the 5-inch Rumak struggled to resolve both, the Newtonian made light work of them. The latter is head and shoulders the better double star telescope. The companion to both these close binary star systems was much more steadily held in the Newtonian than in the Maksutov. I believe the large central obstruction of the latter renders it more sensitive to my local seeing conditions, since it puts much more energy into the diffraction rings than the much smaller obstruction on the Newtonian(19.6% compared with 36%).
The magnification employed to resolve the 1” pair Lambda Cygni on the 8-inch f/6 Newtonian was 406x and above. The best view I obtained was at 812x when I got a beautifully resolved split even when the pair was placed right at the edge of the field!
You see, at these high magnifications the entire field is aberration free. Indeed, we can easily compute this field size for any Newtonian given its diameter, D, and focal ratio F.
The diffraction limited field of view in millimetres is given by 0.022F^3.
Setting F= 6 gives 0.022 x 6^3 =4.752mm
Next converting this to angular degrees we get:
(57.3 x 4.752)/ 1218 =0.224 degrees.
My work horse eyepiece for double star observing has a constant AFOV of 58 degrees throughout its zoom range. This means that any magnification above 58\0.224 = 250x will yield a field that is above the diffraction limit, explaining why the definition of high resolution double stars remains text book perfect from centre to edge. This obviously has advantages for an un-driven telescope like Octavius. I can place the subject anywhere in the field and get perfect resolution, when conditions are good.
Incidentally, this is also true when I use Octavius to observe Jupiter on nights of good seeing, when powers of ~250x appear to be optimal.
Vindicating Sir William Herschel
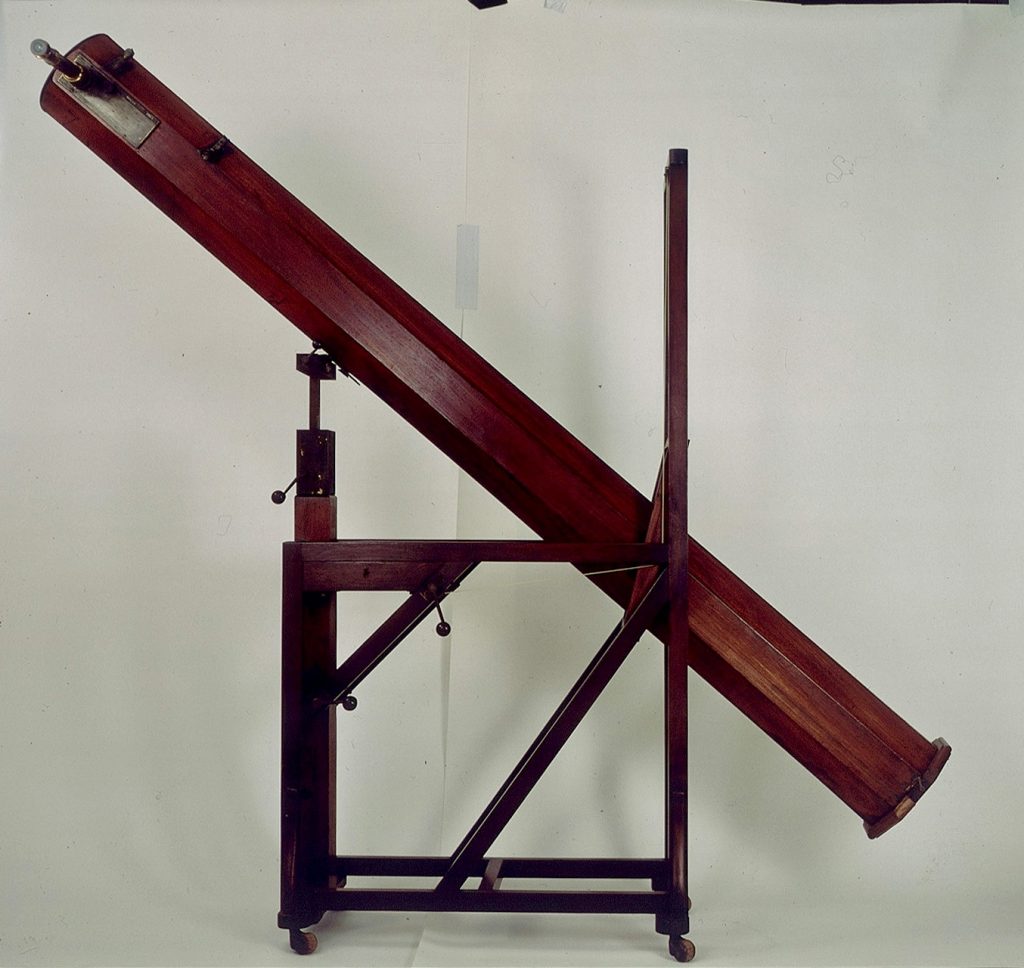
In Chapter 8 of my historical work, Chronicling the Golden Age of Astronomy, I gave mention to Sir William Herschel’s earlier telescopes, of which the 7 foot focus Newtonian is most famous. In his first two preliminary surveys of the heavens, he used a 4.5 inch speculum metal mirror and then a larger, 6.2 inch mirror, to catalog thousands of stars down to the 8th magnitude of glory.
The 6.2 inch F13.5 spherical mirror was reputed to have excellent definition, so much so that Herschel described it as a ‘capital telescope’ with which he discovered the planet Uranus as well as many tight double stars.
What is less commonly known is that Herschel sometimes employed extraordinarily high magnifications- up to 7600x in fact, according to a study conducted by Dr W. H. Steavenson back in 1924, Herschel used these magnifications to help tease apart the closest double stars, and with great success, as records show he was able to sketch an elongation in systems such as Omega Leonis dating to 1782 using a power of 932x when the components were separated by just 0.4”!
Such results completely fly in the face of modern amateur sensibilities, who adopt a much lower upper limit to telescope magnification of about 50x per inch. This might be true for extended objects but it’s certainly not true for double stars as they are simple, point sources of light. What is more, Herschel’s 7 foot telescope had an un driven alt-azimuth mount, just like my own 8“ f/6 Newtonian. Nor were Herschel’s observations conducted at some exotic location where the seeing was idyllic. He conducted such observations from Slough, England, which has never been celebrated for its extraordinary seeing conditions. No, such conditions are quite common in the UK; only laziness, ignorance and ill-preparedness prevent more observers from performing such feats.
How much have contemporary amateur astronomers forgotten in the modern age of instant fixes?!
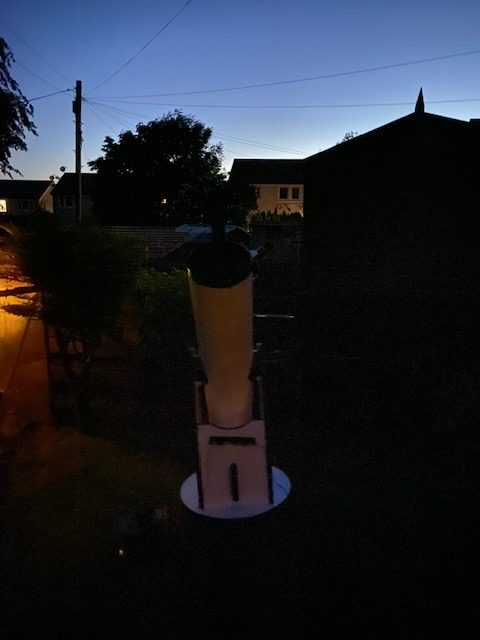
Painting Octavius
I took advantage of the prolonged spell of fine summer weather in July of 2026 to give Octavius a colourful makeover. The optical tube is now jade coloured while the lazy susan mount and water butt base got a matt black finish
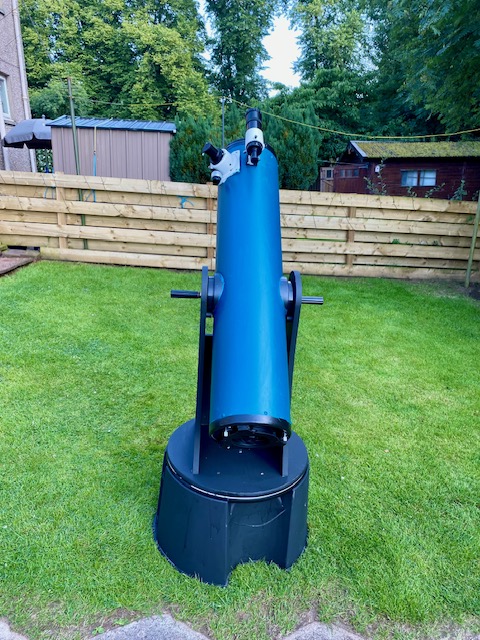
I like the new colour scheme: after all, there is hardly anything left of the original Skywatcher telescope, so why maintain its native colour?
Spying Iota Cassiopeiae: Herald of Darker Skies
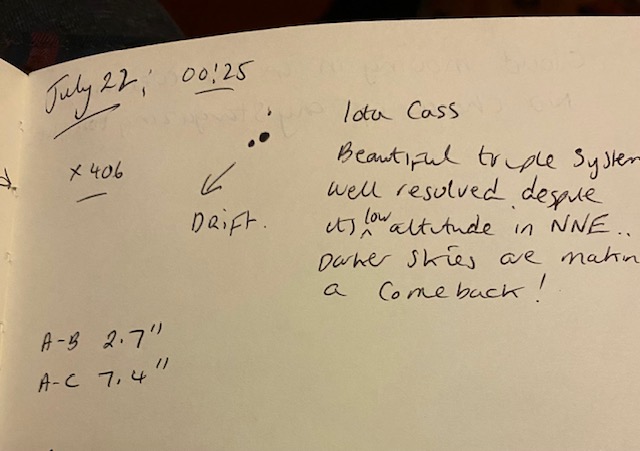
By the last week of July, the summer twilight begins to fade back into proper darkness. I was reminded of this shortly after midnight on July 22 when I ended my vigil by searching out Iota Cassiopeiae lying low in the northeast. From the end of May through early July, this part of the sky has the strongest twilight making any observations here very difficult. But now that July is coming to an end, it was finally dark enough for me to star hop my way through the main stars making up the ‘wonky W’ of Cassiopeia towards Iota in the north-northeast. Despite the atmosphere being a bit choppy this evening owing to a weak northerly air flow, Octavius was able to nicely resolve this beautiful triple system easily. A-B is separated by 2.7’’ while A-C being a wider 7.4’’.
Digging a bit deeper, it’s interesting to learn that Iota Cassiopeiae, lying ablut 133 light years distant, actually consists of at least 5 stars. What is more, astronomers are still not sure whether any of the wider components are gravitationally bound to each other. In other words, this could be a lucky alignment of stars along our line of sight. The reader may quip that not knowing such things in the third decade of the 21st century is ridiculous. but for astronomers, like all other scientists whose salaries are paid by tax payers, pinning down the true nature of all five stars relative to each other is just not a priority. That said, with the right equipment, a large amateur telescope could help solve this mystery. Any takers?
Despite the prolonged sunny and warm weather July has brought, it has not yielded the usual tally of favourable vigils to conduct high resolution double star splitting. The readon I believe is the unusual wind directions which occurred throughout much of July which brought northerly and easterly air flows – directions of moving air that increase the atmospheric turbulence.
A Visit to Gamma Delphini
Despite the prolonged sunny and warm weather July has brought, it has not yielded the usual tally of favourable vigils to conduct high resolution double star splitting. The reason, I believe, is the unusual wind directions which occurred throughout much of July, that brought northerly and easterly air flows – directions of moving air that invariably increase atmospheric turbulence.
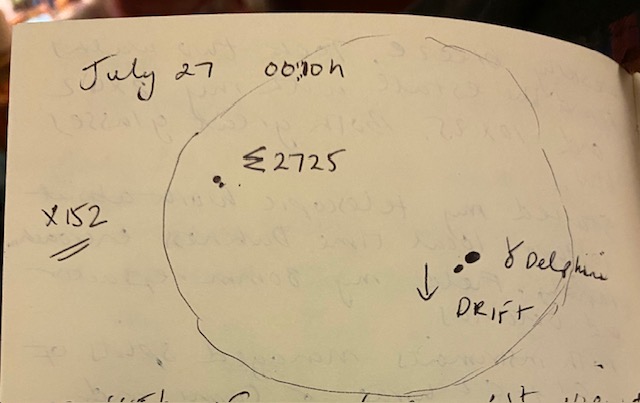
The night of July 26-27 2026 bucked that trend however: a fresh westerly wind restoring good seeing in the Endrick Valley. After enjoying a couple of 1” splits with Octavius, I noticed the diminutive constellation of Delphinus was near the meridian, so I took the opportunity to track down an old acquaintance: the celebrated double star, Gamma Delphini, which is an easy target in even the smallest of telescopes. It looked magnificent in the 152x power field of view. The pair, located some 115 light years away, orbit their common centre of gravity every 3000 years. The field of view was big enough to frame yet another tight double, the fainter 8th magnitude Sigma 2725 (from the Struve catalog). Intriguingly, the latter system is 6.1 light years closer to the solar system than Gamma Delphini: a grand optical spectacle to contemplate on a decidedly cool July night.
To be Continued………..
A Work Commenced July 27 2026
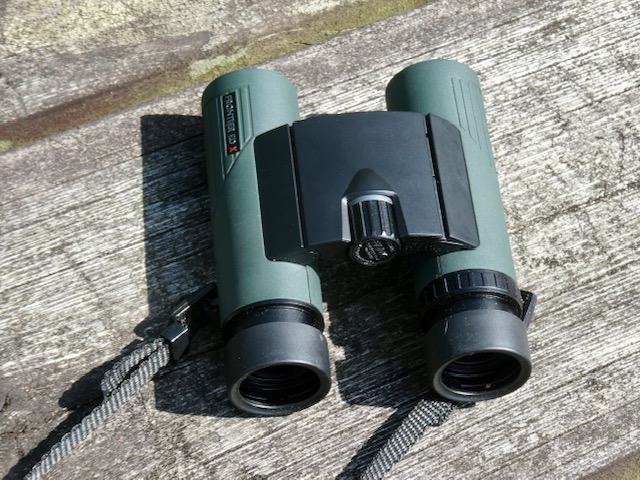
Product: Hawke Frontier EDX 10 x 25
Country of Origin: Designed in the UK, assembled in China
Chassis: Rubber armoured Magnesium Alloy chassis
Exit Pupil: 2.5mm
Eye Relief: 16mm
Field of View: 116m@1000m(6.6 angular degrees)
Close Focus: 0.95m measured
Dioptre Compensation: +\-4
ED Glass: Yes
Field Flattening Optics: No
Coatings: fully broadband multicoated, dielectric phase correction coating on prisms, hydrophobic coatings on outer lenses
Waterproof: Yes
Nitrogen Purged: Yes
Weight: 312g measured
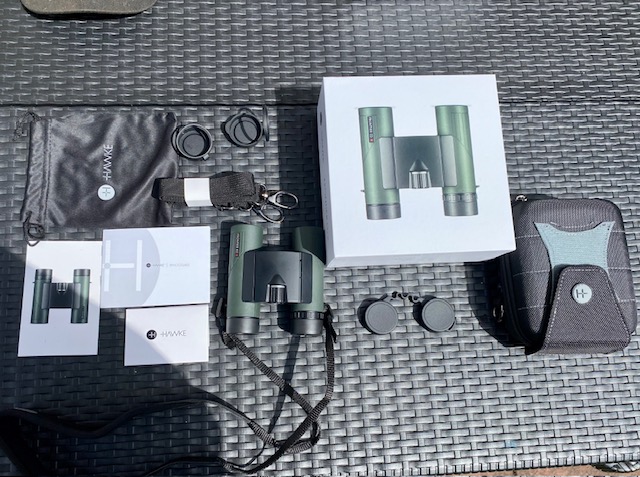
Accessories: Padded neck strap, rainguard, objective lens covers, lens cloth, soft pouch, hard carry case, instruction manual
Warranty: No Fault Lifetime warranty
Price(UK): £299.00
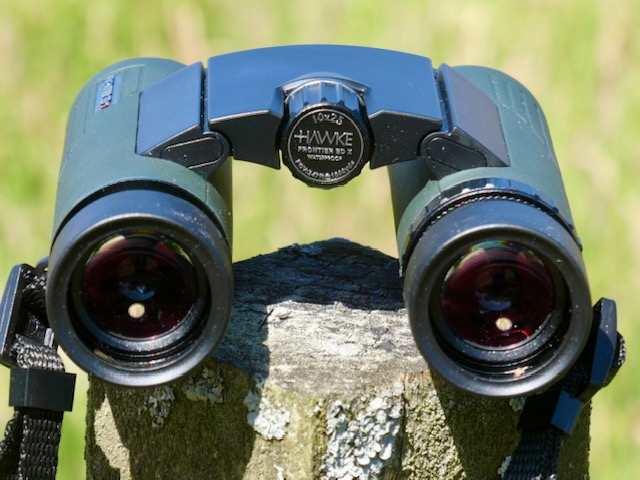
This is going to be a quick review: the Hawke Frontier EDX 10 x 25 turned out to be every bit as delightful as the 8 x 25. Like the lower power model, it shows no diffraction spikes when aimed at street lamps after dark, and no internal reflections.
The 10 x 25 has a larger AFOV than the 8 x model delivering a thoroughly enjoyable 6.6 degrees of true field. At 10x that’s really impressive. Compare that to the Zeiss Victory Pocket 10 x 25 which yields a mere 6.0 degrees in comparison.

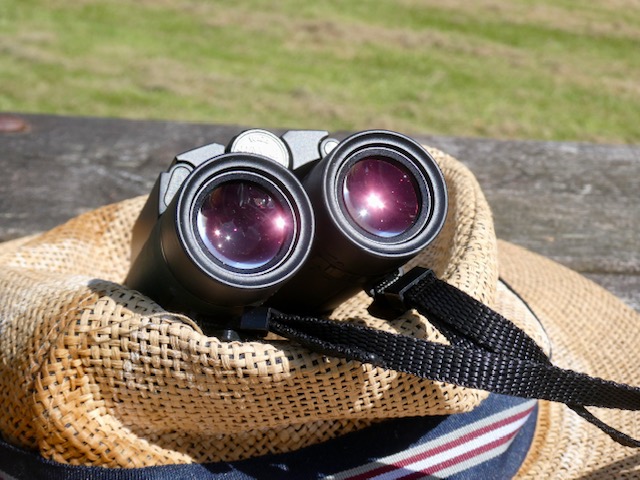
And just like I reported about the 8 x 25, the optics in the 10 x 25 are equally if not even more impressive! Tack sharp right the way across the almost flat(to my eye) field, excellent contrast and bright, true to life colours.
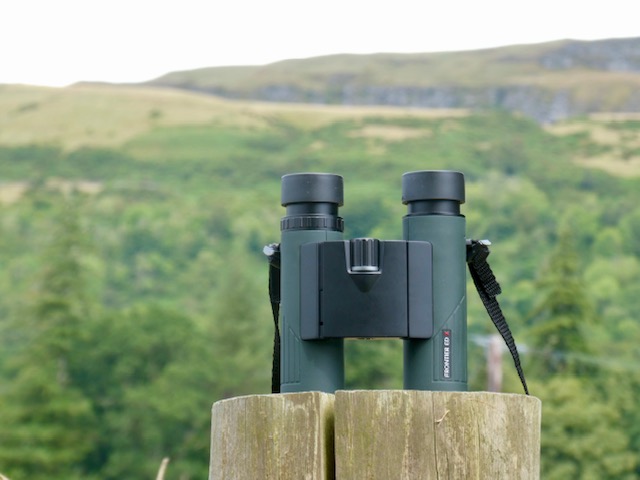
If I had to pick one though, it would undoubtedly be the 10 x 25. It’s just so out of the ordinary for a high powered pocket glass: very comfortable to use with or without glasses, a wide and unusually relaxed visual experience in a great, pocketable, folding design. The Hawke Frontier EDX 10 x 25 is arguably the best pocket binocular I’ve personally experienced, and that’s saying a lot!
Highly recommended!
A Work Commenced June 1 2026
Get $15 off the purchase price by using the code Neil 15 at the following link
I’ve had the pleasure of testing many binoculars from nearly every aperture class. People often ask me, which binocular has impressed me the most over the last couple of years. You may be surprised to hear that I have a new answer: the Svbony SA207 Pro 8 x 42.
I took it on vacation at the end of May to the pretty town of Aberfeldy, about 90 minutes drive north of my home. Here we checked into the Moness Resort, set among the rolling hills of Perthshire. The weather was idyllic: clear blue skies and warm Spring sunshine allowing me to see just how good this new binocular could perform.

Black Beauty
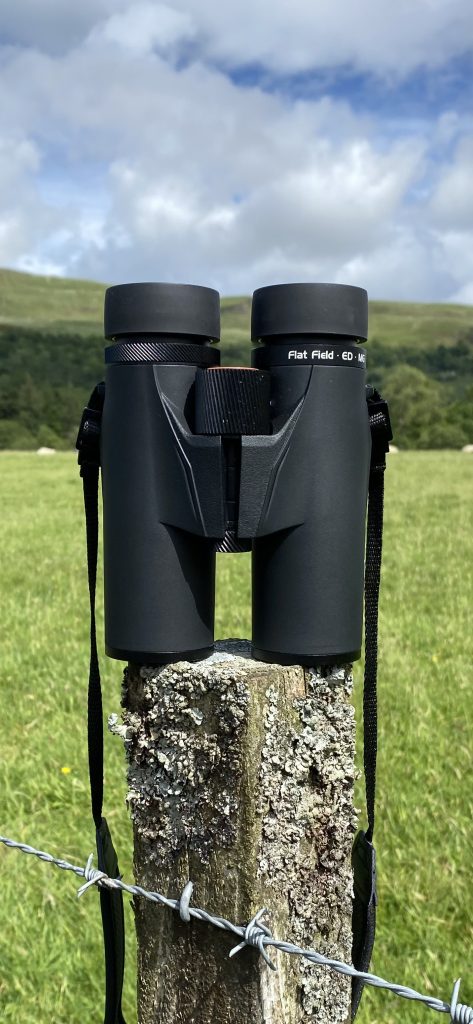
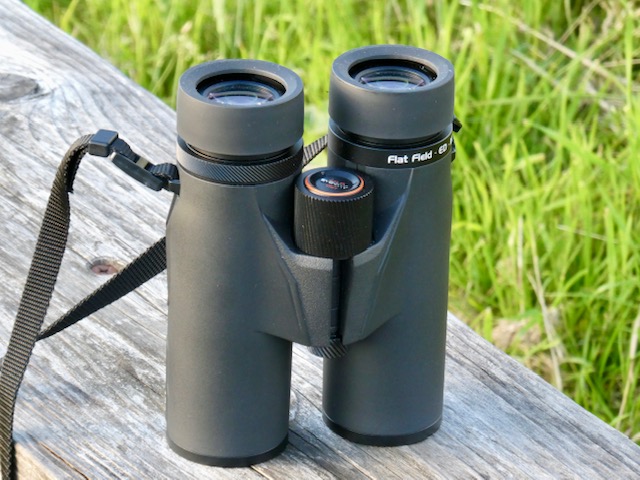
The SA207 Pro looks and feels like an alpha glass. It’s incredibly robust but so easy to use. Everything about this glass exudes quality: the handsome black rubber armouring, the superbly functioning focus wheel, which rotates with buttery smoothness, the continuously variable dioptre ring firmly keeping its position. That large eye box which makes the viewing experience supremely comfortable. Yes it’s a heavy glass but it balances perfectly well in my medium sized hands. Svbony has really stepped up to the mark with this new SA207 line.
The optics are incredibly sharp: beautiful, microcrystalline details coming through from every viewing portal. I would rate the optics higher than the widely lauded Sky Rover Banner Cloud series: and that’s saying a lot! The optical glass appears to be distinctly different from the Banner Clouds giving even less chromatic aberration off axis and a cooler colour tone. The resolving power of the SA207 Pro is just awe inspiring, especially at distance; every minute detail pops into clear view, allowing one to pick off hill walkers and ramblers miles away: every burn and crag standing out in glorious detail.

Rising early in the morning before breakfast, I took off for a saunter with SA207 Pro along the river Tay which flows right through the Moness estate. I came to a spot on the river with thick wooded areas on either side: an ideal spot to track down Dipper birds. Settling myself against the trunk of a Beech tree, I was soon greeted by a family of Dipper birds bobbing up and down on the rocks in the middle of the fast-flowing river. I was genuinely surprised how close I could get to them: clearly they were unperturbed by my presence. I was rewarded with beautifully sharp views of their plumage: chocolate brown back and sides and snow white bellies and throat. Dippers are utterly charming creatures.
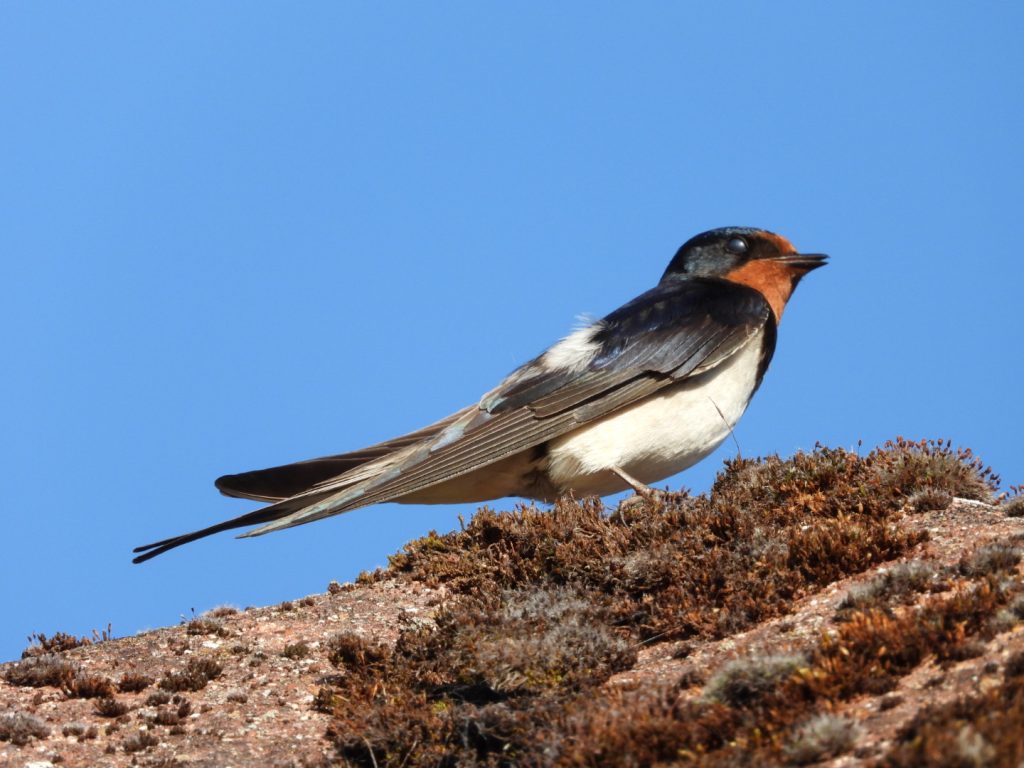
The Swallows have arrived back on our shores for another long summer season. Their screeches fill the air during the day but in the evening they calm down a bit, perching on the rooftops of our self catering chalet. I spotted one just a few metres away, allowing me to take close up pictures in good light.

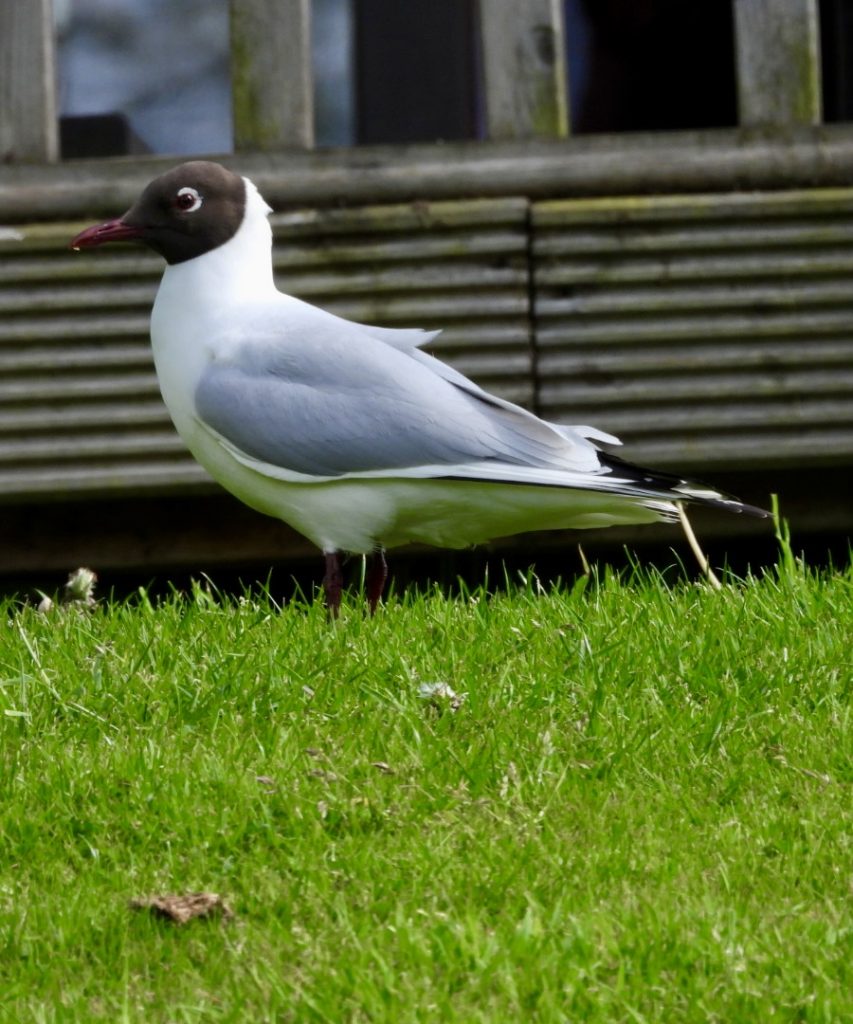
With an enormous, ultra-flat field of view – 9.1 degrees- exceeding top tier European brands like the Zeiss Victory SF and rivalling that of the much more expensive Swarovski NL Pure 8 x 42, watching fast moving birds like Swallows becomes especially easy to do. Back at home, I watch them feasting on insects hovering just over the water of Culcreuch Pond. Their manoeuvres are astounding. To think this evolved by blind forces of nature is downright moronic blasphemy! One afternoon, I experienced a sight I had not seen before: a seagull hovering high over the pond suddenly bombdived and captured a small Roach before flying off to consume it! It sounds all the more crazy since that’s what seagulls ought to do. At last; I saw a gull…..a real gull!
Neat!
Where there’s Water there are Birds…..
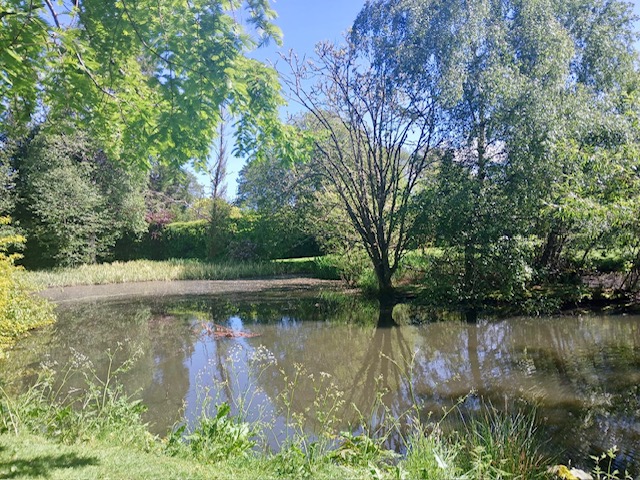
The Moness Resort has a small pond frequented by lots of different species of birds: Mallard, Moorhens and other surprise visitors. Sitting on the bench overlooking the pond, I enjoyed using the SA207 Pro 8 x 42 to watch them soaking up the sunshine on its banks and then waddling back into the water for a cool dip.

I was also lucky enough to study both Grey and Pied Wagtails collecting debris to build their nests. While usually a bit more cautious, here they seemed totally unfazed by the presence of humans.
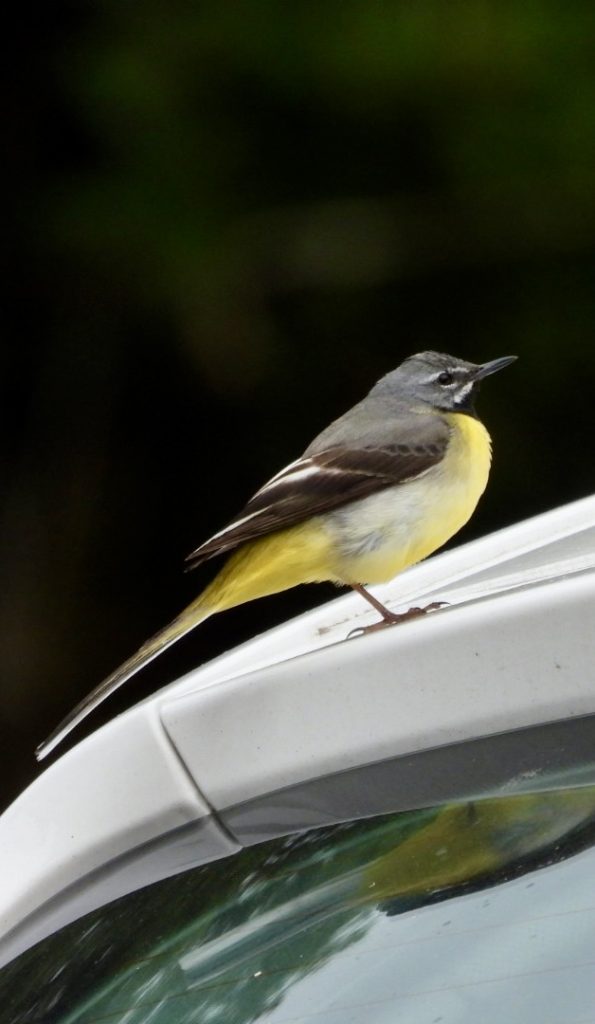

The aerial acrobatics of these small birds is amazing: one second they are walking about calmly, bobbing their long tails up and down as they move, and then suddenly taking to the air, leaping straight up from the ground and looping back down to terra firma catching insects hovering in the air above them.
In the evenings, we’d often be greeted by the arrival of small groups of Blackheaded Gulls, surveying the area for scraps of food.
Moon Watching
Our short stay at the Moness Resort also coincided with the presence of the First Quarter Moon culminating low in the south. At this time of year, strong twilight persists until midnight, so I had to stay up fairly late to get the best views. Nonetheless I was able to enjoy some beautiful views of our natural satellite with the SA207 Pro 8 x 42, following its changing phase into early Gibbous. The Moon appeared wonderfully sharp in this binocular but seemed rather small – an illusion created by the enormous field of the instrument. There was no colour fringing inside the SA207 Pro’s huge sweet spot. Only by placing the Moon very near the field stops could I make out any colour fringing: blue on one side, yellow on the other.
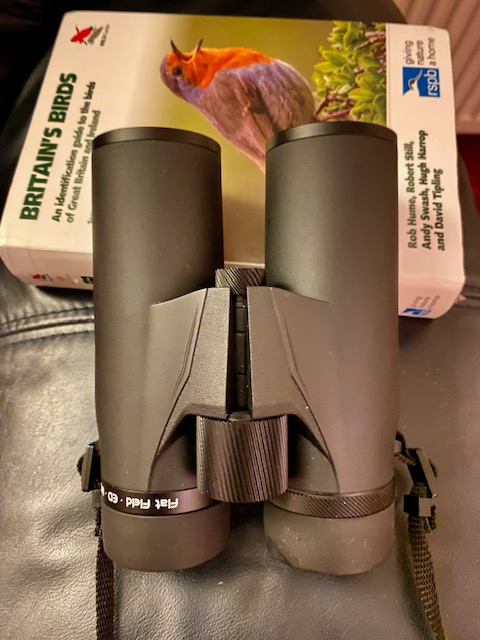
Optimal Adjustments
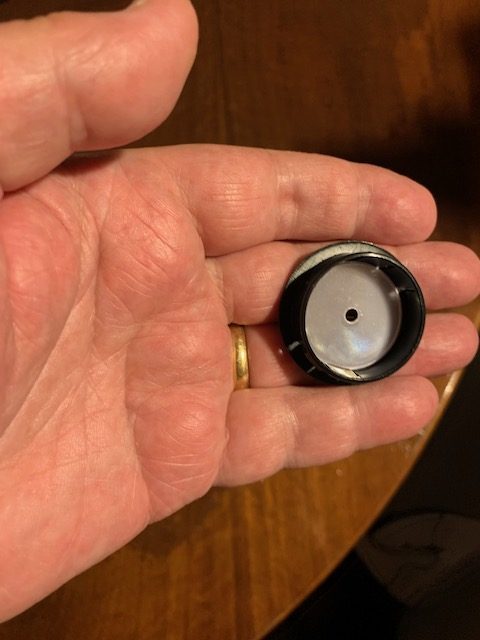
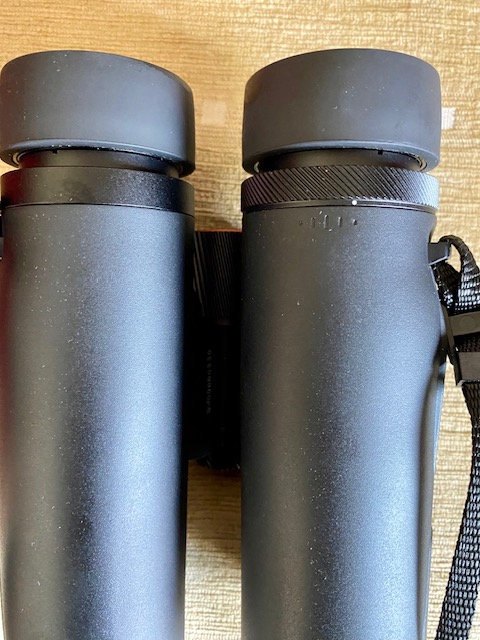
To get the absolute best performance from the SA 207 Pro, it pays to tinker with the adjustment of both the inter pupillary distance and the positioning of the eyecups. As a non-eye glass wearer, the step-less design of the rubber eye cups is an excellent new feature. I like to use the absolute minimum eye relief for two reasons: I want to get the most immersive view possible, and to minimise any glare when glassing against the light. For me, that position lies about 5mm above their fully retracted position as shown below.
If you don’t get the correct separation of the barrels, the SA207 Pro gives blackouts- a common occurrence in most binoculars with large eye lenses. After achieving rough squaring on, I look through the binocular, panning the landscape to watch for blackouts and making small adjustments to the separation of the barrels until they all but disappear.
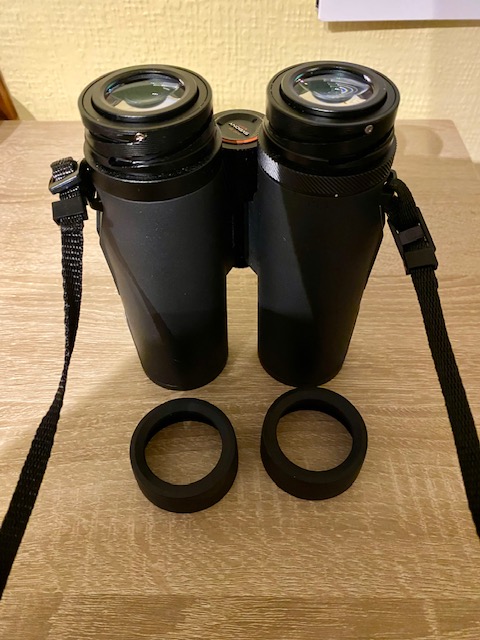
One additional design feature of the SA207 Pro 8 x 42 is the ability to remove the rubber eye cups for better access to the eyepieces. Even after a few days of use, quite a bit of airborne pollen can accumulate around the eye lenses. In most binoculars in this price class , this simply isn’t an option.
An Encounter with a Redstart
The superb sharpness and enormous field of view presented by the SA207 Pro makes picking off small birds in the distance much easier. I was reminded of this when, after returning home, I walked along the road from Culcreuch Castle, where I had previously logged the presence of a breeding pair of Redstarts in an old oak tree.

Superficially, these look like Robins and could easily be misidentified in binoculars of lower quality, especially at distance. Redstarts are migratory birds, coming back to the same place each year where they rear their young. And sure enough, in the first days of June, I tracked the breeding male down, making its nest in a small hollow of the same oak tree. By keeping a safe distance from the spot and playing the waiting game, I finally managed a decent shot. I’m hoping I can eventually track down its mate.

A Great Long Range Microscope

The SA207 Pro 8 x 42 has an exceptionally short close focus of just 1.5m.

That renders it an awesome instrument to watch close up targets like rocks, flowers and insects.

Indeed I’m only aware of one other binocular that focuses closer than the SA207 Pro- the Leica Trinovid HD – which can get down to about 1m. I’ve enjoyed exceptional close-up views of bluebells, wild garlic that decorates the forest floor on the estate, cherry blossoms and other Spring flowers that delight the eye with exquisite colour and form.
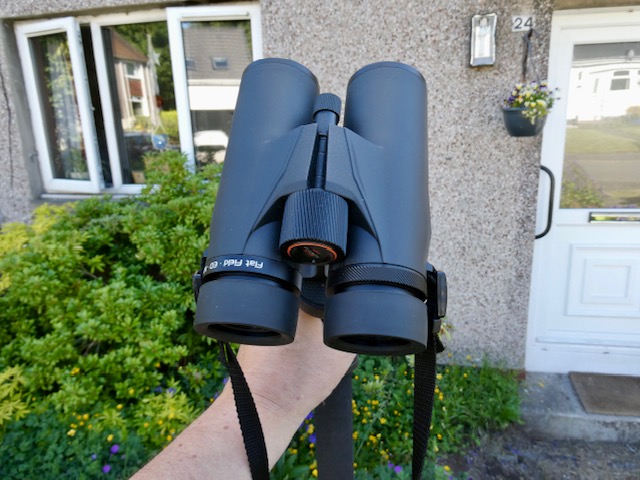
A Glass with Gravitas
Scotland is the windiest country in Europe, being frequently battered by eastward moving Atlantic depressions. It’s also the reason why Scotland leads the world in renewable wind power. Even in the summer months we can still experience strong gusts inland where I’m situated. Just yesterday, June 8, I was glassing in 30 mile per hour winds. Now I’ve said it before and I’ll say it again, heavier glasses are better suited to windy conditions than lighter ones because their greater mass provides a degree of inertial dampening. It’s my lived experience. For this reason, I’ll always favour a heavier glass over a lighter one on the many windy days we experience in Scotland. The SA207 Pro 8 x 42 proved just the right tool for glassing under these gusty spells. And it was yesterday, June 8, that I first caught sight of a juvenile Redstart near the same oak tree, its ruffled down feathers swaying in the wind.

The SA207 Pro 8 x 42 weighs over 900g but it’s no trouble walking with it for several miles on level ground. And while some dodgy ‘reviewers’ have rather nefariously emphasised the weight of such glasses, I see these comments as more ‘Big Jessy’ culture that sadly permeates our post modern world.
If you happen to live or work near the sea, where strong gusts are more prevalent, instruments like the Svbony SA207 Pro 8 x 42 will undoubtedly serve you better!
2-inch Filters
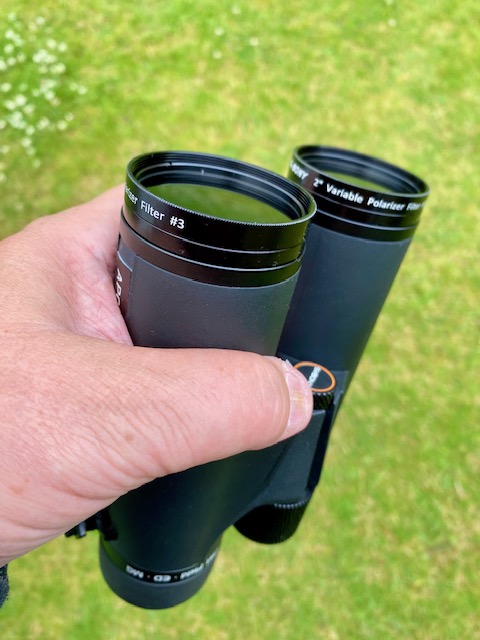
One other neat feature of the SA207 Pro 8 x 42 is its ability to accept 2 inch visual filters. They simply screw into the objectives. Svbony produce a good variety of economically priced filters for various activities, including a variable polarising filter which acts much like sunglasses on bright sunny days. The company also produce an Ultra High Contrast (UHC)filter transmitting 95% of the main nebulae emission lines. The UHC filter will help enhance brighter emission nebulae like the North American nebula in Cygnus once dark skies return to our shores in August. Those living in heavily light polluted skies might benefit from using the Svbony CLS filter, which cuts off light pollution to enhance the views of galaxies and star fields.
NL Cure
The exceptionally sharp, high contrast and ultra-wide flat field presented by the SA207 Pro is the equivalent of any premium optic offered by European manufacturers. While the latter nations have underwent economic suicide by embracing the green new scam, de-industrialising at an alarming rate, Chinese companies like SvBony have well and truly caught up, to such an extent they are now offering premium optics at prices that were hitherto unheard of. For example, Zeiss has phased out and closed its manufacturing facility at Wetzlar, where their alpha optic, the Victory SF line, was once produced, citing a downturn in economic growth as one of the reasons. As I stated in the past, these new ultra-high-tech binoculars from companies like Sky Rover and SvBony offer optical performance indistinguishable from those now being offered by Swarovski, and in particular their flagship NL Pure series. How Swarovski can continue to market the NL Pure at such high prices- and we’re talking £2500 – is beyond me! As numerous testers on forums like Cloudy Nights and Bird Forum have now attested using detailed photographic comparisons, there is little to choose between them and the new Chinese binoculars.
Some have cited higher build quality to justify such exorbitant price tags, but here again their speculations need to be taken with a grain of salt. Binoculars are not complex devices, with just a few moving parts, so they are very unlikely to malfunction even after years of use. Indeed, some SvBony binoculars I reviewed some five or six years ago are still working perfectly!
For sure, the long warranty periods offered by European binoculars can offer services like nitrogen gas refilling, but my experiments using desiccant-filled Tupperware containers will ensure that any binocular can remain fog proof long after it has outgassed its dry nitrogen or argon.
Quality control has also been a concern to some. But I’m glad to see that SVBony now has authorised dealerships in
the UK and not just Amazon. The same is likely the case in other countries.
In summary then, buying a European alpha makes little economic sense in light of new products like the SA207 Pro.
Stand aside NLPure, Hello NL Cure….
Mounting Options
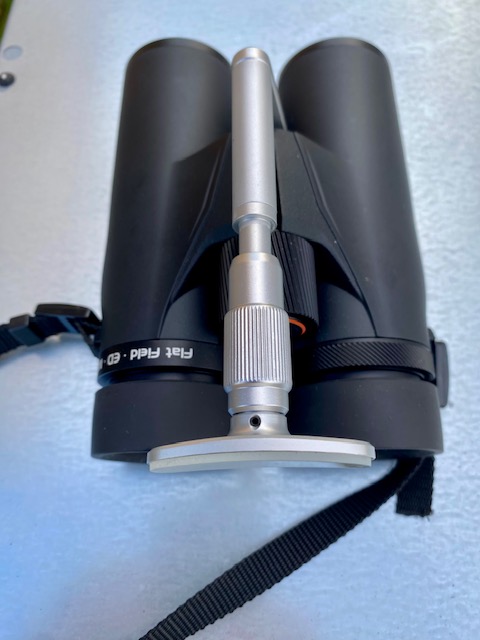
To get the absolute steadiest views from the SA207 Pro 8 x 42, it pays to place it on a mount. Indeed, when I’m adjusting the dioptre compensation for my right eye, I always mount my binoculars to get the very best images. The SA207 Pro can be mounted on a regular tripod, either by using a dedicated adaptor that screws into the front of the binocular bridge between the barrels. For terrestrial use, I prefer to use a simple mounting block, placing the binocular on a simple horizontal platform, held in place using a simple velcro loop as shown below.
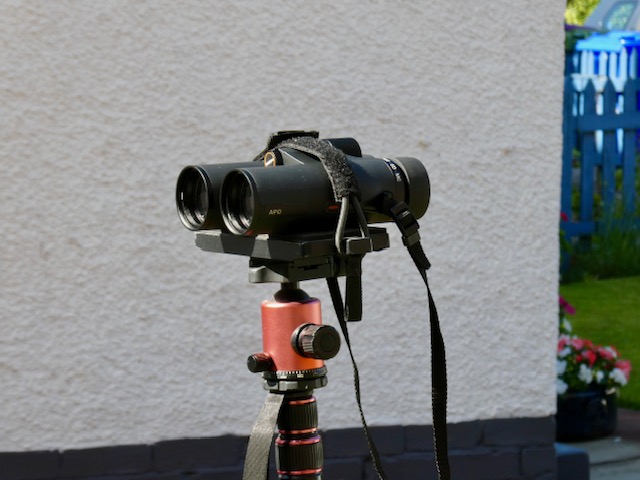
For astronomical observations, I much prefer the freedom of a monopod. I highly recommend Oberwerk’s 2000 heavy-duty monopod which has an excellent trigger grip to adjust the angle of view at will. I hope to use the monopod to star gaze with the SA207 Pro once darker skies return in August.
There is yet another interesting option: a dedicated forehead rest. Swarovski brought to market their own rendition of the forehead rest for their flagship line of NL Pure binoculars. I’m not at all sure about how efficacious these devices are, as I’ve not seen any science or engineering data to back up the claims of the forehead rest, but I guess the basic principle behind the design is ghat it offers an extra location to rest the binocular i.e. the forehead. Luckily, there are third party manufacturers producing forehead rests and I’ve purchased one for testing. Hopefully it will be here soon.

Well, the forehead rest arrived on the afternoon of June 22. It’s an ingenious little device. It screws into the front of the binocular in the same way you screw in a mounting bracket. It comes with tubes of various length to suit your particular facial features.
Does it work? I would say yes but with a few qualifications. While it certainly reduces handshake, it doesn’t do anything to alleviate lower or upper body motions from your legs and torso. Is it necessary at 8x? My resolution tests show a very slight improvement at 8x but I think it would be much better suited to 10x and 12x binoculars which are more challenging to hold steady. That said, it’s nowhere near as stable as using a monopod, so I’d still recommend the latter if ultimate stability is required.
Cold Truths
A binocular with the optical excellence of the SA 207 Pro 8 x 42 ought to be able to deal with temperature extremes. The instrument worked fine in temperatures above 45C, after I placed it inside a car for a couple of hours with the summer Sun blazing down on the windscreen.
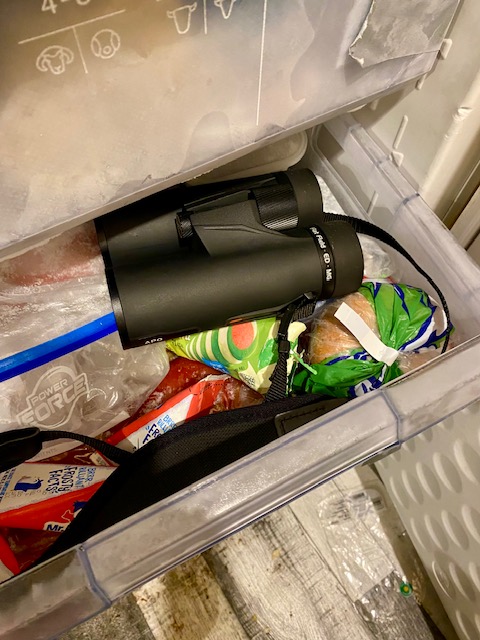
I also tested its low temperature performance by first placing the binocular inside my fridge at 4C for an hour. The instrument coped fine: the focus wheel did slow up but not enough to prevent rapid re-focusing at this temperature.
However, the same was not true when I exposed the SA207 Pro to a deep freeze at -20C for 90 minutes. When I took it out, the focus wheel had all but frozen up, but quickly loosened as it heated up to room temperature. This result was a bit disappointing, as a similar test on the Sky Rover Banner Cloud series – another New World Alpha binocular- showed its focus wheel operating much more freely at -20C.
The ultra-low temperature performance of the SA207 Pro could be improved by replacing the grease used in the focuser with a lubricant that maintains its fluidity at lower temperatures. Having said all that, I suspect this won’t matter to the vast majority of users, but it’s certainly worth pointing out.
On a more positive note, I noted no internal fogging as the binocular warmed up from either the fridge at 4C or the freezer at -20C, showing that it is properly sealed.
Exploring Quiet Country Roads
July represents the peak of the summer here in Scotland where we enjoy significantly longer days and cooler temperatures than those who live in the southern part of the UK. Wild flowers decorate the narrow winding roads surrounding my village, making it ideal for viewing the creation with the SA207 Pro 8 x 42.


As strong afternoon light gives way to soft evening sunlight, even familiar plants can interact with sunlight in stunning new ways. Look closer at a maturing Thistle and a riot of insect life comes sharply into view.


Tracking Down Fainter Stars in Summer Twilight
As I mentioned earlier, throughout June and much of July, my local skies are twilit, meaning that they don’t get truly dark. One of my favourite summer activities is tracking down high resolution double stars using my high-resolution 8 inch f/6 Newtonian reflector. And while only the brightest stars are visible to the naked eye, I can track down fainter stars if I know they are in the vicinity of a known brighter luminary.
Sometimes however, some of my more challenging targets are not located near any bright star. And while my 8 x 50 finder can cover a decent swathe of sky, the SA207 Pro with its whopping, ultra-flat 9.1 degree field is the perfect tool for speeding up finding my target.
The evening of July 12 2026 was a case in point. I was trying to track down Zeta Herculis located between Lyra in the east and Bootes in the west. Scanning the area of sky between these constellations and remembering the distinct colour and glory of the star, I soon picked up a prime candidate – a third magnitude, creamy white star, which was near the meridian. The perfect colour correction of the SA207 Pro 8 x 42 quickly picked it up and I was able to train my 8 inch Newtonian on it to attempt a split of this very close and unequal double star! Despite less than perfect seeing I did manage a split at high powers.
The First of a Bigger Family?
The SA207 PRO in 8 x 42 configuration is sure to be popular with birders and those who like to explore landscapes. The large exit pupil of the 8 x 42 format will also lend itself naturally to star gazers who enjoy broad sweeps of the night sky. But for hunters or those who like to see details, a 10 x 42 model would also be highly successful. I hope SvBony can bring such a model to market with the same ultra-wide and flat field of view(7.8-8 degrees). For astronomical or low light viewing, a 10 x 50 offering a 7 degree field would also be highly desirable in today’s market. Here’s hoping!
To be Continued…
A Work Commenced July 19 2026
Use Product Code Ne30 to get $30 off your purchase.
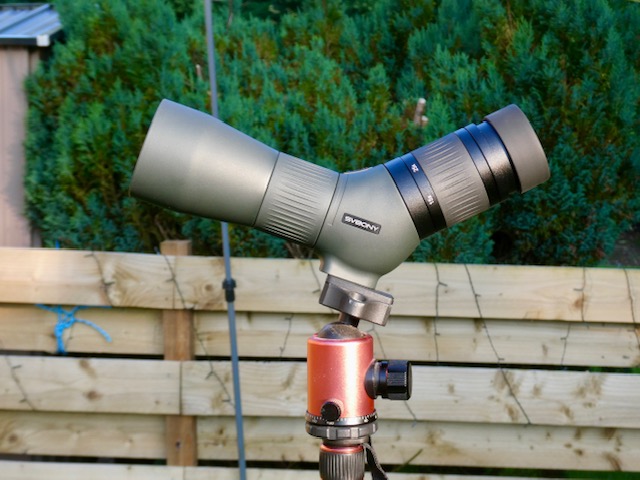
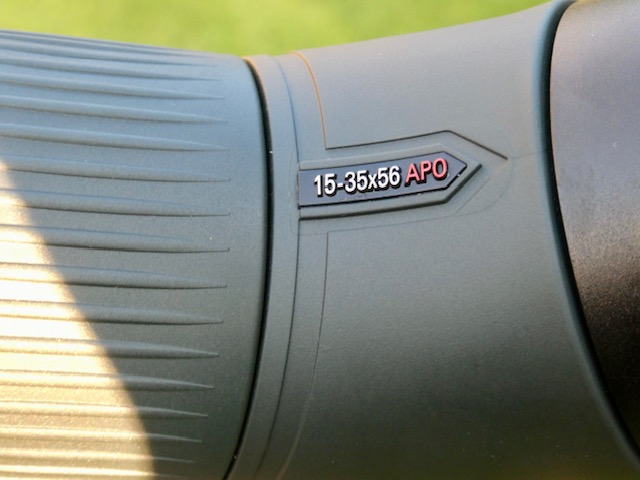
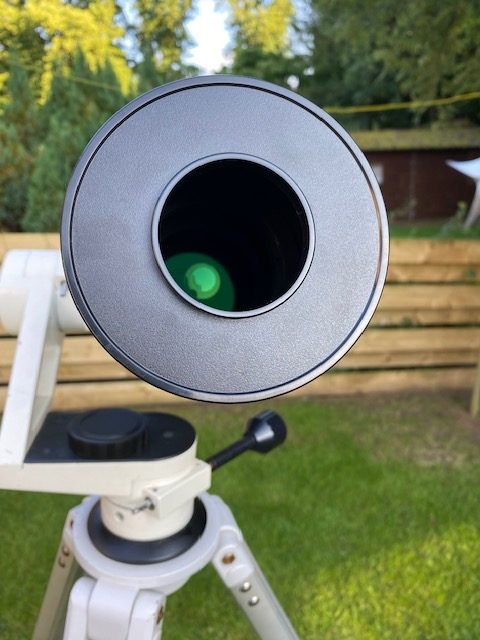
Product: SvBony SA401 PRO 15-35 x 56 mm Flat field APO Spotting Scope
Place of Manufacture: China
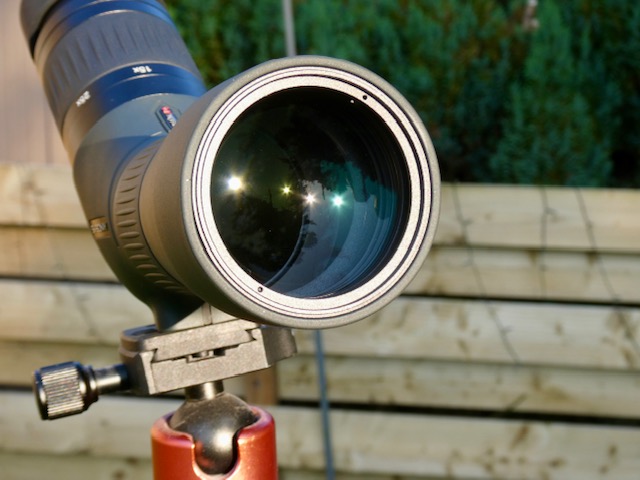
Clear Aperture: 56mm
Chassis Substrate: Magnesium alloy
Objective Type: Triplet APO
ED Glass: Yes
Eyepiece Design: 11-element, 7-group optical layout with an integrated field flattener
Field of View: 4.0- 2.1 angular degrees
Eye Relief: 17-16mm
Eyepiece Diameter: 28mm
Eyecup Design: Twist up, Multi Stage
Armouring: Army Green Rubber
Prism Type: High light transmission K9 Roof
Light Transmission: 92 per cent
Coatings: Fully Multicoated
Retractable Dew Shield: No
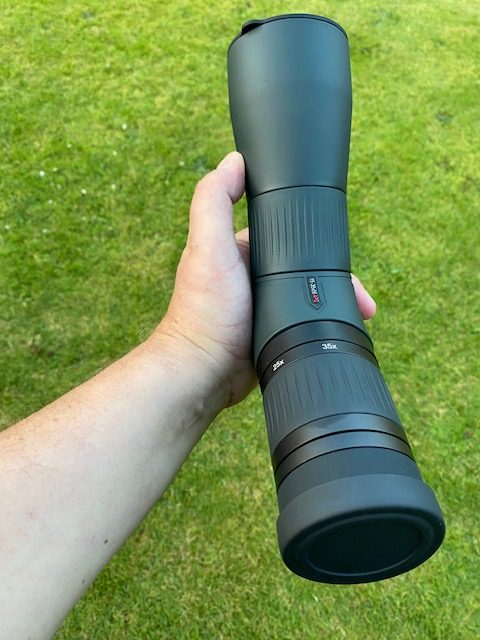
Focuser Type: Oversized Single Speed Helical
Rotatable Tube: No
Waterproof: Yes (IPX7)
Nitrogen Purged: Yes
Close Focus: 7m advertised, 3.06m measured
Weight: 1200g advertised, 1069g measured
Warranty: 2 Years
Retail Price(UK): £399.99
Without a shadow of a doubt SvBony Sports Optics has taken the world by storm by offering very high quality optics – binoculars and spotting scopes – that are now competing favourably with the best that European manufacturers are producing. You don’t have to take my word for it either: check out the preamble video above comparing SvBony’s earlier model SA401 APO to its Swarovski equivalent – where the presenter provides ample video evidence showing how the SvBony scope compares favourably with the latter despite being several times less expensive.
Over the last few years, I’ve noticed a distinct trend in spotting scope marketing. There appears to be a much greater demand for smaller, lighter weight optical devices that still deliver premium optical quality. For example, the recent launch of the Zeiss Conquest Apia 20-50 x 65mm, for example, delivers a relatively lightweight 1350g spotting scope featuring a maximum field of view of 2.7 degrees at 20x, closing to 1.42 degrees at 50x.
Not to be outdone, SvBony has now launched their new flagship mini spotter- the SA401Pro 15-35x 56mm – offering top notch optical performance that significantly exceeds the Zeiss in a number of ways consumers will immediately appreciate- and all for a fraction of what the Zeiss Conquest Apia retails for!
Pint-Sized Powerhouse
Let’s take a look around this new little optical wonder. Tipping the scales at just 1069g, it’s incredibly light. Size wise, it measures just 11 inches from end to end.
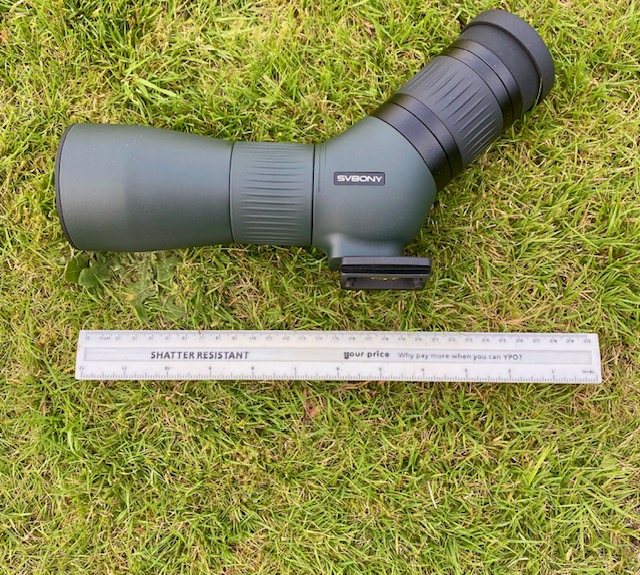
The scope attaches to most any mount using a built in shoe located at the base of the scope.
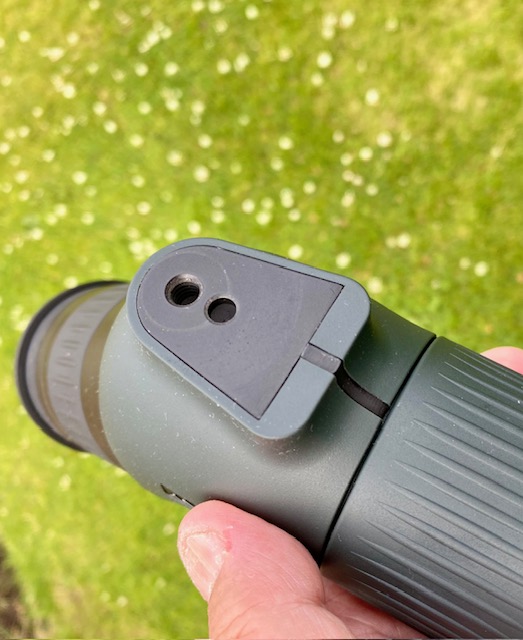
Operation of the SA401 PRO 15-35x 56 is child’s play thanks to the oversized helical focuser on both the barrel and the zoom function immediately under the eyepiece. No faffing about with dual speed focus wheels and the like which are more a hindrance than a help.
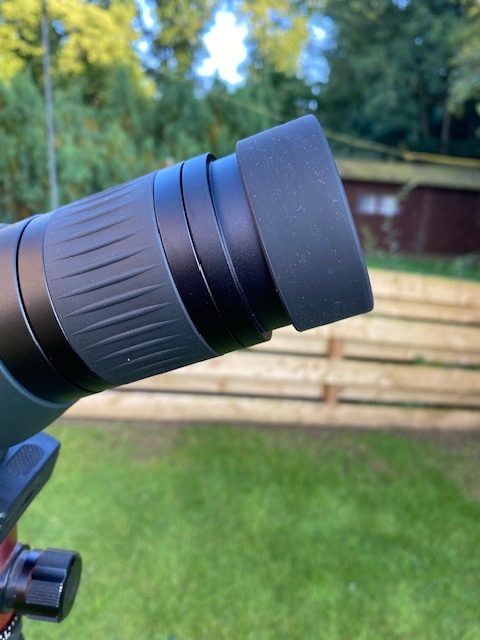
Eye relief is very comfortable throughout its 2.3x zoom range. I can access the entire field of view at all magnifications from 15x through 35x using my ordinary(non-progressive) eye glasses. For those who don’t wear eyeglasses, the rubber twist-up eyecups do a great job.
I was surprised to see that the SA401PRO doesn’t come with a retractable dew shield; an odd choice, that’s for sure. That said, it’s easily remedied by making a lens shade out of blackened cardboard if needs be.
Optical Evaluation
My first optical test was to direct the SA401PRO at a bright light to see how it handled stray light and internal reflections. I’m delighted to report that the scope performed great: very little in the way of internal reflections and a barely discernible diffraction spike. This instrument will do very well observing brightly illuminated sources at any time of the day!
The view through the SA401 PRO is excellent: razor sharp, bright and high in contrast. Sharpness extends almost all the way to the very edge. Pincushion distortion is also well controlled. Colour correction is excellent too. The size of the field at 15x – a whopping 4 degrees- is the amazing stand out feature- far wider than any of its competitors at both the low and high power end of the scale, where the field shrinks to 2.1 degrees! Simply put, this puts far more real estate in front of your eyes- a significant advantage when scanning for or tracking an object.
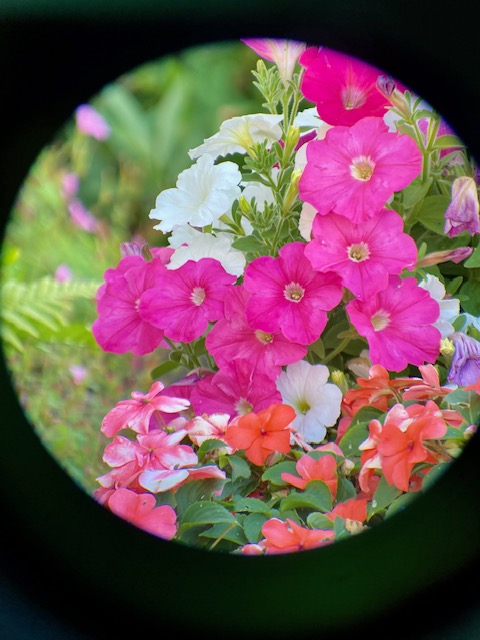
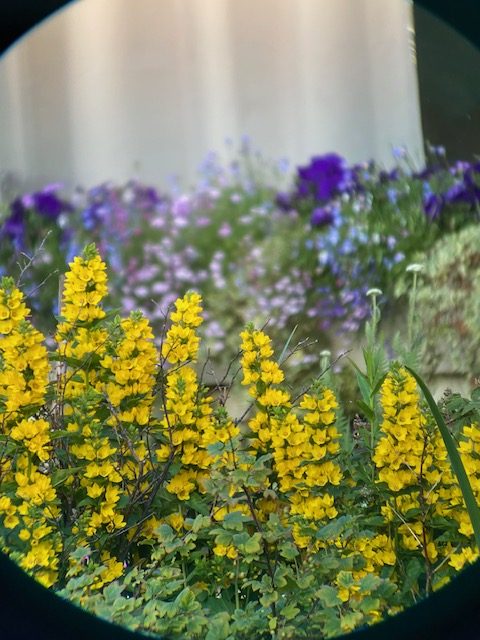
What really surprised me was how close the SA401 PRO can focus- a mere 3.06m – well shorter than the advertised 7m!
That allows you to get photos( limited to low res 200K images by this website) like this flower bed I took handholding my IPhone up to the eyepiece with the target only a few metres away:
In order to assess the colour correction of the SA401PRO 15-35×56, I tested it along side one of my grab ‘n’ go scopes – a Skywatcher Evostar ED80 apochromatic refractor – featuring a 80mm F/7.5 ED doublet objective with one element composed of FPL53 extra low dispersion glass, which has optical properties virtually indistinguishable from Fluorite crystal.

In order to make the test fairer, I stopped down the APO from 80mm to 50mm simply by removing the cap from the objective cover.
Stopped down to 50mm creates a very slow f/12 instrument, and as you’d expect, improves its colour correction still further; sensibly perfect in fact! Comparing the views through this makeshift 50mm f/12 APO and the SA401 PRO I was surprised how comparable the images were in the two instruments. At 35x, the SA401 PRO served up an image with a tad less contrast and a bit more lateral colour near the edge of the field. Clearly the two FCD1 elements mated to the Lanthanum element making up the triplet objective design were doing a very good job. In a further test for colour correction, I turned the SA401 PRO on the bright summer star, Vega, and cranked up the power to 35x. I detected no secondary spectrum around the star as I moved it from the centre to the very near the edge of the field, where I did pick up some lateral colour. Incidentally this was an also an opportunity to test the flatness of the field. Here the SA401 PRO produced excellent results: the star remaining tightly focused about 90 per cent of the way to the field stop, after which I detected minor amounts of coma and astigmatism. All in all, the SA401 PRO exhibits excellent colour correction at least on par with SvBony’s larger SA401 APO scope I’ve previously reviewed, but with a noticeably flatter and wider field.
Some Sample Images
The SA401 PRO mini spotter is easy to use with your smartphone and I obtained all the images for this review simply by holding my phone camera up to the eyepiece. It also works well with SvBony’s inexpensive SC002 imager.
Here is one image showing the edge to edge sharpness of the yellow flowers in the foreground located some 35m in the distance:
Her’s another image showing a section of a fallen tree at about 100m distance.

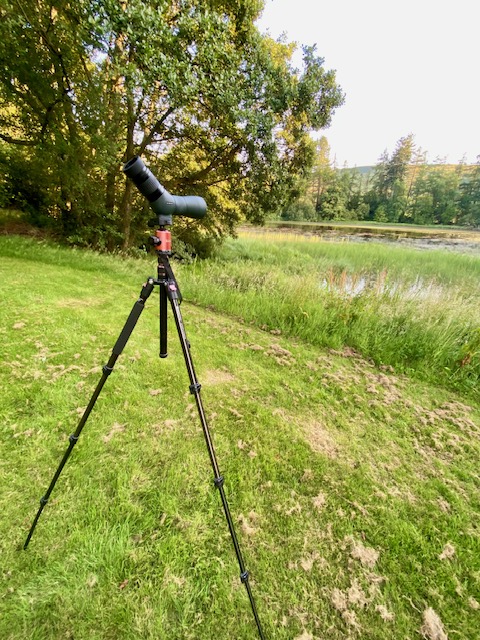
On a fine July evening I took a half-mile walk up to my local pond to see if there was any activity out on the water.
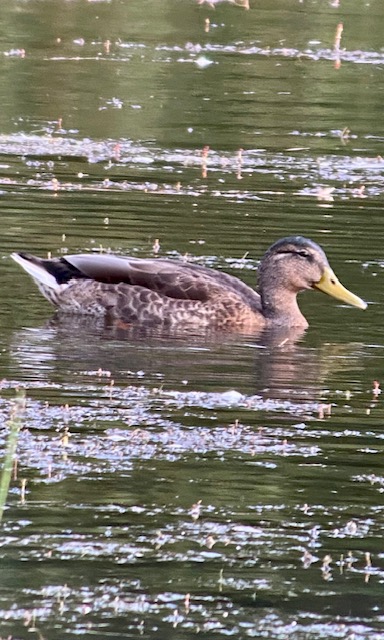
After a long day resting in the summer heat, the birds become more active in the cool of the evening. I took a few shots of some of the birds enjoying a cool dip out on the water.
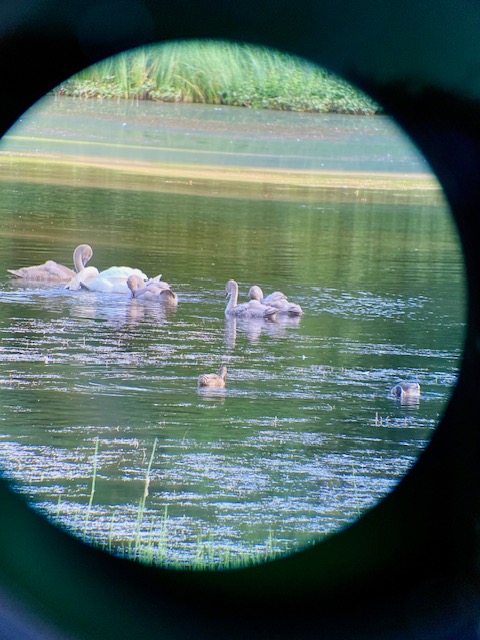

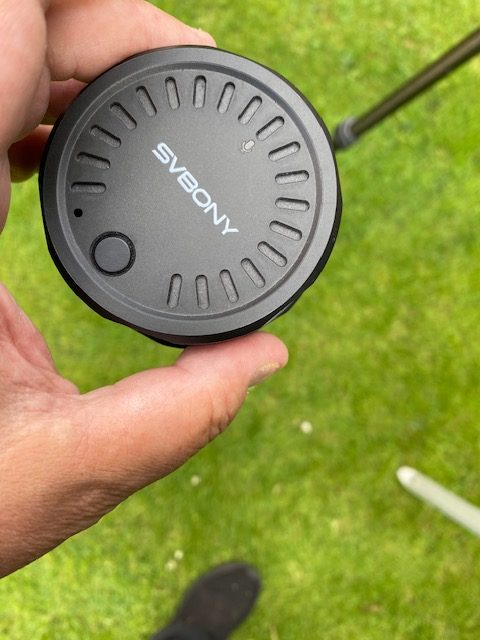
Using the SC002 Imager
SvBony markets a neat little imaging device called the SC002. Incredibly versatile, it attaches to any spotting scope and can be clamped into place by twisting the upper section
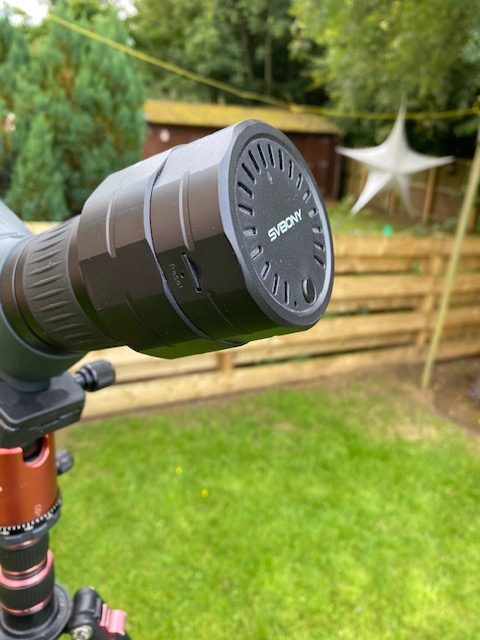
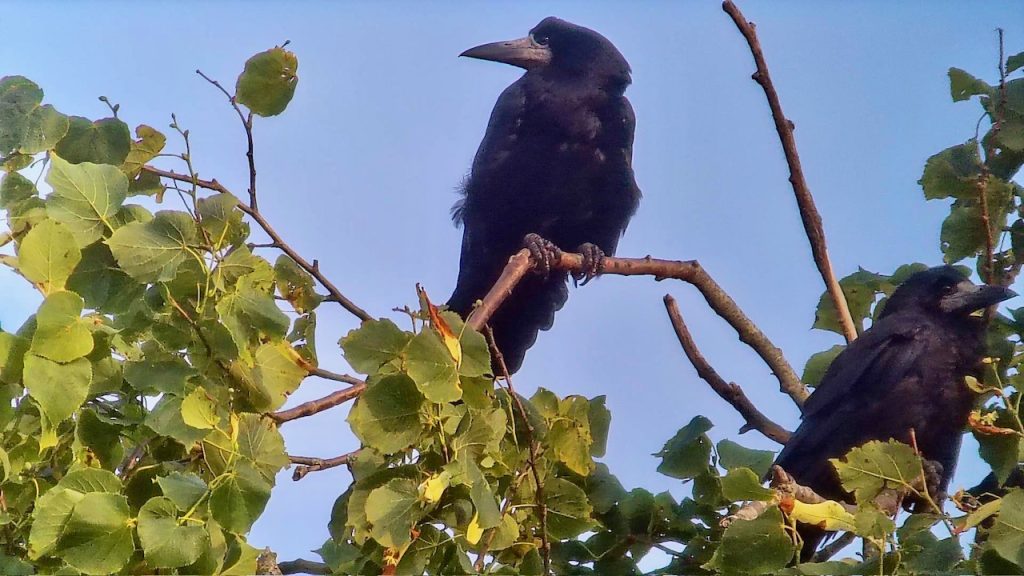
The SC002 imager connects easily to any smartphone and can be used to take images or video footage. I used it to take some photos of some Rooks enjoying some late evening sunshine in nearby trees.
Conclusions & Recommendations
The little SA401 PRO 15-35x 56mm expertly fuses portability with very high optical performance, in a tough weather resistant frame. With a class-leading flat and ultra-wide field, it will prove to be an exceptionally versatile visual and photographic tool to capture breathtaking views of the natural world. It’s an absolute bargain in today’s market! I hope to bring it on vacation with me later this year to observe sea life down at the coast.
Highly recommended!
Read more on a wide range of sports optics in my book, Choosing And Using

Ever wondered where phrases like ‘anti-racism,’ ‘white supremacy,’ ‘post colonialism,’ ‘DEI’ and ‘systemic racism’ came from? The answer is from cultural Marxism: the political pseudoscience that divides everyone into oppressor and oppressed. How could the thoughts of a smelly, demon-possessed alcoholic and ne’re-do-well spunger – Karl Marx- who was disowned by his parents and even let his own family starve in order that he could get his next ‘fix’ – come to dominate sports events, music, Hollywood, Big Tech, law enforcement and even our hallowed institutions – universities, law courts, governments and even the Church?
Senator Ted Cruz (Texas), who’s father fled an evil Marxist regime in Cuba, outlines the sordid history of leftist ideology in western democracies and how it was promulgated by godless pseudo academics -limp-wristed leftists – who never did an honest day’s work in their lives, but who nonetheless managed to brainwash an entire generation(almost) to hate their countries and to attempt to tear down everything that brought them greatness. Cruz outlines how to defend against and defeat this wicked ideology.
The fightback against the Woketards has well and truly begun!
A Work Commenced July 9 2026
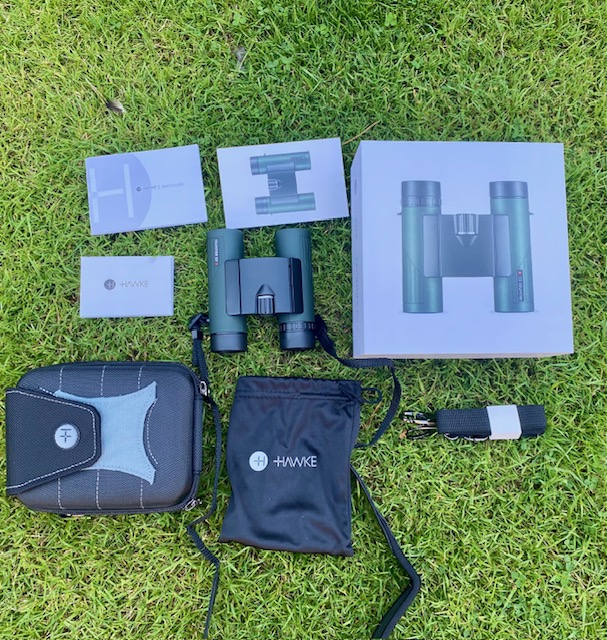
Product: Hawke Frontier EDX 8 x 25
Country of Origin: Designed in the UK, assembled in China
Chassis: Rubber armoured Magnesium Alloy chassis
Exit Pupil: 3.13mm
Eye Relief: 16mm
Field of View: 140m@1000m(8.0 angular degrees)
Close Focus: 1.55m measured
Dioptre Compensation: +\-4
ED Glass: Yes
Field Flattening Optics: No
Coatings: fully broadband multicoated, dielectric phase correction coating on prisms, hydrophobic coatings on outer lenses
Waterproof: Yes
Nitrogen Purged: Yes
Weight: 305g measured
Accessories: Padded neck strap, rainguard, objective lens covers, lens cloth, soft pouch, hard carry case, instruction manual
Warranty: No Fault Lifetime warranty
Price(UK): £299.00
I’ve had this little binocular for just a couple of weeks, but I’ve decided to expedite the review as I’m so thoroughly impressed with it!
I must admit to having a love/hate relationship with pocket binoculars. Sure, they’re small and cute, ‘take me anywhere’ optics. But they’re also fiddly to set up and use and usually have rather restricted fields of view. And while there are exceptions such as the Zeiss Victory Pocket and the Swarovski CL Curio, with their wider fields of view, they command very high price tags.
Now enter the Hawke Frontier EDX 8 x 25, launched just last year by this British-family-owned sports optics company.
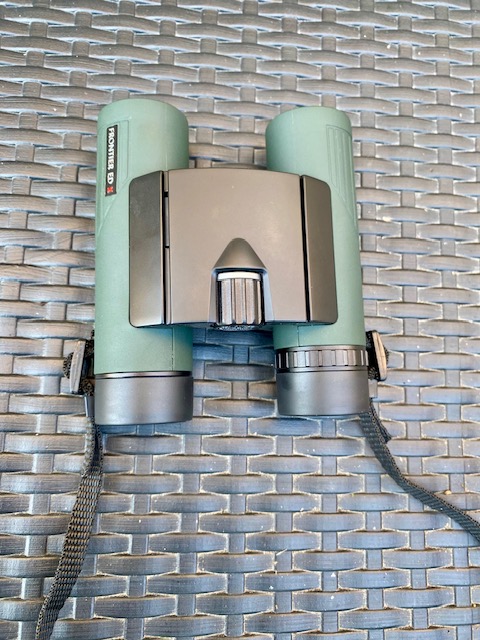
To be honest, I was sceptical about the specs of this binocular when I first perused them. An 8 x pocket glass delivering a field of view of 140m at 1000m? That was wider than a lot of full size binoculars I’ve tested, but it turned our to be absolutely true! More on that later.
The Hawke Frontier EDX 8 x 25 comes in a very nice package. You get a lovely gift box containing a soft pouch, a zip closed hard case just like with their larger Frontier ED-X models.
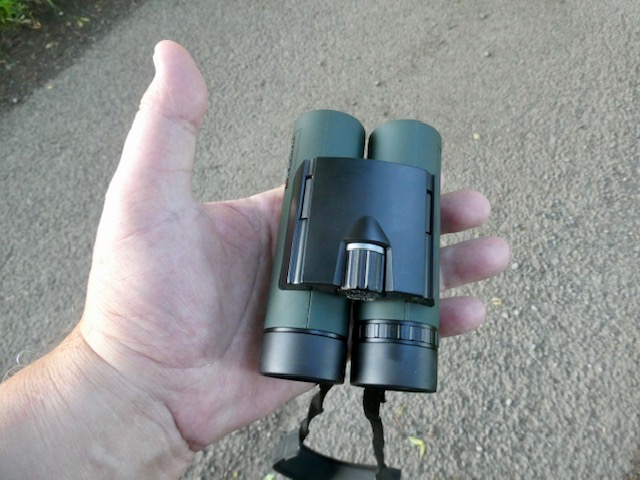
The binocular is very nicely built: a good step up from their Endurance ED 8 x 25 models. The chassis is constructed from strong but lightweight magnesium alloy and the overlying rubber armour is nicely textured to the touch.
The barrels are a little longer than normal for a pocket binocular but note how deeply recessed the objectives are! This helps keep stray light, dust and rain at bay. The anti-reflection coatings applied are immaculate with no streaks or other inconsistencies in evidence.
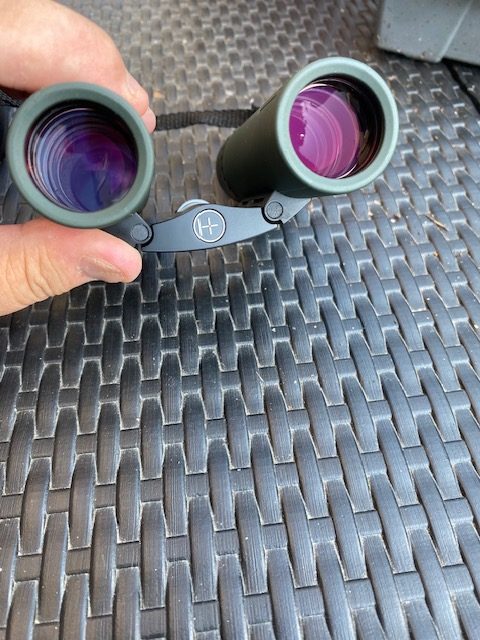
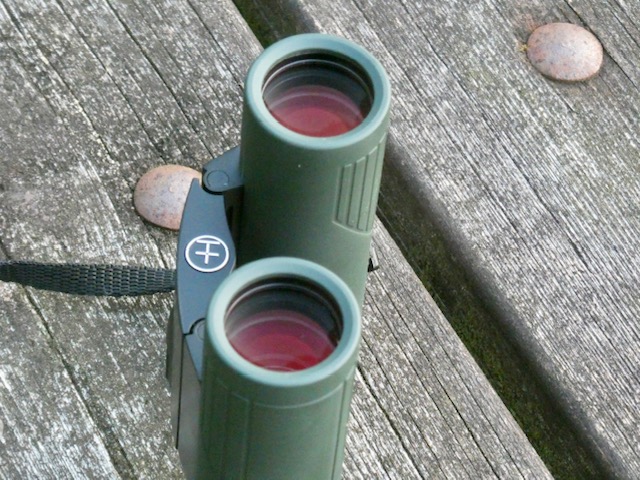
The focus wheel is deeply knurled and highly responsive, moving smoothly with no play or stiction, and taking 1.3 revolutions anticlockwise to go from its closest focus (a very impressive 1.55m) to infinity and a significant bit beyond. This is good news for those of us unlucky enough to have severe shortsightedness.
In the hand, the Hawke Frontier EDX 8 x 25 feels great. I can easily wrap my fingers round the barrels and can even use it effectively with one hand. Unlike most pocket binoculars, which usually offer only two positions to place the eyecups, the Hawke Frontier EDX 8 x 25 has three i.e. an intermediate position. Eye relief is also excellent for a pocket glass. I had no trouble seeing the entire field wearing my eye glasses when the cups were fully retracted.
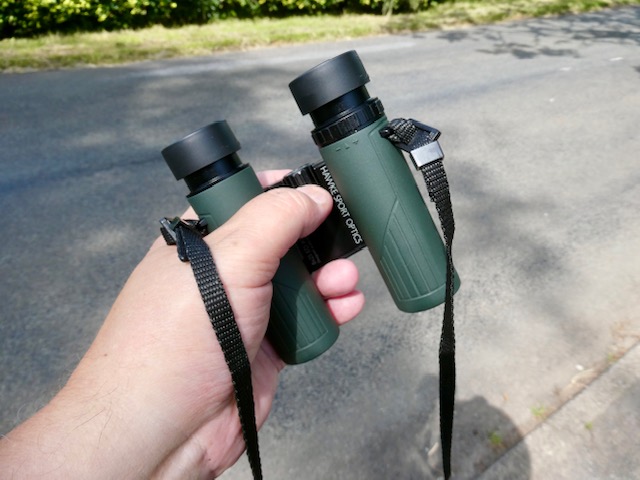
All in all, this is a very easy binocular to engage with, despite its small exit pupil size. One reason for this is the large eyepiece lenses which makes centring your eyes in the exit pupils that little bit easier.
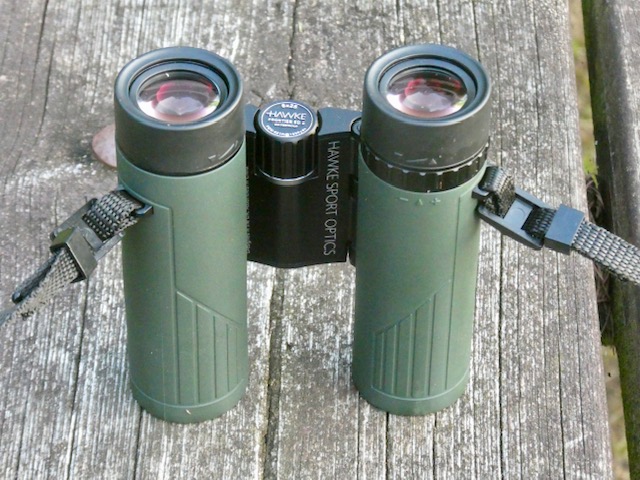
Optical Performance
The first really big surprise that I got with this binocular was how well it behaved when I aimed it at a bright light source. The Hawke Frontier EDX 8 x 25 showed no diffraction spike and only the merest trace of internal reflections! That’s extraordinary in my opinion, as it was a better result than any alpha pocket glass I’ve used in the past. This means it will perform superbly in low light situations, like observing cityscapes or harbour lights at night.
The next surprise came when I photographed the light emerging from the exit pupils of this small binocular:
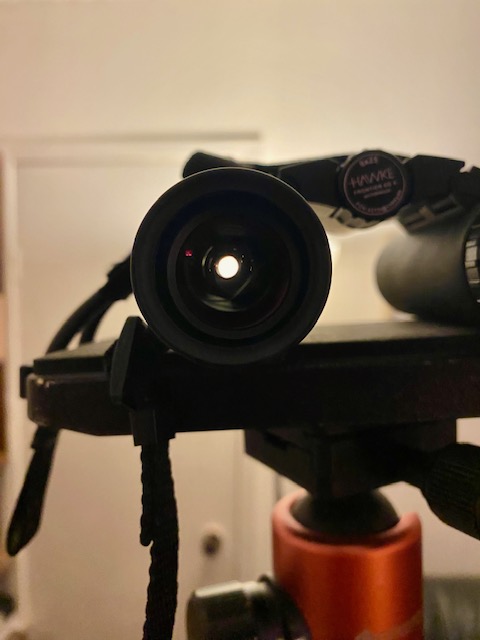
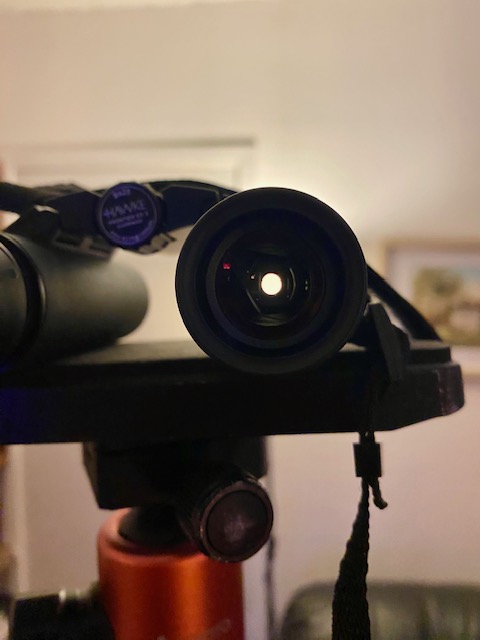
As you can see the results are excellent: perfectly round exit pupils, no truncation, and a nice dark hinterland around them! This is a good sign that the binocular will deliver glare free images in most lighting situations.
The view is outstanding!
Very sharp, bright and punchy with excellent contrast. Chromatic aberration is vanishingly low across the majority of the field, and only revealing a trace near the field stops. Pincushion distortion is also largely absent. The 8-degree field of view is a breath of fresh air compared with the overly tunnelled views presented by most other pocket glasses, especially at this price point. Colours are natural and vibrant. While the specifications don’t mention field flatteners, the view is sharp right out nearly to the very edge of the field, where some peripheral softness creeps in. That said, my 57-year old eyes can accommodate the entire field.
After dark, I was able to test the flatness of the field by centring the bright star, Vega, and moving it slowly to the edge of the field. I was delighted to see that the star remained tightly focused nearly all the way to the edge. It was only in the last 10-15 per cent of the field that I could see some bloating of the star image, but since I was able to focus this out, I knew it was mostly mild field curvature that had crept in.
Comparison with an Alpha Pocket Glass
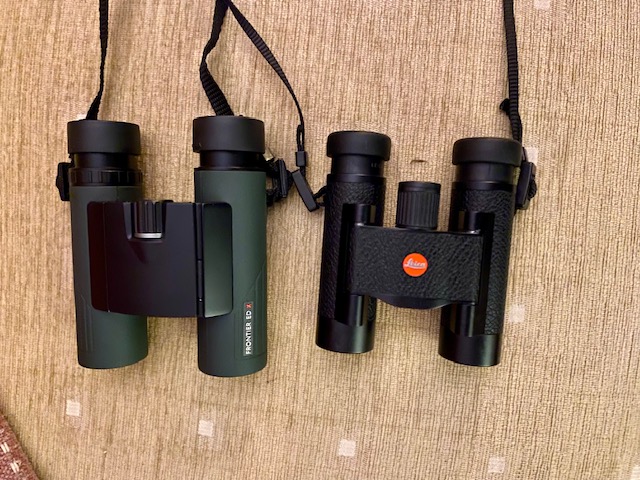
I spent a few hours comparing and contrasting the views produced by the Hawke Frontier EDX 8 x 25 and the Leica Ultravid BL 8 x 20. The latter retails for twice the price of the Hawke glass. I judged central sharpness to be a shade higher in the Leica, with more saturated colours. But there was no detail seen in the Leica that could not be seen in the Hawke. Glassing against the light was also slightly better in the Leica than the Hawke. That said, since you can glass comfortably glass using one hand, you can use the other to shade the objectives when looking very close to the Sun.
The Leica showed a modest diffraction spike when I turned it toward a bright street light after dark. The Hawke showed none. Internal reflections were equally well controlled in both glasses.
But there were many other ways the Hawke pulled ahead. The field of view in the Hawke is much larger – more than 60 larger in fact – than the Leica, and that alone creates a completely different viewing experience, much more reminiscent of that of a larger glass. The Leica shows much more pronounced pincushion distortion off axis compared with the Hawke. Ergonomically, the Hawke proved far nicer to handle than the smaller Leica Ultravid BL 8 x 20. The focuser on the Hawke is much smoother and more responsive than its Leica counterpart and is much easier to hold steady since you can more easily wrap your fingers round the barrels. All in all, the Hawke is the better glass.
Conclusions & Recommendations
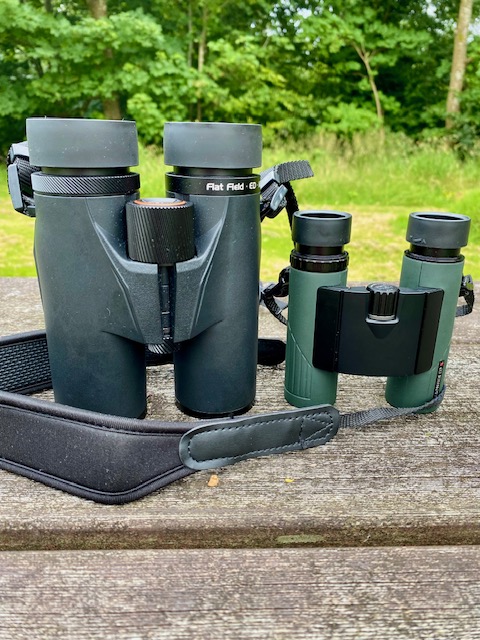
The Hawke Frontier EDX 8 x 25 totally surprised me. I was simply not expecting this level of optical performance from such a small binocular and at such a reasonable price. For sure these are the closest pocket binoculars that behave like 8 x 32s with their easy eye box and remarkably large and well corrected field of view. In fact, I liked the Hawke Frontier ED-X 8 x 25 so much, I also pulled the trigger on the 10 x 25(with its 6.6 degree true field)from the same series!
Could they replace a larger format binocular like the 8 x 42? Maybe for some but not for me; you see, no folding pocket binocular comes anywhere near the sheer brilliance, handling and micro-crystalline resolution served up by an alpha 8 x 42. No, they complement each other, with the smaller instrument being chosen only when sheer portability is of paramount importance.
Highly Recommended!
Read more on all manner of pocket binoculars in my book, Choosing and Using Binoculars.
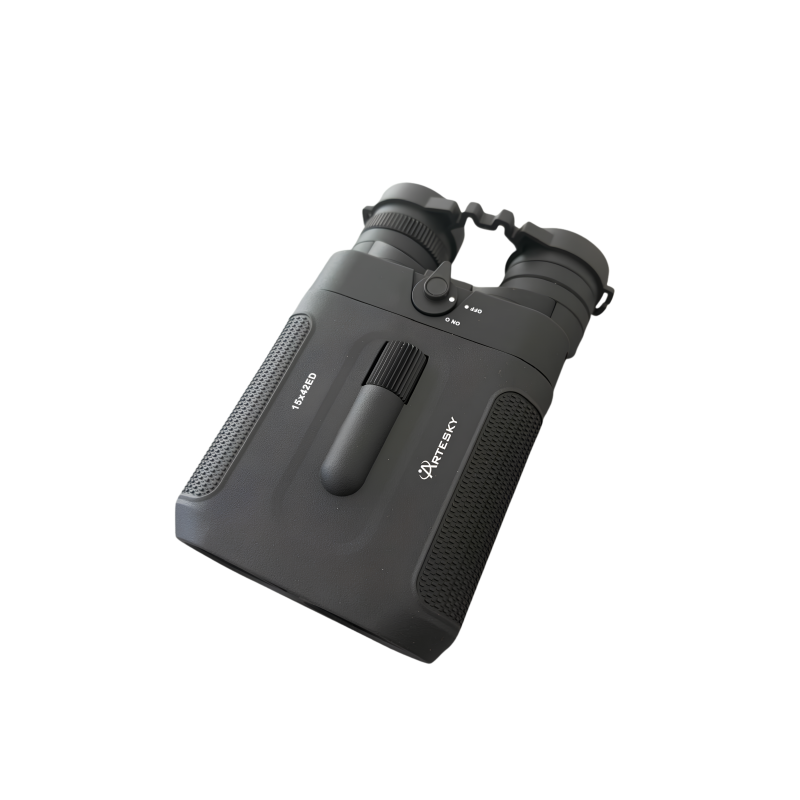
Product: Artesky 15 x 42 ED IS
Country of Origin: China
Chassis: Magnesium alloy with rubber armouring
Exit pupil: 2.8mm
Eye Relief: 13mm
IPD Range: 57-76mm
Correction Angle: +/-3 degrees
Field of View: 75m@1000m(4.3 angular degrees)
Power Source: 2x AAA batteries(user supplied)
ED Glass: Yes, FK-61
Waterproof: Yes IPX-7 specification
Weight(without batteries): 790g
Operating Temperature Range: -20C to +55C
Accessories: Rain guard, objective lens covers, neck strap, lens cleaning cloth, soft carrying pouch, user manual.
Price(UK): £599.00
In this review I’ll be putting the new Artesky 15 x 42 ED Image Stabilised(IS) binocular through its paces.
Tune in soon for more details……