In this blog, I’ll be posting links every day on various topics of interest to those who value truth over lies in this, the most wicked, godless and depraved of human generations since the Days of Noah.
Tucker Carlson: Funded by Islamists
In this blog, I’ll be posting links every day on various topics of interest to those who value truth over lies in this, the most wicked, godless and depraved of human generations since the Days of Noah.
Tucker Carlson: Funded by Islamists

Work Commenced December 22 2025.
In the past I’ve reviewed many Nikon binoculars, but in this blog I’ll be showcasing two remarkable bridge cameras that combine the best features of spotting scopes, image stabilisation and photography in one neat package. Enter the Nikon Coolpix P950 and its bigger brother, the P1100, which offer huge potential to birders and outdoor enthusiasts without breaking the bank.
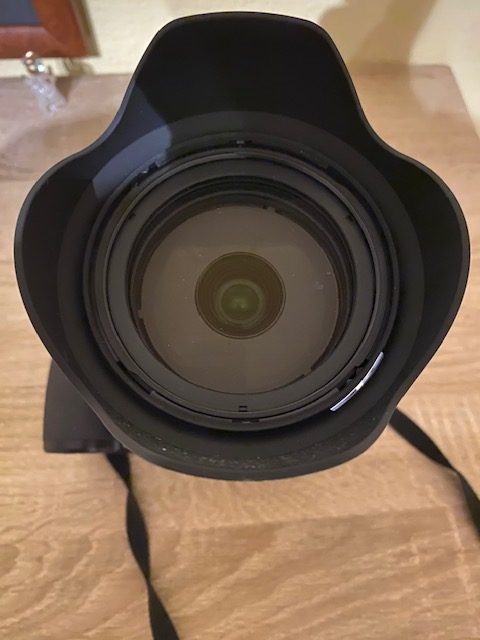
The Nikon P950 and P1100 are cut from the same cloth. With a focal length range of 24-2000mm and 24-3000mm respectively, they offer image stabilised magnifications of 40x and 60x(corresponding to 83x and 125x optical zoom), which enables you get super close to your targets in ways that far exceed the capabilities of imaging binoculars like the Swarovski AX Visio and Svbony SA208. And unlike the new line of image stabilised spotting scopes now being marketed by companies like Kite and Swarovski, they can capture excellent handheld images that can greatly enhance your days out. In a nutshell then, these Nikon super zoom cameras leave all of the above in the dust. Birds that appear as mere specks in an imagining binocular are seen close up in all their glory in these amazing cameras!
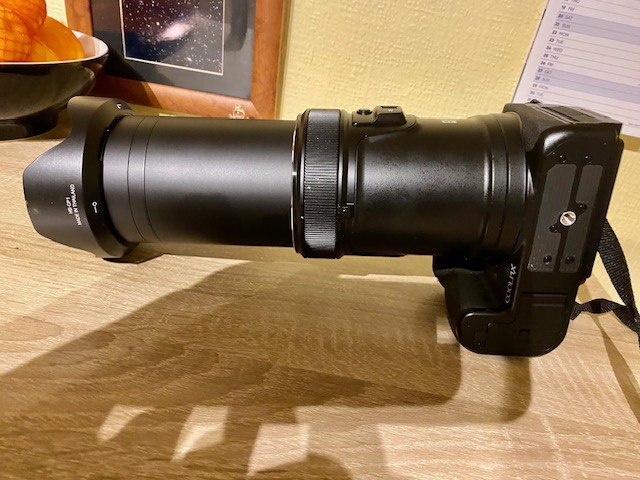
Outwardly, they’re very similar to their predecessors, the P900 and P1000 but include a number of improvements over these first generation models: primarily differing in connectivity (USB-C & Bluetooth 5.2 vs. Micro-USB & Bluetooth 4.1), some new scene modes (like Fireworks), improved ergonomics (new focus selector/control ring), and slightly enhanced image stabilization (5 stops vs. 4 stops), while keeping the same zoom lens and core sensor, with the main driver for the update being EU regulations for USB-C charging ports.
Both cameras have small, 1/2.3 inch sensors, similar in fact to those found in smart phones: a mixed blessing for sure. On the one hand it enables Nikon to pack such large focal length ranges into a portable package(they weigh 1.0 and 1.4 kilos). If a DSLR sized sensor were employed in these cameras, the lenses would be prohibitively long, heavy and unwieldy, not to mention expensive! On the downside, the small sensors don’t perform well in dim light.
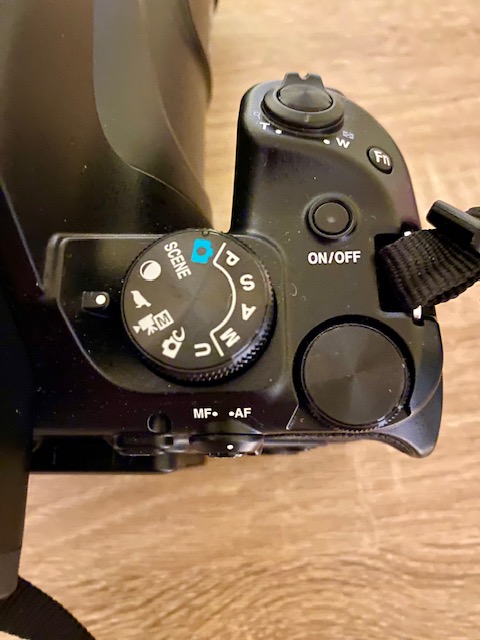
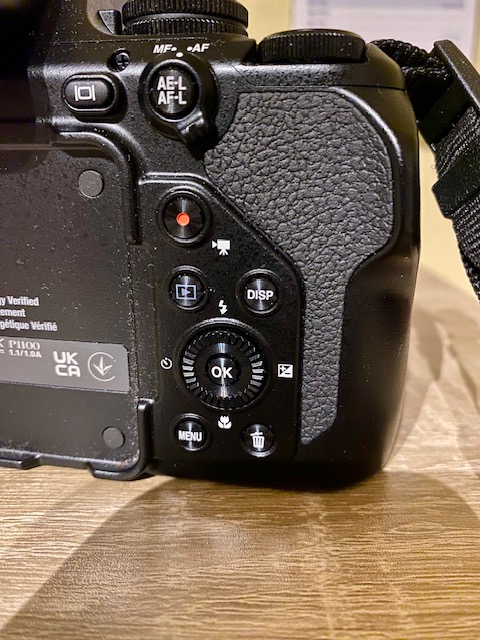
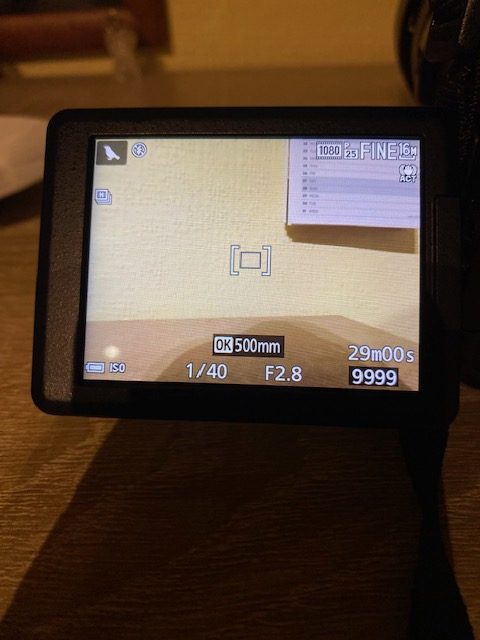
Both the Nikon P950 and P1100 feature a 16 Megapixel CMOS sensor producing images both in RAW and Fine JPEG format. In addition, both cameras feature a number of distinct modes for birding, lunar imaging, fireworks imaging as well as the full gamut of traditional modes including Manual(M), Aperture Priority (A), Shutter Priority (S) and Scene(or Landscape)
Though both cameras are mirrorless, they both have an excellent electronic view finder and high resolution viewing screen that enables the user to see every last detail of your subjects.
The Zoom Nikkor lenses in both the P950 and P1100 have up to 17 elements in 12 groups, including one Super ED and five ED elements. The reader will note the multiple ED elements used in these cameras. I remember a few rank amateurs on the forums openly sceptical about adopting more than one ED element in binocular and telescope optics. All I’ll say to those folk is take a look at the optical specs on these superzoom cameras to see the folly of your scepticism.
The net result of having such a complex optical design is that you get images that are beautifully sharp and contrasty, with virtually no colour fringing. As a keen birder, I do most of my photography in Bird Mode, where the camera selects the best features suited to imaging birds in a variety of lighting conditions. More advanced options can be employed, including manually focusing and choosing Shutter Priority if you wish to capture birds in flight.
The cameras are capable of taking excellent wide-angle landscape photos at the 24mm setting at f/2.8. As the zoom is extended to longer focal lengths the f ratio increases to a maximum of f/8 on the P1100 and f/6.5 on the P950, necessitating good light to get the best images. The following are a selection of images taken with both the P950 and P1100 at various focal lengths. Bear in mind that all these images were shot in Fine JPEG format with little processing, and that only low resolution images could be posted on this blog. That said, I hope the reader will get a good sense of the potential these bridge cameras offer. Also, the images were all taken handheld, that is, without using a tripod or monopod.
Mute Swan Cygnet: 2000mm@f/6.5

Robin: 2400mm@f/7

Grey Heron: 3000mm@f/8

Common Merganser: 3000mm@f/8

BlueTit: 2000mm@ F/6.5
Nuthatch 1500mm@ f/6.8

Wren 2000mm @f/6.5

Buzzard: 3000mm@f/8

Cormorant: 3000mm@f/8
Jackdaws: 2000mm@f/6.5

MistleThrush: 2000mm@f/6.5

Fieldfare & Redwing?~150 metres: 3000mm@f/8

Blackbird: 1000mm@f/5.6
Tufted Duck: 3000mm@f/8

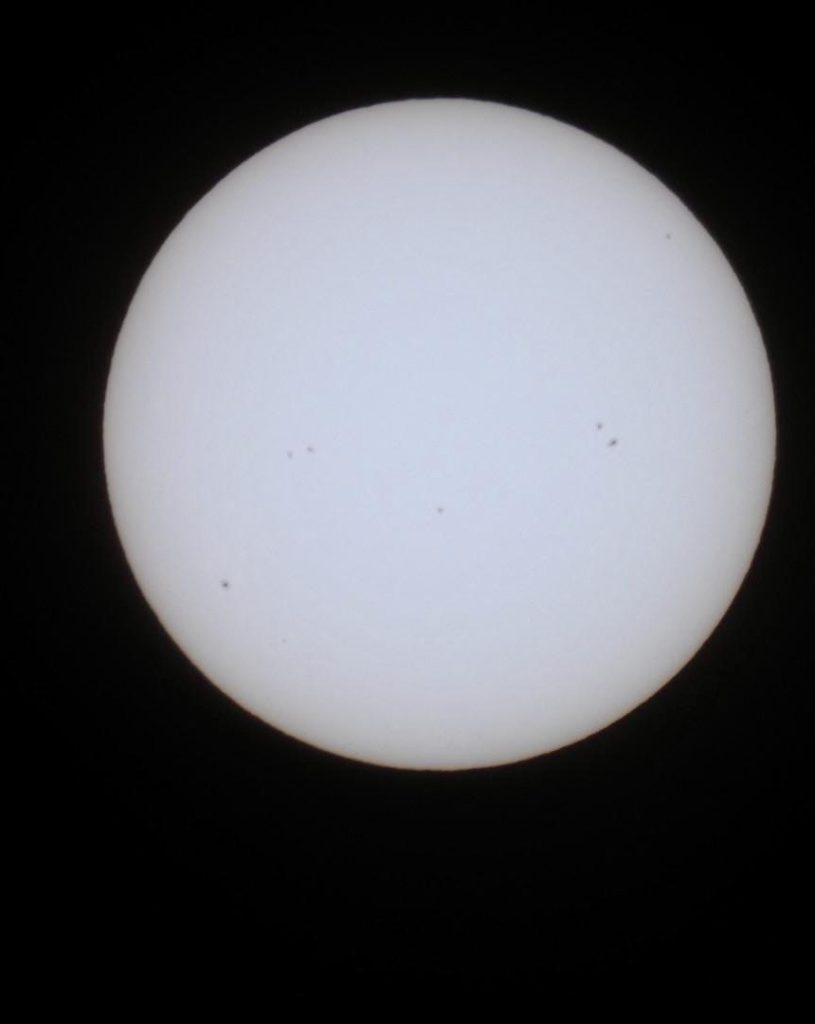
White Light Solar Disk: 2000mmf/6.5
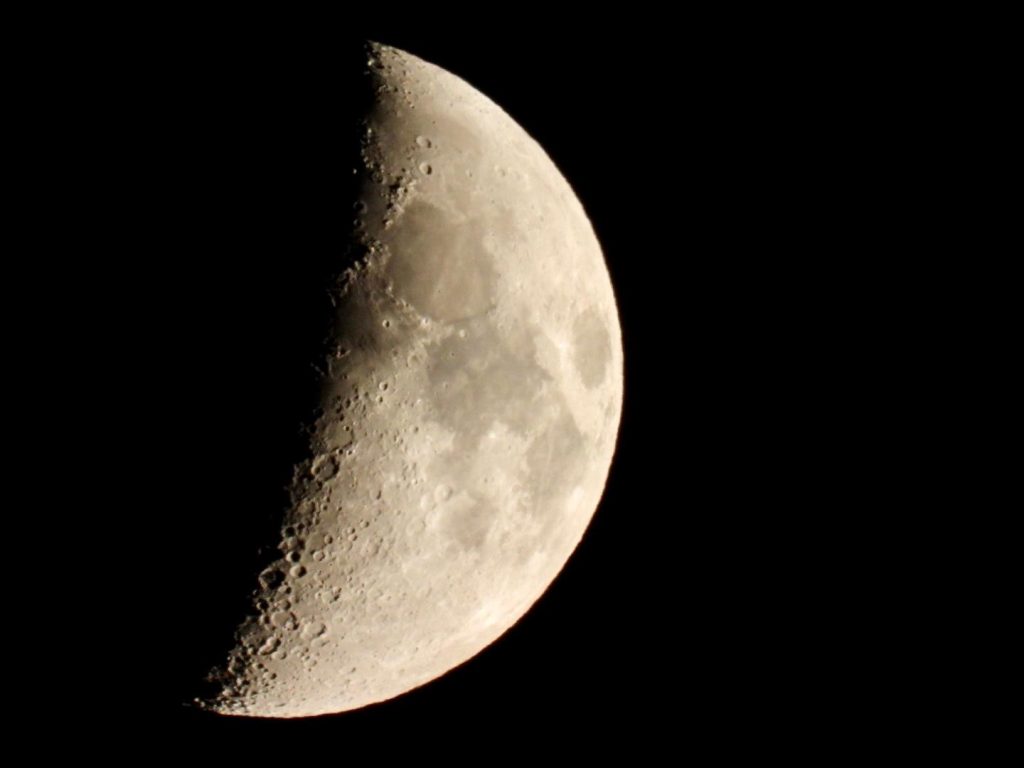
First Quarter Moon: 1800mm f/6.2
To Be Continued………
A Work Commenced June 21 2025
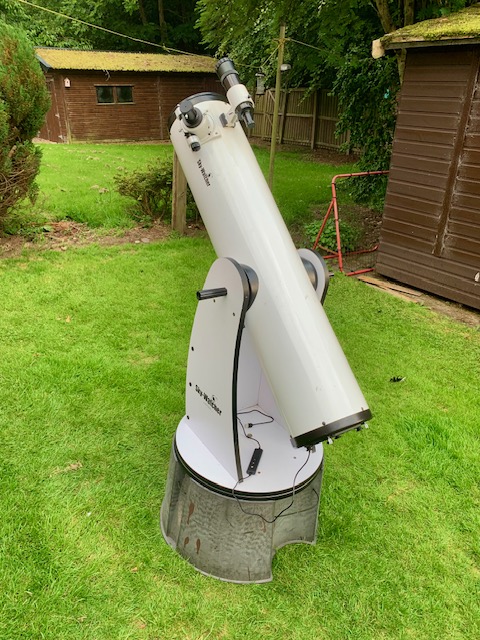
Back in 2015, I parted company with refractors as my main astronomical viewing instruments, having ‘seen the light,’ as it were, when I acquired a brilliantly simple 200mm F/5.9 Dobsonian from Skywatcher. Once properly collimated and acclimated under good seeing conditions, it significantly out-performed a top-rated 5 inch F/12 refractor on pretty much everything. The experience radically changed my perception of the true value of refractors, particularly when scaled up beyond 5 inches.
A year ago, I was delighted to see an astro imager had performed a shootout between a Skywatcher Explorer P 200mm F/5 Newtonian and a high-end 5 inch F/7.8 ED refractor on a high resolution lunar target, showing clearly the former’s superiority despite a nearly five-fold price differential.
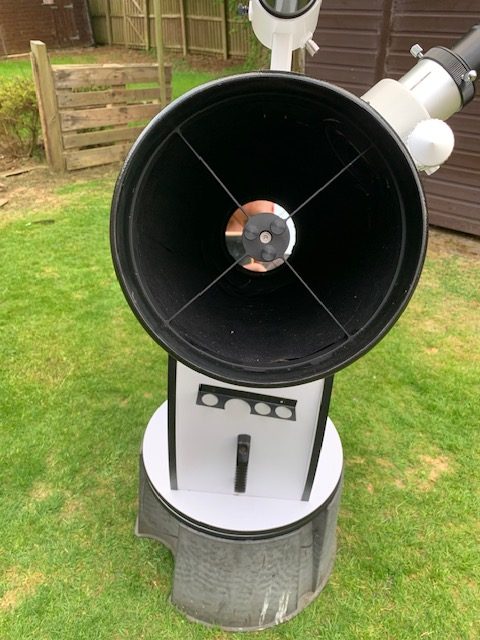
Over the last decade, I’ve made a series of modifications to this 200mm Newtonian, called Octavius, owing to its 8 inches of aperture. The primary mirror from Skywatcher was good but I decided to replace it with a true 8-inch (203mm) F/6 Ultra Grade mirror with an accuracy exceeding 1/10th wave PV from Orion Optics UK, which also came with state of the art reflective coatings – HiLux enhanced aluminium – increasing the mirror’s reflectivity from 85 per cent to over 97 percent across the visible spectrum.
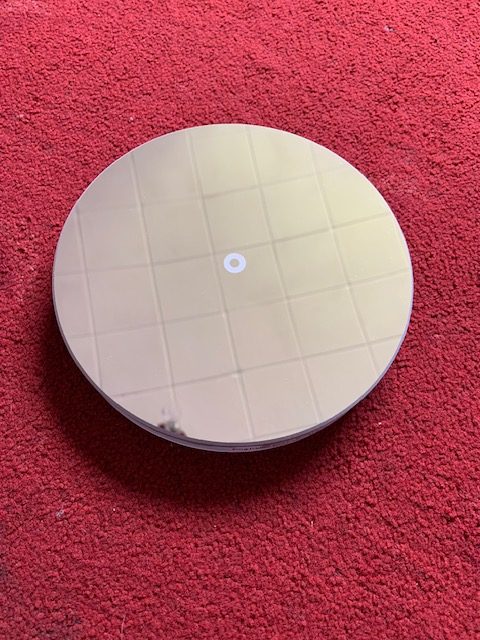
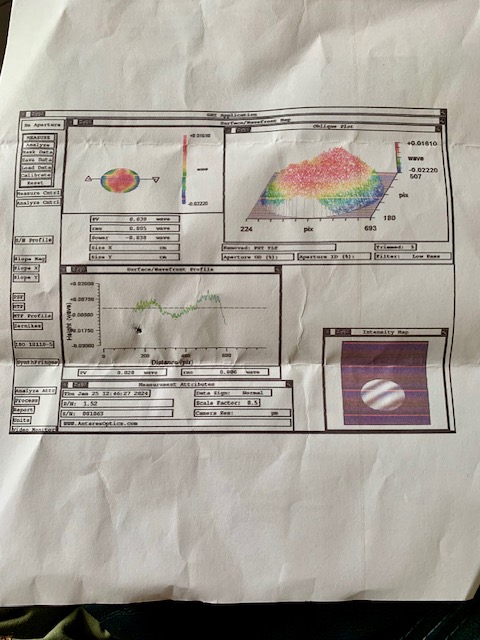
I then upgraded the secondary mirror by ordering up a smaller(1.52 inches) and more optically flat Antares unit with a 1/15th wave PV surface accuracy, whilst also reducing the central obstruction to less than 20 per cent by aperture.
Like the primary, the small secondary mirror came with enhanced aluminium coatings as standard, to maximise image brightness. Because it’s such a small and lightweight mirror, I could attach it to the stalk using double-sided tape.
My own personal experience with enhanced aluminium coatings is that they have much greater longevity compared with standard coatings. Indeed I have older mirrors treated with HiLux that are 10 years old and show no signs of deterioration despite regular use in my damp Scottish climate.
The somewhat flimsy secondary housing on the original SkyWatcher 200P was removed and replaced by a much more rigid and solidly-built structure manufactured by the German company, BackYard Universe.
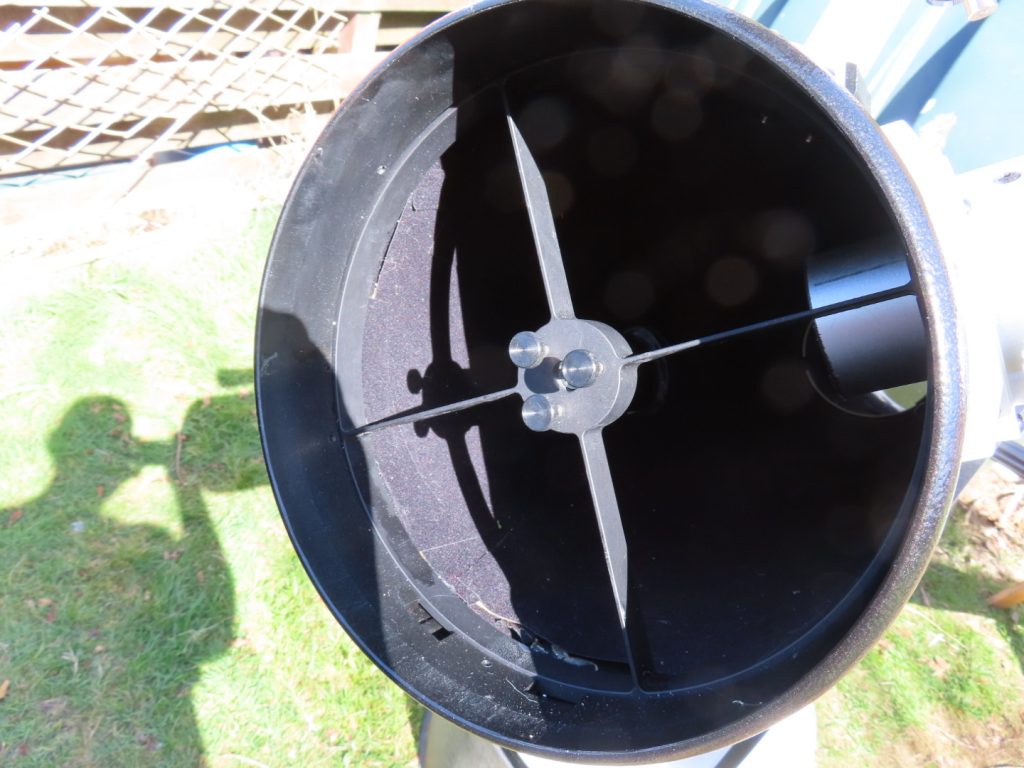
The secondary holder has a diameter of 40mm – slightly larger, in fact, than the 38.6mm elliptical flat mirror – giving a minimum central obstruction of 19.7 per cent.
Of course, If I so desired, I could have installed a low-profile focuser and decrease the secondary obstruction to just 10 per cent using a even smaller secondary, not to mention the need to redesign the spider structure. But in the end I decided against it, as I wanted to create a more all-purpose visual instrument rather than a specialised lunar and planet killer. And in any case, optical theory informs me that once the central obstruction falls below 20 per cent or so, the effects are almost indiscernible from a non obstructed optic of the same aperture.
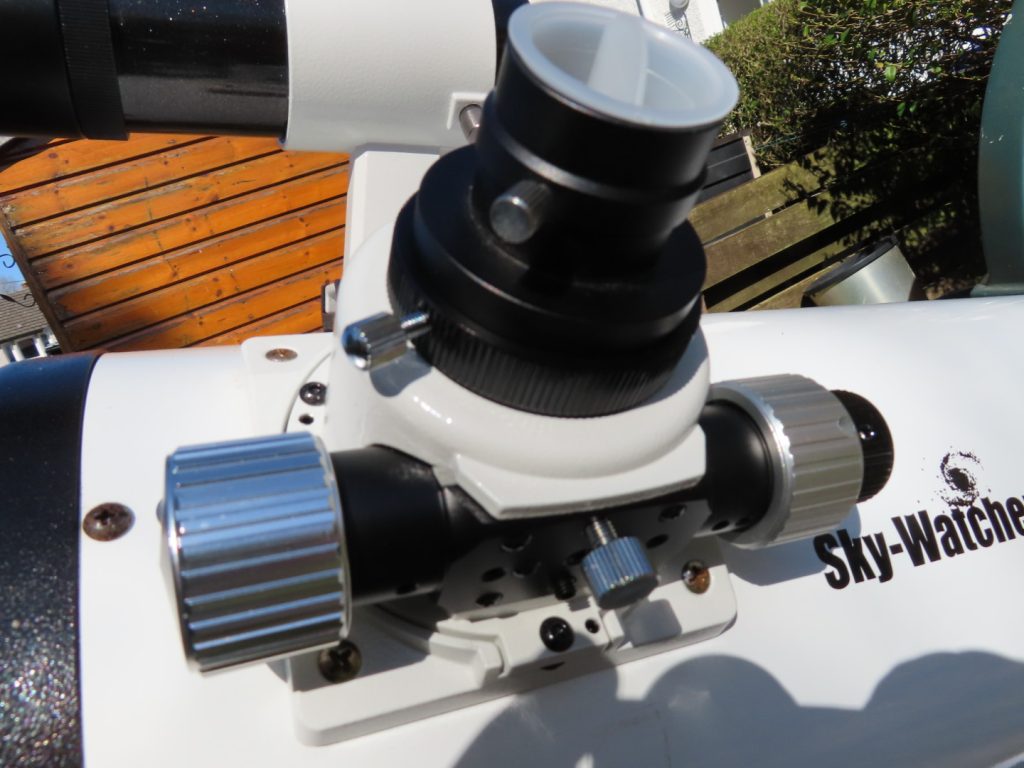
I did however replace the original single-speed rack and pinion focuser on the SkyWatcher Explorer P after ten years of heavy use, with SkyWatcher’s dual-speed Crayford focuser, which allows me to achieve smooth and precise micro-focusing on high resolution targets.
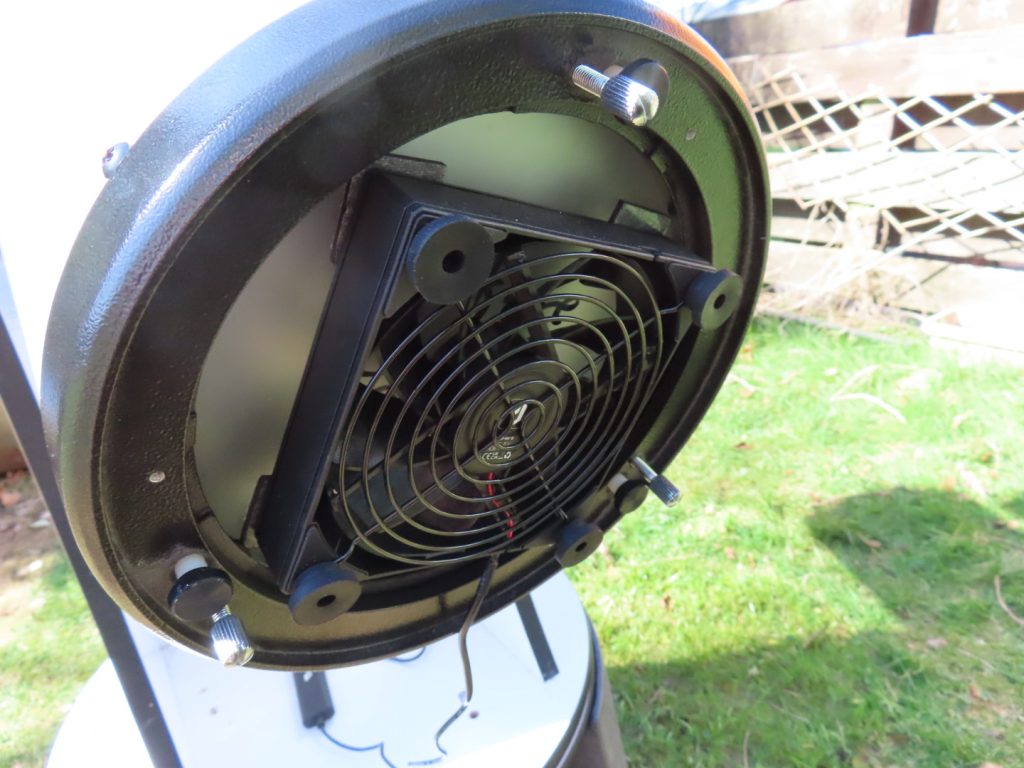
I also attached an inexpensive USB type cooling fan to the rear of the primary mirror which helps remove the boundary layer of warm air accumulating above the surface of the mirror, to help keep the images as crisp and detailed as possible.
The interior of the tube is lined with cork and overlaid by matt black flocking material to further enhance its thermal properties, as well as maximising image contrast.
The telescope sits in the original lazy susan altazimuth mount with the stalks under its base fitting into some pre-cut holes I made in an inexpensive plastic water butt. This raises the height of the telescope further above the ground providing a supremely comfortable standing height – I’m a six footer – for all my astronomical observations. And that brings me to the second reason for abandoning refractors- I hate sitting down, huddling over an eyepiece, straining my back while trying to study a target located high in the sky. Those kinds of observations are much more comfortably executed while standing up. Indeed, I even use my travel scope- a high quality 130mm F/5 Newtonian placed on an altazimuth mount- in exactly the same way i.e. standing up. Once I got used to standing with my Newtonians, there was no going back to refractors.
Just as any fine musical instrument benefits from occasional tuning up, so too does Octavius. At F/6 collimation is very easy, so easy in fact that it only requires a simple collimation cap to get you 90 per cent of the way there, and quite often better. The final tweaking is done manually by performing a star test at high power and making those final adjustments using the collimation screws on the primary mirror. It’s quick and easy, taking only a couple of minutes to get perfect alignment of the optics.
The more rigid secondary structure has greatly helped to maintain precise collimation from night to night, so much so that the instrument only needs occasional tweaking when moved from its indoor storage space to the outside air. That’s how it should be!
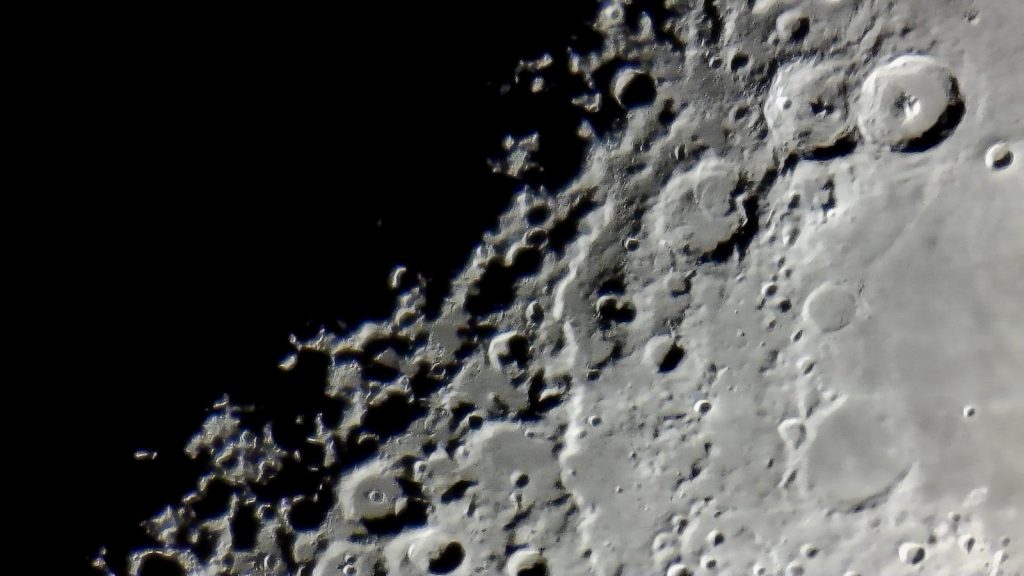
So how good are the optics? In a word- superb! But to elaborate: star testing at 200x under good conditions shows identical diffraction patterns inside and outside focus. Stars focus down to tiny, round Airy disks. By far the biggest benefit has come from the primary mirror. On the night the new primary arrived back in January, I was immediately able to discern the improvement on Jupiter. The new mirror snapped to focus better, showed more contrast and routinely revealed subtle details on the Giant planet that I had only vaguely discerned using the original mirror. Magnifying the first quarter Moon up to well beyond 400x showed no image breakdown whatsoever. The image below is a single shot image of the first quarter Moon taken with the Svbony SC001 2 Megapixel imaging camera, on the evening of May 3 2025, showing some very fine details.
Know Thy Telescope
Modern Newtonian primary mirrors are figured into the shape of a parabola. But why a parabola? Some analytical geometry can help us understand why:


In contrast, a spherical mirror has no fixed focal point but can approximate a parabolic shape if the focal ratio is made very large. Unfortunately, as the aperture increases, the focal lengths needed for spherical mirrors to work well very quickly
become impractical.
Optimum Aperture for Resolving Binary Stars.
Octavius is used mainly as a lunar, planetary and double star scope, although I also use it for deep sky observing too. One of my passions is double star observing, at which Octavius excels. Indeed, with a decade of experience with this telescope, I’ve come to accept that it’s very close to ideal for observing tricky binary systems reaching pairs less than 1” separation.
The following analysis is based on the work of Michael Greaney from chapter 25 of the book, Observing and Measuring Double Stars(2nd edition) which was incorrectly printed( the errors from which were reported by yours truly ,to the editor, Bob Argyle, at the Institute of Astronomy, Cambridge, UK).
According to Sidgwick, the maximum useful magnification of a telescope is approximately 28D^0.5 where D is the aperture of the telescope in millimetres. This was empirically derived, so has taken the effects of atmospheric seeing under British skies into account.
On the other hand, according to the work of the late professional double star astronomer, Dr Paul Couteau, the minimum useful magnification for resolving close binary stars is twice the resolving magnification of the telescope, which turns out to be D in millimetres.
There must exist an optimum value of D between the maximum useful magnification and the minimum useful magnification. If we express this as f(D) = 28D^0.5 – D
Then differentiating with respect to D gives:
f’(D) =14D^-0.5 -1 = 0 for the optimum, which turns out to be D =14^2 =196mm.
This result is just shy of 8 inches, the same aperture as Octavius.
Octavius, Optimus!
A Mid-Summer Night’s Dream

I’ve noted the efficiency of the 8-inch F/6 Newtonian many times over the years, but as a case in point, I used the instrument on two nights just after the summer solstice to resolve some tricky double stars at high power. First on the night of June 24-25 and again on June 28-29 2025. My workhorse eyepiece for this kind of project is my trusty Svbony SV 215 3-8mm planetary zoom eyepiece yielding magnifications of 152x – 406x. As the experienced observer, Alan Dyer, of Sky & Telescope concluded in his review, this is an excellent eyepiece, fully the equal of the Nagler zooms but offered at a much more attractive price. Additionally, I usually have 1.6x, 2x and 3x Barlow lenses handy to boost the magnification as high as 1218x.

This time of year, the twilight limits my observations to a short period of time between 11:30pm and about 1:00am local time, as any later and the sky begins to brighten again. I usually ‘warm up,’ starting with easier pairs such as Epsilon 1 & 2 Lyrae, all four components of which are easily split at 152x in the 8-inch. Moving on to Delta Cygni, which has a faint close companion, Octavius made light work of resolving this system at powers upward of 300x. One invaluable tool I use to enhance the detection of these close, unequal magnitude pairs is a polarising filter, which helps to cut off some of the diffraction ‘gunk’ between the components, in much the same way as an apodising filter works.
From there, I moved over to Aquila, low in the east, and tracked down the sixth magnitude star Pi Aquilae, centered it in my 8 x 50 finder scope and then cranked up the power to 406x, which is sufficient to tease both components – a pair of white sixth magnitude stars separated by just 1.4 arc seconds – and orientated roughly east-to-west.

Confident of good, steady skies, I next trained the instrument on Lambda Cygni – by now high in the eastern sky. Starting at 406x, I leave the star drift through the field, watching with intensity what the image might show me. Sure enough, I began to glimpse the secondary star (magnitude 6.3) almost precisely north of the primary(magnitude 4.7) and separated by a sliver of twilit space merely 0.9 arc seconds apart. Checking Stelledoppie afterwards, I was delighted to see its estimated position angle to be 01 degree, so almost immediately due north of its primary! Cranking up the power to 812x using a 2x Barlow lens gave an even more impressive view: the two stars cleanly resolved, and racing through the field of my un-driven telescope at breakneck speed! How swiftly the Earth moves! Time waits for no one.
At their distance from the solar system, the pair orbit their common centre of gravity every 391 years.

The above was recorded after midnight on June 25 but I was able to repeat the split just a few nights later on June 29. So, two clear nights just after the solstice when the telescope was able to resolve this sub arc-second pair! This might sound unusual, but it’s actually quite typical of our summer sky seeing – and, truth be told, all over the British Isles(having surveyed its suitability across Ireland as well),- here in rural central Scotland!
Unequal Pairs
The Dawes Limit has long remained the empirical limit on the resolution of double stars. Formulated in the 19th century by the celebrated Victorian observer, William Rutter Dawes, it states that the resolution limit for a telescope in arc seconds is given by 4.56/D where D is the aperture in inches. The formula Dawes arrived at was for equal brightness 6th magnitude stars. Thus, Octavius ought to be able to resolve equal magnitude pairs as close as 0.57 arc seconds. But things get more challenging for pairs of unequal brightness. In short the bigger the brightness differential between the stars the harder they are to tease apart.
Of the closer pairs already discussed, the easiest is Pi Aquilae(1.4”), since they only differ in brightness by 0.41 stellar magnitudes. More challenging yet is Lambda Cygni (0.9”) with a brightness differential of 1.53 stellar magnitudes. But at 00.02h on the night of July 17, during a spell of excellent astronomical seeing, I trained Octavius on Zeta Herculis, a yellow-white sun-like star still high in the summer sky just past meridian passage. The secondary is separated from its primary by 1.53” but the magnitude differential is 2.45. Charging the telescope with a power of 650x using my polarising filter, the 8-inch Newtonian was easily able to resolve the secondary immediately due east of its primary( confirmed by consulting Stelledoppie). Another similar test of this kind can be conducted on Propus(Eta Geminorum)during the winter months. With a separation of 1.83” but a magnitude differential of 2.63, this is considerably easier to tease apart.
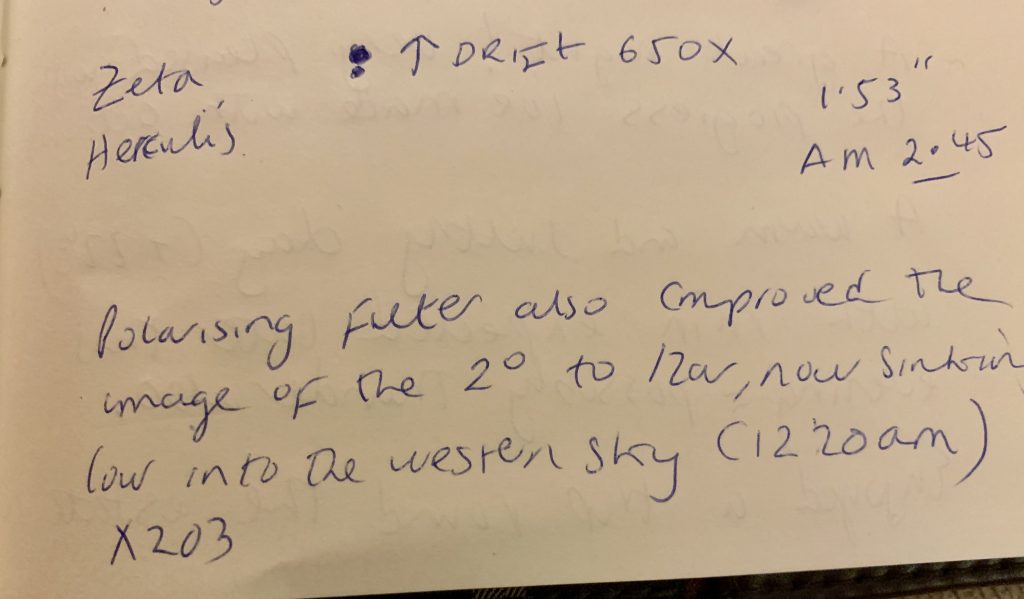
Why mention close, unequal pairs like these? Well, commonly accepted wisdom holds that Newtonians work best for equal magnitude pairs, but I’ve found this to be another myth promulgated by some members of the amateur community. After studying the work of Christopher Taylor, a theoretical physicist by training, and keen double star observer with a particular interest in resolving sub-arc second pairs using a 12.5 inch F/7 Calver reflector erected on a massive, un-driven altazimuth mount down at Oxford(discussed in Chapter 11 of Argyle’s book previously mentioned), it became clear to me why Octavius does so well on unequal double stars like Zeta Herculis. It has a small central obstruction and vanishingly low spherical aberration- both of which result in transferring substantially less energy from the Airy disk into the diffraction rings, thereby making a faint companion more easily resolvable from its primary. Indeed, Taylor admits as much in his book chapter, by making the point that his century-old Calver mirror was deliberated left under-corrected to help keep track with falling temperatures.
Examining the Airy disks of second and third magnitude stars in Octavius on nights of good seeing, reveals tiny pinpoint stars with a singular ring of moderate size and brightness. In other words: the images are very refractor-like.
Perhaps most fascinating of all is the sheer dynamism of pairs like Zeta Herculis. Located a few tens of light years away, the companion to Zeta Herculis orbits its primary in just 34.5 years. That means that its position angle relative to its primary changes significantly in just a few years! Having carried out observations of this system regularly over the last decade I’ve witnessed its rapid movements from one year to the next. How cool is that?
For the record, Tau Cygni, easy to pick up even in summer twilight, and currently separated from its primary by 1.1” but with a 2.75 magnitude difference, presents a similar type of challenge.
A New and Improved Primary Mirror Fan

I’ve dithered for years about whether a primary mirror cooling fan would be worth installing. I’ve generally not encountered much in the way of thermal issues using Octavius, as we experience only small diurnal temperature swings for much of the year, though April and May have brought their problems, with warm sunny days and chilly nights. I generally store the telescope in a dry, unheated shed, just a few degrees warmer than the outside air. However, during the cold winter of 2024-25, I bought a small USB desk fan and affixed it to the rear of my primary mirror using a few layers of double-sided tape. It was powered by a small portable power pack and after several trials,I became convinced that it did clean up the images of Jupiter and Mars in a subtle but consistent way. However, I did perceive some vibrations at the high powers I use for close double stars. I attributed this to the direct attachment of the fan to the mirror.
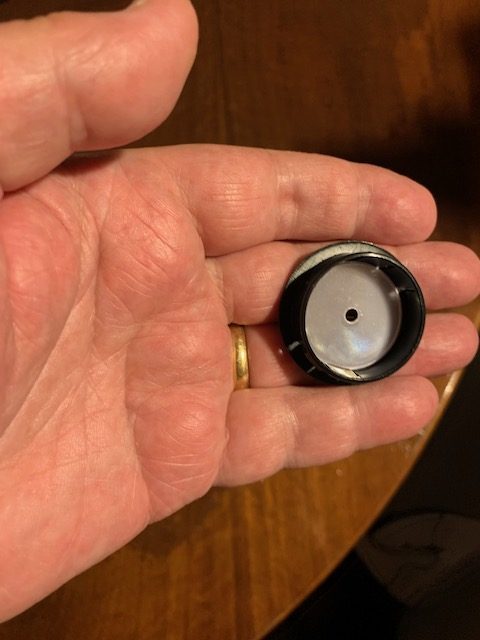
So I decided to splash out on a dedicated mirror fan manufactured by Austral Solutions, based in Spain. This new fan attaches to the outer tube of the telescope in such a way that it doesn’t touch the primary directly, but blows ambient air onto to the centre of the primary mirror. It’s powered by a 12v DC step-down transformer (user provided)powered from a mains (AC) source. Although this requirement necessitates having a constant supply of electricity, it’s more reliable than the portable power pack I had used with the original fan, which often cut out, especially on colder evenings, over the winter and spring. My results this summer, examining high-resolution double stars, testing various permutations (turning the fan off and on and critically examining the seeing disks) has convinced me that keeping the fan running constantly significantly increases the stability of the Newtonian image.
Finding Fainter Pairs
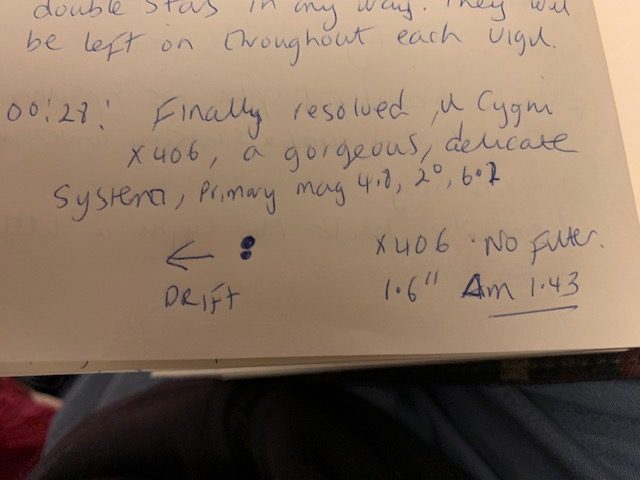
By late July, the skies above me become noticeably darker, allowing me to better track down fainter binary star systems. One example is Mu Cygni, which can now be tracked down using my finder scope on the eastern flank of this large, summer constellation. My notes show that I had not visited this system for about six years, so I was excited to pay a visit to this old friend. On the night of July 23-24, I trained Octavius on Mu, which is easily identified by virtue of a wide, unrelated 7th magnitude star off to the east of it in the finder telescope. Charging Octavius with a power of 406x(fan running), I was greeted by a beautiful sight: a pair of white suns separated by 1.6”, the primary having a magnitude of 4.8 and the secondary- 6.2-roughly due north of it. I don’t remember this system to be much of a challenge for a good 4- or 5-inch refractor employing high powers back in the day. Clearly the secondary is closing in on the primary, making it more challenging than I remember.
In addition, on the same night, I trained Octavius on Iota Cassiopeiae, now at a decent altitude off to my northeast, and cranked the power up to about 200x to reveal this beautiful triple system for the first time this season. A nice way to end my vigil on this rather cool July night!
A Return to Dark Nights
By the last week of July, the skies are turning noticeably darker after sunset here in rural central Scotland. On the night of July 29-30, I enjoyed a reasonably calm, clear sky and by half past midnight local time, I could once again see the faint glow of the summer Milky Way coursing its way through Cygnus and Cassiopeia. Seeing was only average though, so no high-resolution double star observing was conducted. Instead I turned Octavius on some familiar summer deep sky objects. To view some of the larger objects on display, I employ longer focal length 1.25” eyepieces like my 22mm (70 degree AFOV) yielding a low power of 55x in a true field of 1.26 degrees and a medium power from my 15mm (68-degree AFOV) which yields a power of 81x in a 0.84 degree field. The reader will note that I do not employ 2” eyepieces for lower power wider FOV viewing for two principal reasons: I strongly dislike having to switch between the 1.25” and 2” formats, and the lower powers of these longer local length oculars shows up the astigmatism in my right observing eye which I find distracting when used without eye glasses. That said a 1.26 degree field is more than enough to enjoy pretty much all of the objects I visit with Octavius. If I want larger fields, I turn to my large, 15 x 56 binoculars.
I first turned Octavius on the Ring Nebula(M57) in Lyra, its ghostly glow coming through nicely at 152x. Then moving into Hercules, I quickly located both M13 and M92, both globular clusters located far out in the halo of our galaxy. Although these are best resolved at powers of 150x to 200x, tonight I was happy to admire these beautiful baubles of ancient starlight at 81x using my 15mm eyepiece.
After having quick looks at easy double stars such as Gamma Delphini and the colourful, O1 and O2 Cygni and the famous 61 Cygni, I trained the telescope on the wide but rich open cluster M39 at the head of Cygnus, enjoying the dozens of pinpoint stars strewn across the field of the 22mm eyepiece, and set against a rich Milky Way hinterland. By 1:00 AM local time, Cassiopeia was just clearing my rooftop and I had hoped to catch a glimpse of the famous Double Cluster in Perseus. Alas it was still too low for me to access it. It will have to wait a wee while longer before I can view this spectacular object in my trusty 8 inch Newtonian.
The Assault on Tau Cygni
The night of August 9-10 was cool and breezy, but the sky was clear, with relatively calm twinkling stars..The full Moon culminating low in the south. I fielded Octavius at around 10:30pm local time and tested sky conditions by looking at a few binary systems of increasing difficulty. First I targeted Delta Cygni and was delighted to get a very clean split at 244x. Then I moved over to Lambda Cygni, cranked the power up to 650x and once again managed to split this system with relative ease. Confident that this would be a good night to try my hand at Tau Cygni, I began by observing the star at powers up to 406x but with not a lot of success. Patience is a virtue, however. The system had a few hours to go before it reached its highest altitude crossing the meridian. Leaving the fan running continuously, I covered the optics and ventured inside for a while before returning to the telescope every half hour or so. With each attempt, I could see that the appearance of the Airy disk of the 4th magnitude yellow white primary looked better and better as I was looking through less atmosphere. After midnight, using a power of 812x , I got my first glimpse of the secondary with a current separation of about 1” off to the SSE of the primary but it was only tentative at this stage. By about 1.00AM local time, I ventured out again, charging the instrument with a power of 812x and positioned the star on the east side of the telescopic field. In moments of superior seeing, I could make out a faint disk in the same position I had glimpsed earlier, but now it was more steadily held. Reaching for my 3x Barlow and switching it out with my 2x Barlow, the telescope could now deliver a power of 1218x – crazy I know! To see this system at such high power on an un-driven mount, you start at the lowest zoom setting (8mm with a 3x magnification boost), placing the star at the eastern edge of the field, focus as finely as possible and then crank the power upwards toward 1218x. The strategy paid off! At these extremely high powers, I was better able to tease the components apart and record its position relative to the direction of drift. After I had made a sketch, I consulted Stelledoppie and was delighted to see that the companion was in just the right position it should be in August 2025. I note the last measure was made back in 2017 when the estimated position angle was 190 degrees. Since then the 7th magnitude companion had moved eastward in its orbit round the primary. Back in 2017, it was located off to the SSW but now it was in a SSE direction.
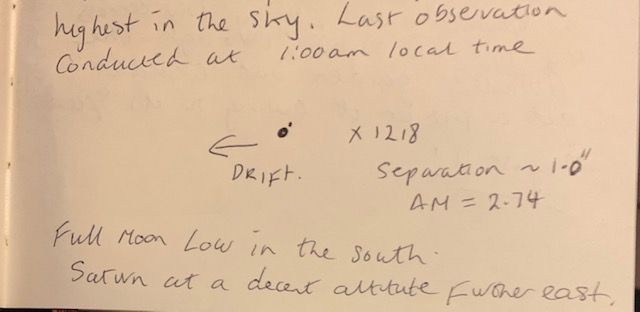
This was a thrilling observation: one of the most difficult I’ve tried in quite some time: a companion separated by just 1” of sky but fully 2.74 magnitudes fainter! This would be a severe challenge for a 6-or 7-inch refractor but it was quite doable on a good night here in rural central Scotland, using a fine-tuned 8-inch Newtonian with a sub-20% central obstruction. The sun-like star Tau Cygni B, orbits its primary every 49.5 years.
A Visit to 61 Cygni:
In the same telescopic field as Tau Cygni my 8 x 50 finder scope picks up the lovely pair of orange stars known as 61 Cygni. Even the smallest telescope is capable of resolving these stars and even steadily held 10x binoculars should tease these apart. At 153x Octavius frames these stars perfectly with a nice Milky Way background. The brighter of the two has a magnitude of 5.2 and its companion nearly a full visual magnitude fainter. To my eye both stars exhibit the same orange hue and that’s not surprising as they are both K spectral class dwarf stars with temperatures a little over 4000K. 61 Cygni was all the rage in the first few decades of the 19th century, when astronomers noted their large proper motion, a good sign that these stars were relatively close to the solar system. As recounted in great detail in Chapter 11 of my large historical work, Chronicling the Golden Age of Astronomy, it was the great German astronomer, Friedrich Wilhelm Bessel, who, by 1840, first measured their distance from the solar system to be 10.3 light years away: only 10 percent lower than the modern accepted value. 61 Cygni represents a true binary star system, the components of which orbiting their common centre of gravity every 680 years.
Astronomers have yet to identify planets orbiting these cool, long-lived stars, but in general, unless their planets orbit very close to their parent stars, the chaotic orbital motions of close binary star systems like this generally cause their planets to be ejected from their system over time. Still, in the mind’s eye, I can imagine being on the surface of one such world, watching two golden suns rising and setting in a clear sky. How wonderful it would be to witness such a sight!
Two Golden Binary Stars in Draco:
On the lovely evening of August 26, a light southerly wind kept the dew at bay and the sky above was glorious, with the Milky Way snaking its way from southwest to northeast. I trained Octavius on Eta Draconis: a lovely golden sun easily visible to the eye at magnitude 2.7. This was my third observation of this system in as many weeks. Seeing was excellent tonight as is often the case in August, so I cranked the power up to 406x and watched it drift through the field. It wasn’t long before I glimpsed its very faint secondary close in at 4.7” from the primary, and off to the southeast. The challenge here, once again, is not the angular separation per se, but rather the magnitude differential. The companion is 5.4 magnitudes fainter but still quite easy for Octavius.

Returning to the lowest power setting on my zoom eyepiece yielding 152x, brought another star of the 6th magnitude of glory into the same field of view as Eta. Indeed it is quite easily seen in my 8 x 50 finder. This star, known prosaically as STF 2054, also took on a golden hue but after I increased the power to 406x I could easily resolve its companion just 0.93” away from the primary and orientated north-south( the companion is due north). The fainter star is about a magnitude dimmer than its primary. Using my 2x Barlow lens provided 812x which made seeing the components that little bit easier again. Intriguingly, after consulting the astrophysical data on both Eta Draconis and STF 2054, I discovered that both stars have exactly the same spectral class – G8III – making them about 700 degrees cooler than our Sun but also explaining why their colours looked similar in the eyepiece.These two stars visible in the same field will make for an excellent test of resolution for moderate-aperture backyard telescopes under good seeing conditions.

The Joyous Return of Jupiter:
Throughout the autumn I’ve enjoyed many nights doing double star observing. But in recent weeks, the mighty planet Jupiter has returned to the eastern sky later in the night. Jupiter is, by a country mile, my favourite planet to study, its constantly changing atmosphere over timescales of days and weeks enthrals me. From the beginning of November, I fielded Octavius to observe the planet, but didn’t meet with much success, as the seeing conditions were not up to scratch for performing high- resolution planetary studies. But in the wee small hours of November 21, my perseverance finally paid off.
Though we’ve enjoyed quite a few clear nights in November, they’ve been accompanied by a northerly airflow, which always brings turbulent seeing conditions. You don’t need a telescope to verify these unfavourable conditions either: when the stars are scintillating wildly, even over head, there is no chance of obtaining fine planetary images. And contrary to what some observers claim, smaller telescopes don’t really help to alleviate this problem. For example, my portable travel scope – a high-spec 130mm F/5 Newtonian – is no better at ‘beating the seeing’ than my 8-inch is, at least at this location. Years of experience has taught me that.
The night of Nov 20-21 was clear and steady, with the stars twinkling much more calmly than any of the other clear nights in November. Temperatures had plummeted to -4C. At about 00:45 local time(UT): I trained Octavius on Jupiter and was delighted to see a beautifully sharp image of the Giant Planet with the Great Red Spot(GRS) near the central meridian. I made a quick sketch (see below)of the planet at 244x using a Baader Moon & Skyglow filter which helps bring out more subtle, low-contrast details.
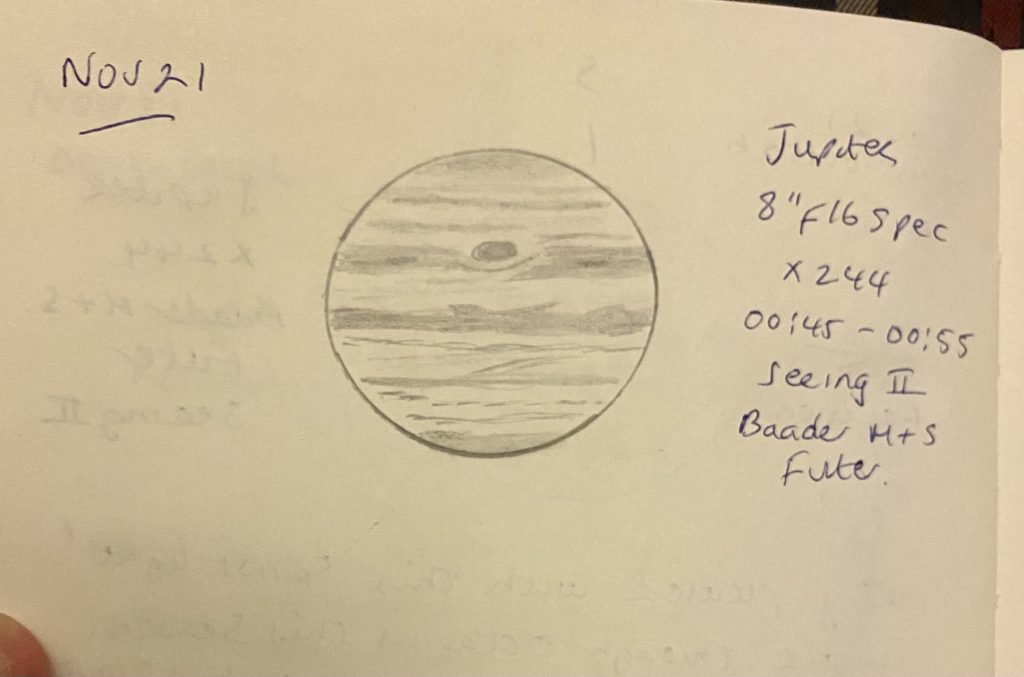
The planet was quite a bit away from meridian passage when I made the sketch. I continued to watch the planet until 1:30 UT noting the increase in detail as it climbed in altitude. Pushing the power up as far as 406x produced really promising results, with little breakdown in the image: something I couldn’t do with the original SkyWatcher optics- a testimony to the optical quality of this 8-inch F/6 Newtonian which renders planetary images as good or slightly exceeding a top-rated 6-inch refractor.
This is only the beginning: as the days and weeks go by, Jupiter will be available for observation at earlier, more convenient times, as it heads toward opposition in January 2026. Watch this space!
The Promise of a Misty Night
It’s now December: deepest darkest winter in the northern hemisphere. We’re now just three weeks out from Jupiter’s opposition in early January. Checking the weather forecast on December 15 2025, I noted partially overcast conditions with the likelihood of mist forming later in the night. Mist is a very reliable indicator of good, steady atmospheric conditions and sure enough after leaving Octavius cool off for an hour, I began observations of mighty Jupiter about 11:30pm local time by which time the planet had reached a decent altitude in the eastern sky but still a few hours from meridian passage. Charging the telescope with a power of 152x, I could immediately see that the planet was rock steady and showing lots of fine detail. Cranking up the power to 244x and using both a Televue Bandmate planetary filter and a Baader Moon & Skyglow filter interchangeably, I enjoyed magnificent views of the Giant Planet. On the whole, I prefer the Baader filter to the Televue owing to its greater light transmission and neutral colour cast though the Televue is certainly no slouch. I made a sketch of the planet at about 11:45pm showing the features I was able to tease from the disk. Bear in mind, this is still not Jupiter at its best as it needs to climb even higher in the sky before culminating in the south but it certainly provided the inspiration for scrutinising this magnificent world beyond the snow line of the solar system.

To be Continued…….

A Work Commenced December 9 2025
Product: Sky Rover Banner Cloud 7.5 x 32 with 2-ich astronomical filters
Country of Manufacture: China
Chassis: Magnesium alloy overlaid by protective rubber
Exit Pupil: 4.3mm
Eye Relief: 18mm
Field of View: 184m@1000m(10.4 angular degrees)
Dioptre Compensation: +\-4
Coatings: Fully broadband multicoated, Phase corrected Schmidt Pechan prisms, hydrophobic coatings on ocular and objective lenses
Prism Type:H-Bak7GT
ED glass: Yes
Field Flatteners: Yes
Waterproof: Yes, 1m/30 mins
Nitrogen Purged: Yes
Close Focus: 2m advertised, 1.95m measured
Light Transmission: 90-92%
Tripod Mountable: Yes
Dimensions:13.9 x 12cm
Weight: 822g
Accessories: Soft padded carry case, objective covers, ocular rain guard, 2-inch astronomical filters, filter adaptors, padded neck strap, microfibre cloth, instruction manual
Warranty: 3 Years
Price: $409 without filters, $505 with 2” filter set
In previous reviews, I showcased two amazing new high-performance binoculars from SkyRover: the 8 x 42 and the larger 10 x 50. These featured class-leading optical designs with ED glass, flat fields and ultra-wide angle eyepieces( 9.1 & 7.5 degrees, respectively) that left their European competitors in the starting blocks. Since their launch in 2023, the Banner Cloud series has gone from strength to strength, delivering world-class performance at prices hitherto unheard of. Customers voted with their wallets, and despite desperate attempts from ignorant, spineless trolls, they are currently enjoying great success bolstered by many dozens of happy user testimonies.
But SkyRover did not rest on their laurels, reaching out and listening to their client base, when they committed to bringing to market two new models in the 32mm aperture class: the 6 x 32 sporting a true field exceeding 12 degrees, and just recently, a 7.5 x 32 model boasting a field of view of 10.4 angular degrees! Of course, there have been designs like these before but never offering the same level of image quality at the edges of the field and at bargain prices. The new SkyRovers are changing all that. In this review, I’ll be showcasing the long-awaited 7.5 x 32 SkyRover Banner Cloud(SRBC), which I believe could be their best binocular yet, for daytime viewing at least! To see why, read on.
A Beautifully Presented Binocular

The SRBC 7.5 x 32 arrived in a beautiful presentation box. Many of the key features of the binocular are printed on the side, as is the new 3-year warranty.

The padded case is very well made with an eye catching red SR logo on the front. The padded neoprene neck strap is an ideal match for the weight of this binocular too. The rain guard fits over the eyecups firmly as do the objective lens covers.

The 7.5 x 32 has shorter barrels than the 42mm series making it a bit more compact. It’s still a hefty glass though, tipping the scales at 822g without the rain guard and objective lens covers attached. This makes it significantly heavier than most other 32mm binoculars – a necessity to get that class-leading field of view.

The large central focus wheel is buttery smooth to turn with absolutely no free play. I reported that the focus wheel on the 8 x 42 SRBC stiffened significantly at the end of its travel but this is not the case on the new 7.5 x 32. 1.4 turns clockwise brings you from closest focus to a little bit beyond infinity. Intriguingly, the earlier models from the series focused counter clockwise!

The dioptre compensation under the right eyepiece turns with just enough inertia to stay in place once adjusted. Indeed, I have never had any issues with this on any SRBC binocular I have had the pleasure of using.

The eye cups offer five positions in total. They click into place firmly and hold their position well. They can also be unscrewed from the binocular to get at dust and other debris picked up during extensive field use. Eye relief is very generous for the bespectacled among us. I was able to see the field stops when the cups were fully retracted while wearing my progressive glasses.
The objective lenses have multilayer antireflection coatings that ensure very high light transmission. They are well baffled against stray light and protected from whatever the weather throws at you.

The 7.5 x 32 feels great in the hands. My fingers can wrap around the large barrels to comfortably access the focus wheel. Indeed, it balances that little bit better than the 8 x 42, guaranteeing a more secure hold in field use.
Another neat feature of both the 6x and 7.5 x 32mm SRBCs is their ability to accept 2 inch filters for deep sky sweeping, which are affixed via two supplied screw-on adaptors. We’ll take a closer look at this provision later in the review.

Optics
My first test was to see how the binocular behaved when pointed at an intensely bright light source. Just like all the others in the Banner Cloud series, the 7.5 x 32 yield excellent results, with no significant internal reflections with a rather subdued diffraction spike. Checking for light leaks round the eye pupils yielded excellent results with round entrance pupils surrounded by lots of darkness: a good omen indeed in predicting how well the instrument would behave against the light.

The view can summed up in a few words: wonderfully sharp from edge to edge, exceptionally immersive, with hard, round field stops, lovely contrast, accurate colours and almost no chromatic aberration save for the merest trace in the last 10-15 percent of the field. Depth of field is also very good indeed. Pincushion distortion is extremely mild especially given the exceptional size of the field. Resistance to general and veiling glare is also well above average. In short, a world-class image with a huge wow factor owing to that enormous field of view.
Notes from the Field

In order to get the most immersive field of view with the least amount of glare, I never extend the eyecups out to their fullest extent but rather bring them down two clicks as you can see in the photo below. The left eyecup is positioned correctly for my eyes compared with the fully extened cup seen on the right:

This 7.5 x SRBC is by far the most comfortable and immersive 32mm binocular I have personally experienced. The larger exit pupil over a regular 8 x 32 certainly helps here but there is also the improved depth of focus moving from 8x to 7.5x, as well as that enormous, ultra-flat field of view. The sheer size of the field is hard to relate in numbers, but compared with say the Zeiss Victory SF 8 x 32, which hitherto presented the widest field of view in a 32mm roof prism format, the 7.5 x 32 SRBC presents a portal nearly 40 per cent larger by way of comparison!
Like the other SRBC models I’ve field tested, there is a generous amount of post infinity focusing in the 7.5 x 32, which is good news for those of us who have severe myopia. Close focus was measured to be slightly less than 2m: great for watching close up objects like insects, flowers and rocks in ‘macro’ mode.
A Comparison with a Known ‘Alpha Class’ 32mm Format Binocular

The lust of the eyes and the pride of life…..
To give the reader some idea of the quality of the view through the 7.5 x 32, I compared it with a Leica Ultravid HD Plus 8 x 32. The latter needs no introduction of course: it is widely regarded as one of the very best compact binoculars ever made. It is also the smallest of the current genre of 32mm binoculars. With a field of view of 7.7 degrees though, the view is noticeably restricted compared with the SRBC which brings a field nearly twice the size to your eyes. Central sharpness is excellent in both but that sharpness extends all the way to the edge of the SRBC field. In contrast, the little Leica glass shows a touch of peripheral softness in the outermost 10 per cent of the field. Colour tone is a little different too, with the Leica glass serving up ‘warmer,’ more saturated colours than the more neutral tones of the SRBC. What really surprised me however, was the level of lateral chromatic aberration in both binoculars. I fully expected the SRBC to show more pronounced fringing owing to its much larger field but that was not the case. Examining a variety of high contrast targets under harsh lighting conditions, it was the Leica that showed more pronounced fringing near the field stops! Pincushion distortion was much more evident in the Leica too!
The importance of a wider field of view was brought home to me one early afternoon in December while carrying both instruments with me on a two mile trek around my local estate. On one heavily overcast occasion, I was glassing some denuded tree branches with the 7.5 x 32 SRBC, when I noticed a Great Spotted Woodpecker perched on a branch in the upper left-hand corner of my field of view. I made a mental note on where the binocular was centred and then reached for the Leica glass, centring the field of view on that same spot. The Woodpecker was no where to be seen, as it was outside the field of view of the Leica glass!
Lessoned learned: with smaller fields of view you’ll be missing stuff.
Impression has a power all of its own.
The hydrophobic coatings on both the Leica and the SRBC outer lenses worked equally well in my field tests. Both instruments quickly dispersed condensation breathed on the eyepieces on cold, damp winter days. Performance against the light was very comparable in both binoculars, that is, excellent!
Now a word on the ergonomics of both binoculars. While the Ultravid HD Plus has a very nice focuser, the focus wheel on the SRBC is even smoother and easier to move. The Leica also has a locking dioptre built into the focus wheel, which is excellent, but hardly a necessity. The traditional dioptre compensation ring located under the right eyepiece is perfectly adequate to the task. It holds its position very well indeed.
A final note on the weight difference of the binoculars: the Leica weighs in at a mere 536g compared with the significantly bulkier 822g SRBC. As I’ve noted before, the extra weight allows me to hold the SRBC a little bit more stably owing to its greater inertia. This becomes important while glassing under windy conditions, when the majority of users would notice the difference. The greater weight of the SRBC generates a more stably held image. In summation, only if portability is the primary concern, would I choose the Leica over the Sky Rover.
Sweeping the Heavens

While a 32mm aperture binocular would not be my ideal choice for deep sky viewing, having an ultra-flat 10.4 degree field is not to be sniffed at. I chose the 7.5 x 32 over the 6x model since it goes that little bit deeper and has a larger image scale. My experiences of the 7.5 x 32 on the night sky were very favourable. The Moon is razor sharp against a dark sky hinterland. Placing the full Moon in the centre of the field gives the impression that the magnification is lower – an illusion caused by the magnanimity of its field of view. After all, the 7.5 x 32 can get 20 full Moons into its field! Again I could only detect some minor fringing when the Moon was placed quite a bit off axis but to speak of such fringing is academic at best.
I did do one check to estimate the field size of the 7.5 x 32. Albireo in Cygnus and the Coathanger asterism in Vulpecula are separated by about 10 degrees of sky and I was indeed able to see both in the same field of view. This was not achieved using the 8 x 42 SRBC with its 9.1 degree field.
Showpieces of the winter night sky were beautifully presented: the Hyades & Pleiades in Taurus, the Sword Handle and Belt stars in Orion could be seen in the same field of view with plenty of room to spare. Kemble’s Cascade, the Alpha Persei Cluster and the famous Double Cluster were also nice to observe. I did notice a modest drop in illumination of stars as they approached the field stops though. I didn’t do much observing with the UHC filters however. I observe from fairly dark rural skies so there would be little need to use them. Under my conditions they did show a modest enhancement of nebular objects such as M42 in Orion but at the expense of attenuating star brightness a bit.
Conclusions

Test driving the new 7.5 x 32 has been a real thrill. For a modest price of just a few hundred dollars you’re getting super nice optics that is sure to wow you from the first time you bring it up to your eyes. I consider the Sky Rover Banner Cloud series to be quite revolutionary, pushing the envelope on optical quality and setting new records in wide field viewing. Christmas has certainly come early!!
Dr Neil English runs the full gamut of binocular genres in his book, Choosing & Using Binoculars, A Guide for Stargazers, Birders and Outdoor Enthusiasts

Why do the [a]nations rage
And the peoples meditate on a vain thing?
2 The kings of the earth take their stand
And the rulers take counsel together
Against Yahweh and against His [b]Anointed, saying,
3 “Let us tear their fetters apart
And cast away their cords from us!”
4 He who [c]sits in the heavens laughs,
The Lord mocks them.
5 Then He speaks to them in His anger
And terrifies them in His fury, saying,
6 “But as for Me, I have [d]installed My King
Upon Zion, My holy mountain.”
7 “I will surely tell of the [e]decree of Yahweh:
He said to Me, ‘You are My Son,
Today I have begotten You.
8 Ask of Me, and I will surely give the [f]nations as Your inheritance,
And the ends of the earth as Your possession.
9 You shall [g]break them with a [h]rod of iron,
You shall shatter them like a potter’s vessel.’”
10 So now, O kings, show insight;
Take warning, O [i]judges of the earth.
11 Serve Yahweh with fear
And rejoice with trembling.
12 [j]Kiss the Son, lest He become angry, and you perish in the way,
For His [k]wrath may [l]soon be kindled.
How blessed are all who take refuge in Him!
Psalm 2: Legacy Standard Bible
In this blog, I’ll be reviewing the Legacy Standard Bible(LSB), published by the Lockman Foundation.
Tune in soon for more details……

But even if we (or an angel from heaven) should announce any “good news” to you other than what we have proclaimed to you, let that person be cursed.
Galatians 1:8
And no marvel; for Satan himself is transformed into an angel of light.
2 Corinthians 11:14
Islam is rapidly gaining influence in the West, yet its origins cannot be firmly rooted in history. In this brand new biography, the distinguished Islamic scholar, Dr Robert Spencer, outlines the mythology behind its founder, Muhammad, casting a critical eye on the alleged prophet’s ‘morality,’ as well as asking the question about whether he actually existed.
A work Commenced November 27 2025
Product: Opticron Oregon 20 x 80
Country of Manufacture: Chins
Field of View: 57m @ 1000m (3.2 angular degrees)
Exit Pupil: 3.75mm measured
Close Focus: ~20m
Eye Relief: 17mm
Interpupillary Distance (IPD) Range: 56-73mm (2.2-2.9 inches
Prism Type: Porro I
Coatings Fully multi-coated
Waterproof: No
Weight: 2185g
Accessories: Hard case, neck strap, instruction manial and lens cleaning cloth
Price(UK:£150
Over the last year, I’ve been testing out various large aperture binoculars with a goal to selecting the most powerful instrument I could profitably use either with or without a monopod. That led me to investigate various formats: 15 and 18 x 50 Canon IS binoculars, an Oberwerk ED Ultra 15 x 56, various 15 x 70 models from Celestron and Helios, as well as a quick brush with the Opticron Oregon 20 x 80. These experiences were both enjoyable and rewarding, as I was able to compare and contrast their performance under a dark night sky.
After conducting this study, I reached a startling conclusion: the instrument that ticked all the boxes was the budget priced Opticron Oregon 20 x 80, producing the best deep sky views of all the models tested. So, I ordered up another 20 x 80 unit to conduct more tests and concluded that I had made the right choice. What follows is a more detailed review of my ‘second light’ experiences with this binocular.
A Tried & Trusted Design

The second, new Opticron Oregon 20 x 80 arrived in great shape. Collimation was excellent and the focus wheel worked smoothly and precisely. Ditto for the right eye dioptre compensation ring: which moved with just the right amount of traction as well as holding its position well.
Like I reported with an earlier unit, I noted a small restriction in aperture owing to the small Porro I prisms utilised in the design which reduced its aperture to 75mm. To my mind, this was a perfectly acceptable compromise given its modest price tag. And losing 5mm proved to be no big deal in the scheme of things.

Testing the binocular out on some bright street lights after dark, I was delighted to see little in the way of internal reflections. The same was true when I turned it on a bright October full Moon.


Mounting it on a heavy-duty Oberwerk 2000 monopod, day time views were very impressive: very sharp, nice contrast, vivid colours, with very modest amounts of chromatic aberration. But in truth, what I really looked forward to is giving this beast a good test drive under a dark country sky where it delivered in spades!
Testing on a variety of my favourite deep sky objects including M31, the Pleiades, the Belt Stars and Sword Handle of Orion, M35, M33, Kemble’s Cascade, The Alpha Persei Cluster and nearby Double Cluster, Albireo, the circumpolar galaxies M81 & M82, and the Coathanger asterism, I was immediately struck by the brightness boost of the large 80mm objectives. The central bulge and spiral arms of M31 stood out much better than any of the smaller instruments. The young, blue and white hot stars of the Pleiades sparkled much more prominently compared with the view delivered by both a 15 x 70 or a Canon IS 18 x 50, which appeared much more lacklustre in contrast. M35 was much better resolved in the 20 x 80 than any of the other binoculars I turned on it. Albireo was much more impressively resolved in the large, Opticron Oregon owing to its greater resolution and magnification. The three prominent Belt Stars of Orion could just fit inside the 3.2 degree field of the 20 x 80, with several dozen fainter stars(Collinder 70) peppering their hinterland. M42 in the Sword Handle presented prominently with a greenish hue: a colouring the smaller instruments failed to show.
The Double Cluster was stunning in the 20 x 80 showing fainter stars and more vivivid colours than any of the other instruments I had used.
Sure, the Opticron Oregon 20 x 80 doesn’t have a flat field like the Oberwerk ED Ultra 15 x 56 or the Canon 18 x 50, but its small field delivers acceptable results even at the field stops- much better, for example, than the Celestron Astromaster binoculars. Do you really need ED glass for such deep sky work? I would say no! It makes very little difference in my opinion. Even a bright first quarter Moon shows an acceptable level of fringing at the limbs, is quickly forgotten when the level of crater detail immediately stuns the eye.
In a nutshell then, aperture wins!
Neil English is author of Choosing & Using Binoculars

“While all the days of the earth remain,
Seedtime and harvest,
Cold and heat,
Summer and winter,
And day and night
Shall not cease.”
Genesis 8:22
In this updated and expanded edition of climate scientist Steven Koonin’s groundbreaking book, go behind the headlines to discover the latest eye-opening data about climate change―with unbiased facts and realistic steps for the future. “Greenland’s ice loss is accelerating.” “Extreme temperatures are causing more fatalities.” “Rapid ‘climate action’ is essential to avoid a future climate disaster.” You’ve heard all this presented as fact. But according to science, all of these statements are profoundly misleading. With the new edition of Unsettled, Steven Koonin draws on decades of experience―including as a top science advisor to the Obama administration―to clear away the fog and explain what science really says (and doesn’t say). With a new introduction, this edition now features reflections on an additional three years of eye-opening data, alternatives to unrealistic “net zero” solutions, global energy inequalities, and the energy crisis arising from the war in Ukraine. When it comes to climate change, the media, politicians, and other prominent voices have declared that “the science is settled.” In reality, the climate is changing, but the why and how aren’t as clear as you’ve probably been led to believe. Koonin takes readers behind the headlines, dispels popular myths, and unveils little-known truths: Despite rising greenhouse gas emissions, global temperatures decreased from 1940 to 1970 Models currently used to predict the future do not accurately describe the climate of the past, and modelers themselves strongly doubt their regional predictions There is no compelling evidence that hurricanes are becoming more frequent―or that predictions of rapid sea level rise have any validity Unsettled is a reality check buoyed by hope, offering the truth about climate science―what we know, what we don’t, and what it all means for our future.
About the Author
Dr. Steven E. Koonin is a leader in science policy in the United States. He served as Undersecretary for Science in the US Department of Energy under President Obama, where he was the lead author of the Department’s Strategic Plan and the inaugural Quadrennial Technology Review (2011). With more than 200 peer-reviewed papers in the fields of physics and astrophysics, scientific computation, energy technology and policy, and climate science, Dr. Koonin was a professor of theoretical physics at Caltech, also serving as Caltech’s Vice President and Provost for almost a decade. He is currently a University Professor at New York University, with appointments in the Stern School of Business, the Tandon School of Engineering, and the Department of Physics. Dr. Koonin’s memberships include US National Academy of Sciences, the American Academy of Arts and Sciences, and the JASON group of scientists who solve technical problems for the US government. Since 2014, he has been a trustee of the Institute for Defense Analyses and chaired the National Academies’ Divisional Committee for Engineering and Physical Sciences from 2014-2019.
He is currently an independent governor of the Lawrence Livermore National Laboratory and has served in similar roles for the Los Alamos, Sandia, Brookhaven, and Argonne National Laboratories.
A Work Commenced October 26 2025
Product: Svbony SA208 8 x 42 ED Imaging Binocular
Country of Manufacture: China
Exit Pupil: 5.25mm
Eye Relief: 17mm
Close Focus: 4m advertised, 3.65m measured
ED glass: Yes
Coatings: Fully Multicoated
Dioptre Compensation: +\-4
Field of View: 126m@1000m(7.2 angular degrees)
Sensor: 6 Megapixel CMOS
Wifi Range: 10m
Video Capability: 1080P
Battery Life: 4 Hours(4000mAh)
Image Stabilisation: No
Weight: 912g measured, 940g advertised
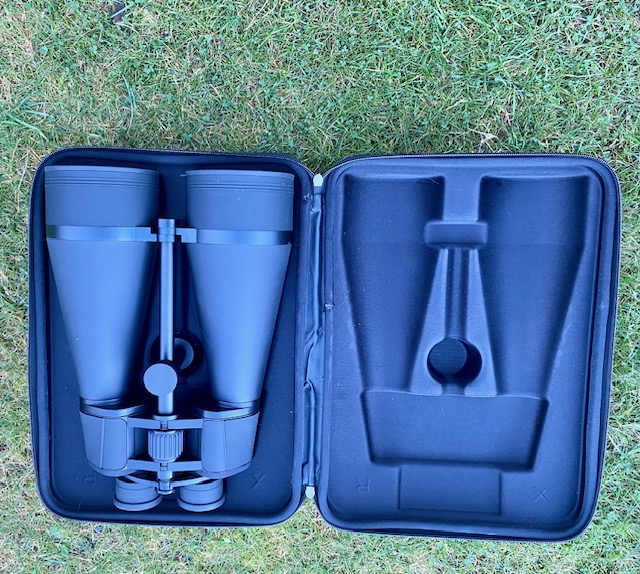
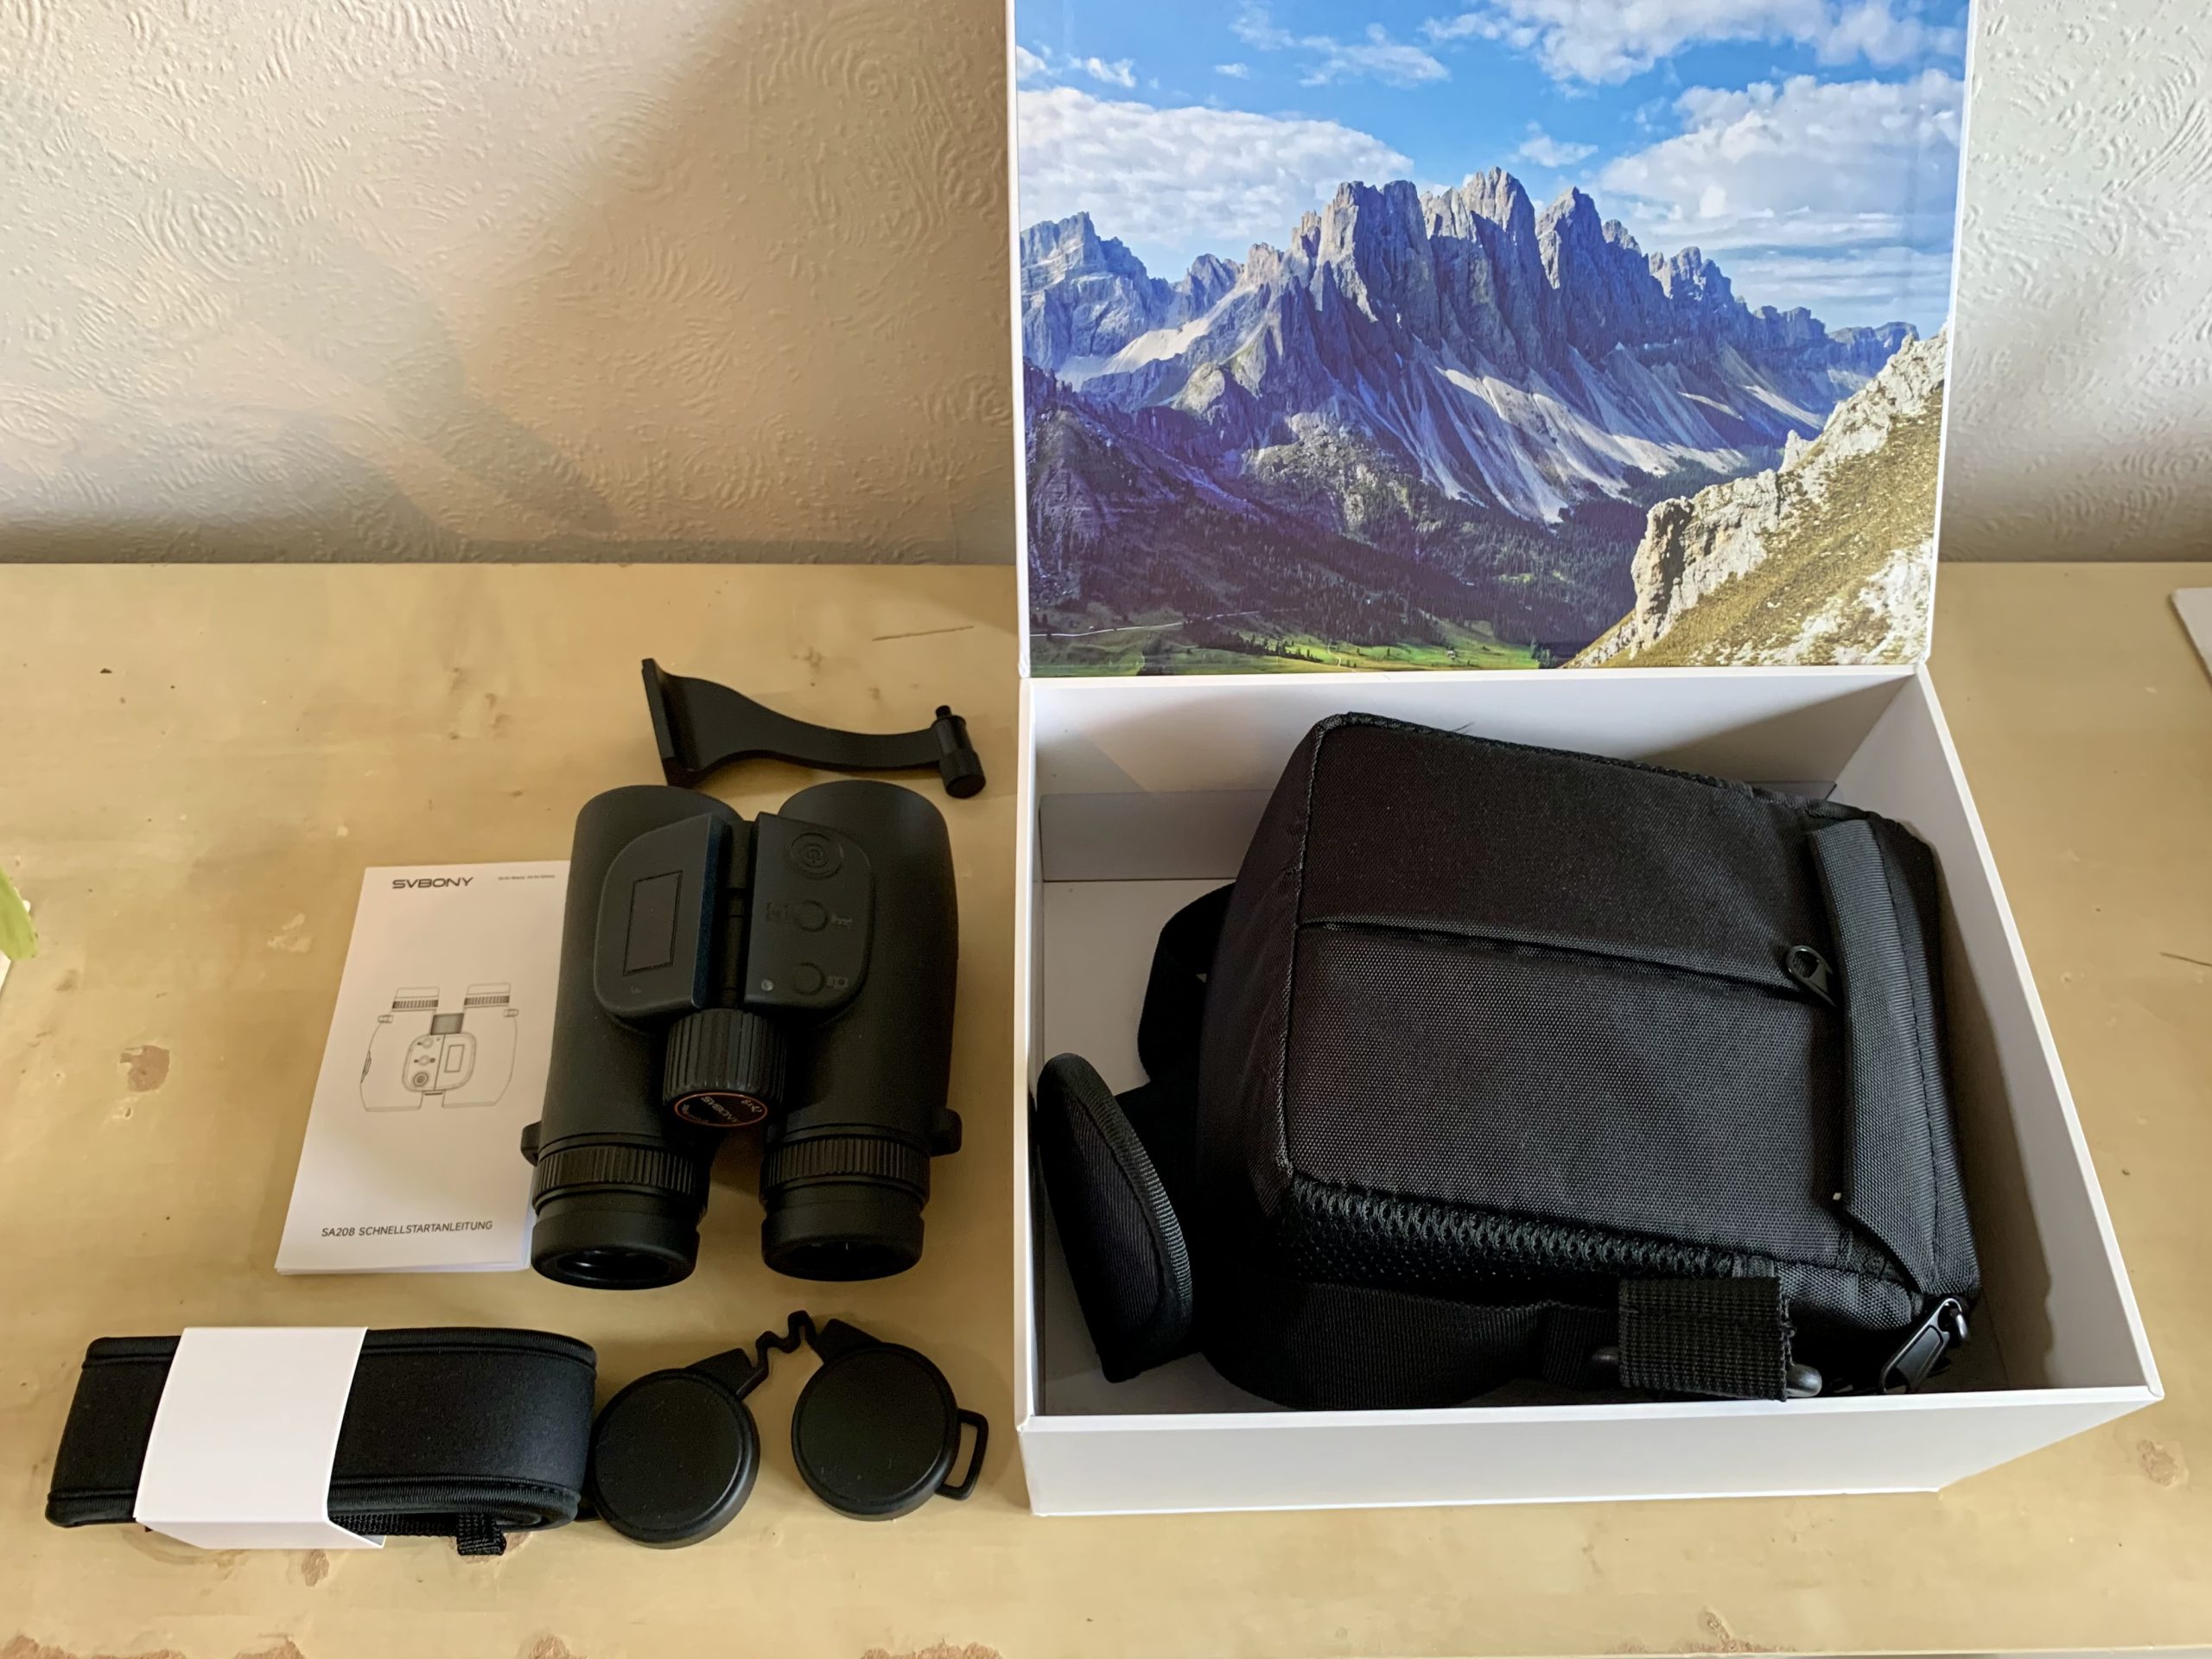
Accessories: Padded zip-closed case, charging cable, padded neck strap, rain guard and objective covers, tripod mounting bracket, 32GB SD card(pre-inserted)lens cleaning cloth, instruction manual
Price: £347.63
Over the last several years, I’ve been delighted to showcase some very impressive binoculars marketed by Svbony. Their SV 202ED and SA205 ED series offer great bang for buck to the modern consumer, empowering more people than ever before to enjoy the great outdoors. Likewise, Svbony’s extensive range of spotting scopes has delighted thousands of individuals with their high quality optics at prices that won’t break the bank.
But Svbony has not rested on its laurels, continuing to develop new, cutting-edge technologies that enrich the outdoor experience. In this review, I’ll be showcasing a new imaging binocular: the 8 x 42 SA208 ED boasting a 6 Megapixel imaging sensor capable of capturing photographs and video footage.
Ergonomics
As usual, the SA208 arrived very well packed with a tastefully designed presentation box. The binocular was housed inside an excellent padded case with a zip lock that provides great protection of the optics and delicate electronics of the SA208 binocular.
The instrument is quite bulky, tipping the scales at a shade over 900g. That’s good news as it’s light enough for the majority of users to transport over extended distances.
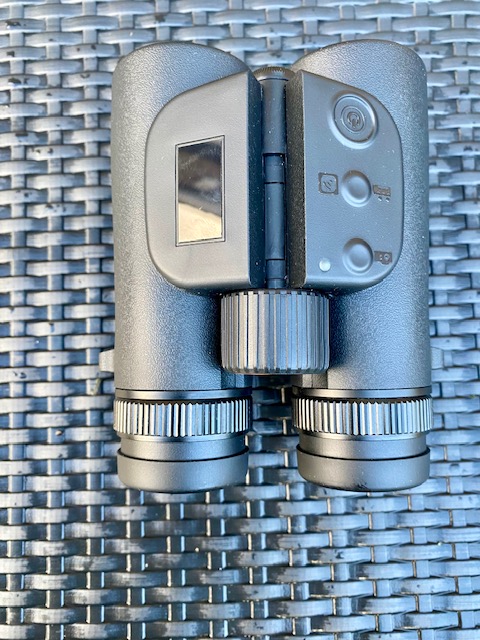
The magnesium alloy chassis is encased in a textured, grey coloured rubber substrate offering exceptional grip.
The central focuser is excellent: it rotates smoothly with a nice amount of inertia and no free play that I could detect. Just over one full turn anticlockwise takes you from closest focus to beyond infinity.

The metal eyecups are covered in soft rubber and are of the twist-up variety. Four positions are available from fully extended to fully retracted. They are very firm, holding their position very well in field use.
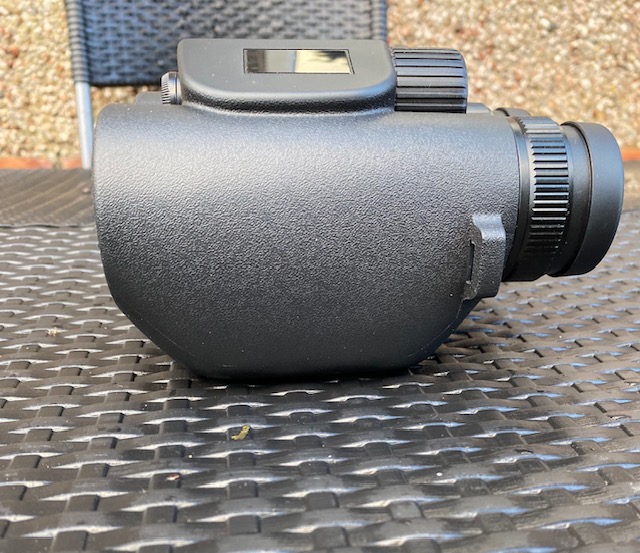
The underside of the binocular houses the delicate electronics necessitating the extra bulk. Thankfully this does not unduly affect the handling of the SA208 as you can rest your thumbs on the underside while accessing the focus wheel with your index and ring fingers

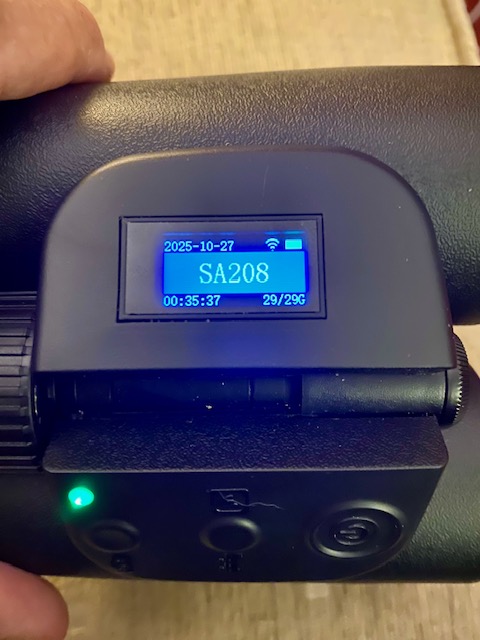
The binocular has a LCD screen on the top of the instrument displaying important information including battery power status as well as Wifi connectivity.
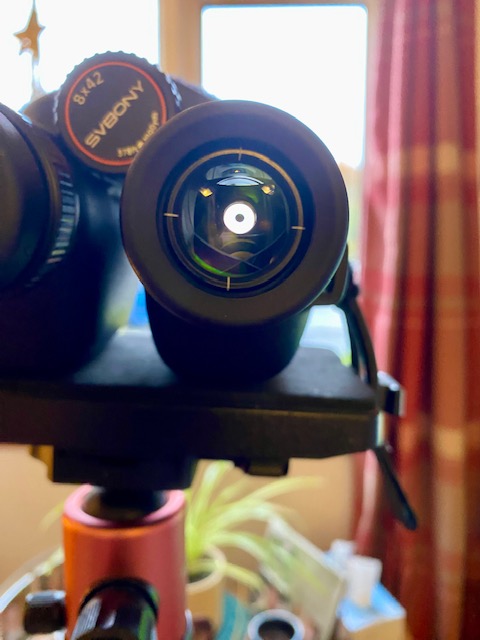
The imaging sensor is mounted inside the ocular train of the right barrel. You can see it in the photo below, where it appears as a dark central spot. This reduces contrast in the right barrel owing to the central obstruction but you quickly become accustomed to it.
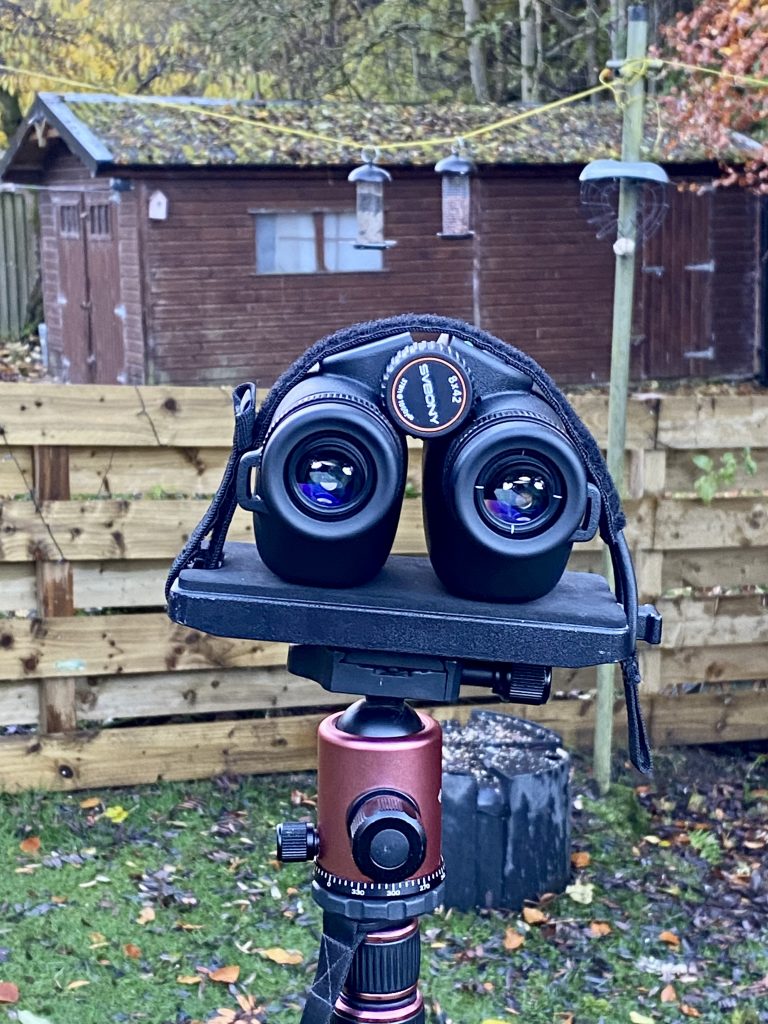
Because the SA208 imaging binocular does not have in-built stabilisation, capturing sharp hand-held shots is somewhat of a challenge, necessitating a steady hand. Placing it on a tripod alleviates this problem though. Svbony supply a good quality mounting bracket that screws into the front of the binocular bridge but I resorted to mounting it using velcro, as shown below:

Optics:
I shone a bright light from across my living room into the binocular to see how it would handle it. The image from the left barrel was clean and tidy with little or no internal reflections, with only a moderate diffraction spike. The view through right barrel produced a weird rainbow of colours, no doubt due to CMOS sensor placed in the optical train at the eyepiece end. This was an acceptable artefact given the nature of this binocular.
Optically the SA208 is very good; sharp, high-contrast images, excellent colour correction and accurate colours. There is very mild pincushion distortion in the outer field of view and edge sharpness is quite good. All in all, using the SA208 as a regular binocular presents no problems whatsoever.
To engage with the imaging system the user must download the free Viipulse App to use on your smartphone. The SA208 is turned on using the large button on the far end of the bridge. Two beeps inform the user that the binocular is ready to connect to your smartphone. Once your phone is connected, the Vjipulse App is opened which enables you to connect to the camera. Using the central focus wheel, you focus on a target in the middle distance (about 100m is ideal). You can fine focus the image by increasing the magnification from 1x all the way to 10x. The images captured however are at 1x i.e. the binocular magnification of 8x. Once the sharpest image is obtained on your smartphone, you individually adjust both the left and right eyepieces individually by rotating a metal ring under each eyepiece while leaving the central focus wheel fixed. Now you’re ready to image using the main focus wheel to adjust sharpness.
To avoid image shake, the SA208 can be set up as far as 10m away from your smartphone where you can use the latter to activate the imaging camera on the binocular. It’s easy and quick to use, maintaining a good connection over many minutes. Indeed the Viipulse App allows up to 3 smartphones to simultaneously view the images captured by the SA208 binocular!
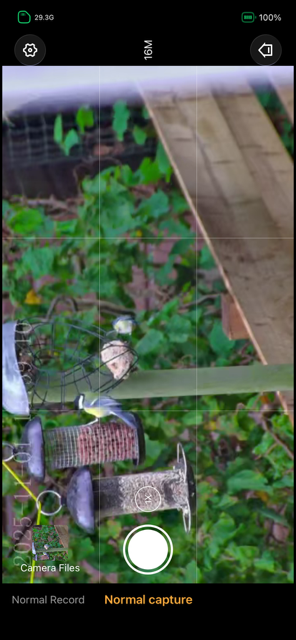
Here’s a screenshot of the Viipulse App opened on my smartphone:
Here’s my first light image of a tree located about 40m in the distance:

The actual file size for this image was 2.5MB. Only a low resolution(150kB) image is posted here.
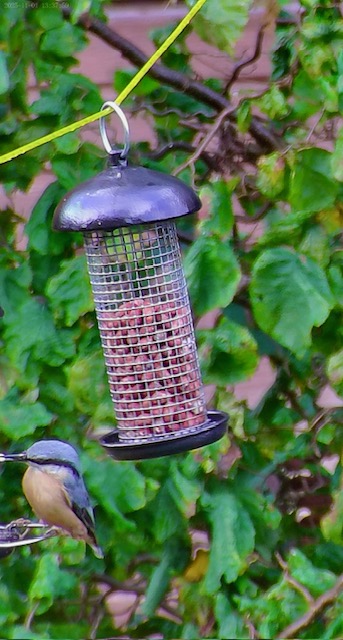
To get some images of birds at my garden birdfeeder. I set up the SA208 a few metres from the feeder and activated the Viipulse App from the comfort of my living room. It worked brilliantly!
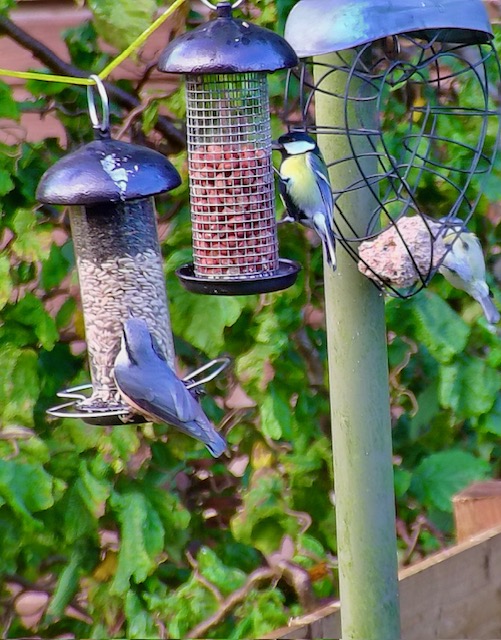
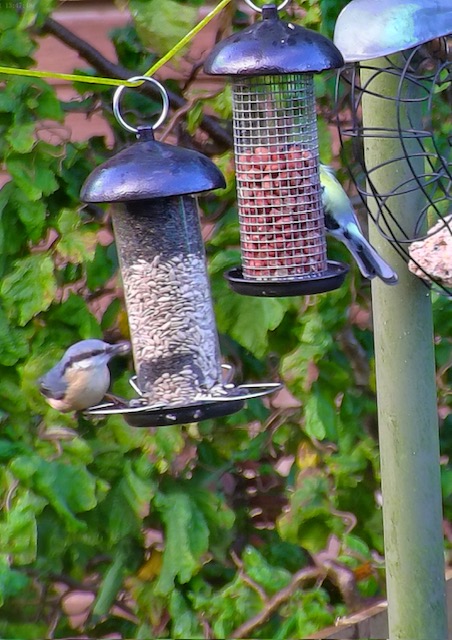
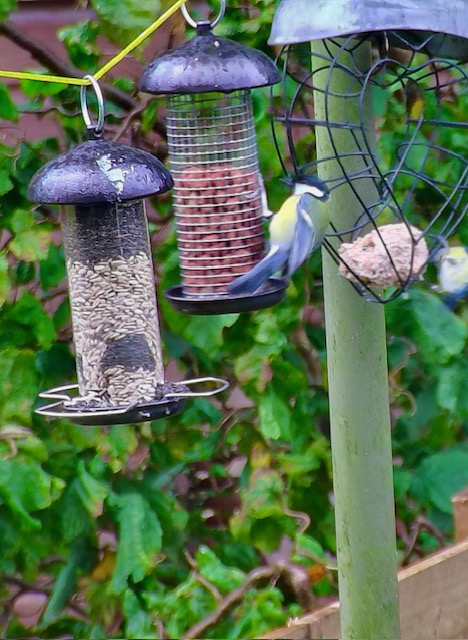
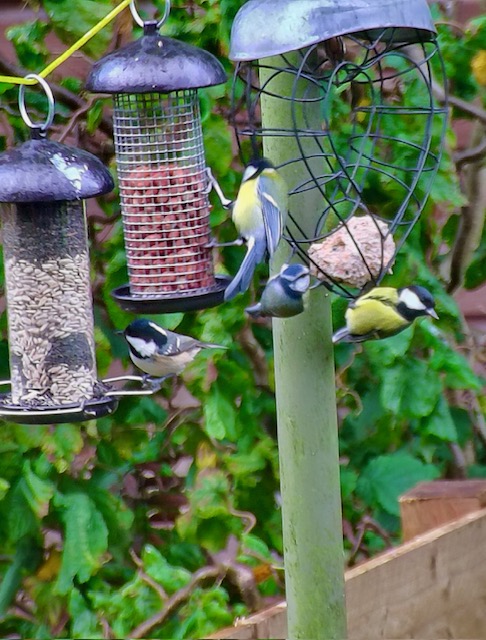
Should you so wish, and in order to reduce vibrations, one can also choose to take images while at the binocular too, by enabling a 3-second delay before the shutter is opened.
Here are a few more images zoomed in a little more:


To be Continued…..

A Work Commenced September 25 2025
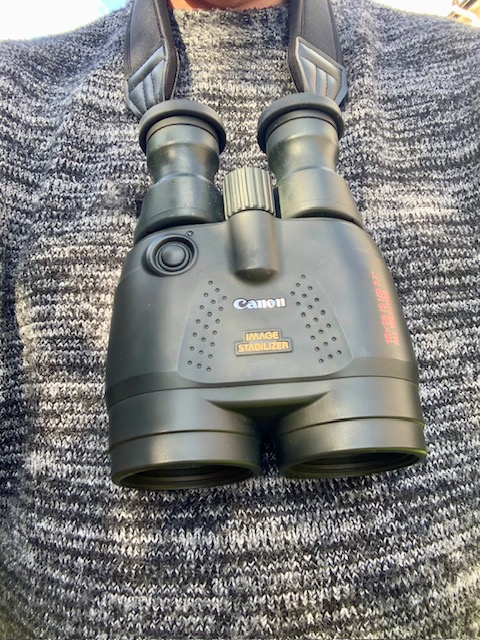
Over the last several years I’ve gained valuable experience with several Canon Image Stabilised(IS) binoculars, including the 8 x 20, 10 x 30 IS II and 12 x 36 IS III. In this review I’ll be test driving Canon’s largest and most powerful IS binocular: the 18 x 50 UD.

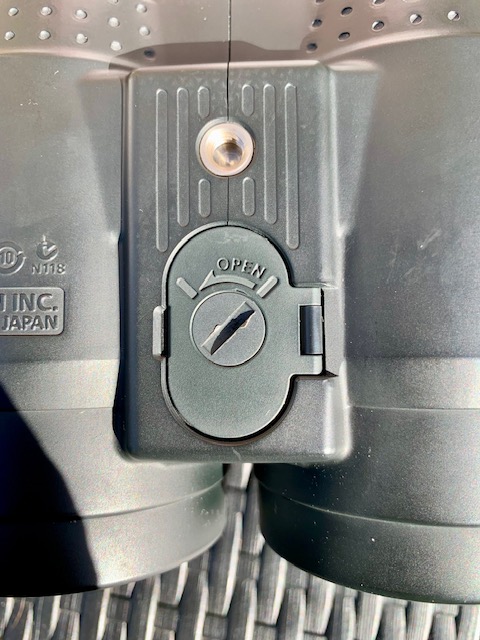
Purchased second-hand from a reputable Japanese retailer, my unit was manufactured in Japan, whereas the newer models are now being produced in Taiwan.
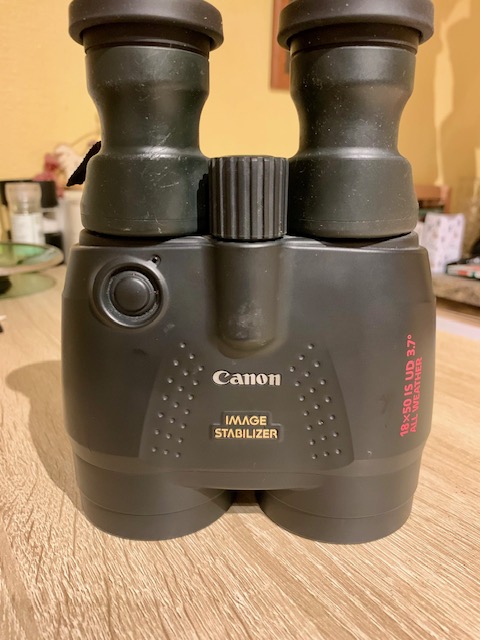
The Canon IS 18 x 50 is one hefty piece of kit, tipping the scales at 1180g. Lacking any central hinge, the inter pupillary distance is adjusted simply by rotating the eyepieces. The armouring is in good condition but is not as grippy as I would have liked. Indeed holding it properly is probably the biggest downside to using it and is definitely an acquired skill.
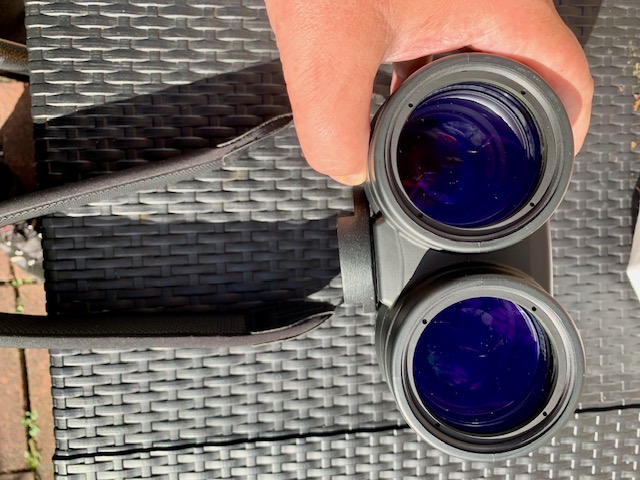
The large 50mm objectives( 4 element)include an ultra-low dispersion(UD) element to minimise colour fringing. The objective lenses are mounting behind an optically flat window so are well protected from the elements. Indeed the binocular is classed as weather resistant(JIS level 4) so can be used even in rainy conditions.
Focus is achieved by moving the objectives back and forth along the optical train.
The focus wheel on my unit still works flawlessly with no free play that I could detect. It operates smoothly and precisely even after all these years: a necessity at 18x since depth of field is very shallow at these high powers.
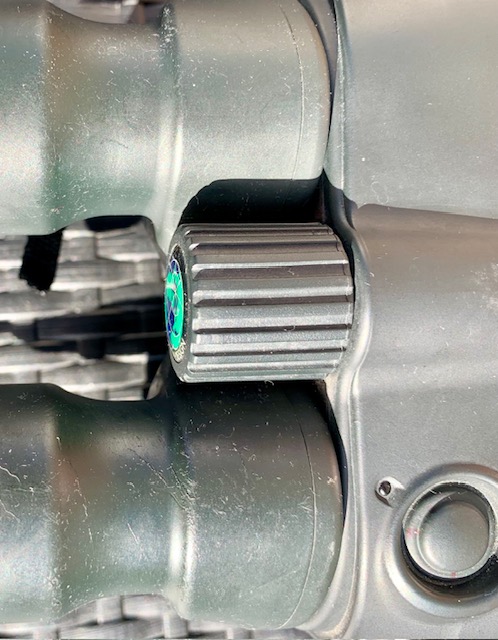
The dioptre compensation(+\-3) is located under the right ocular lens and rotates smoothly with a decent amount of friction. Though I don’t wear eye glasses, I elected to observe through the eyepieces with the rubber eyecups folded down. Eye relief for the bespectacled is a little disappointing though. I was only able to access a little over half the field using my eyeglasses, for example, with the cups folded down.
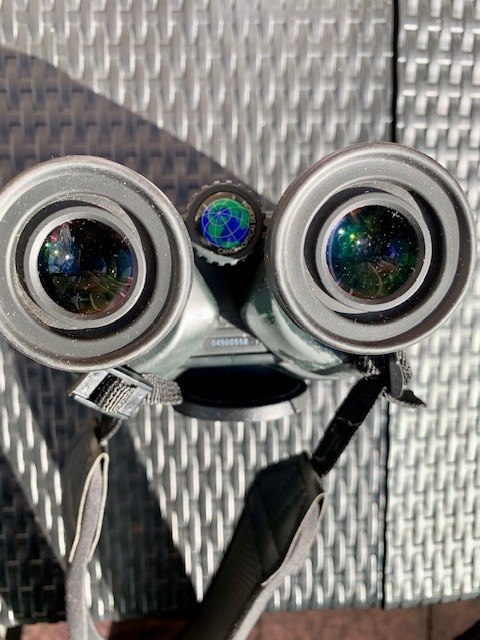
The eyepieces on the Canon IS 18 x 50 UD are a complex, 7-element design which includes a doublet field flattening system. Such a complex optical design requires excellent coatings to maximise light transmission. Thankfully this is guaranteed by Canon adopting their excellent Super Spectra antireflection coatings, as well as incorporating Porro II prisms into the optical design.
The Canon IS 18 x 50 UD can be affixed to a photographic tripod if need be. I found this to be useful when adjusting the dioptre compensation on the right eyepiece.
Like the smaller Canon IS binoculars, these are powered by 2 AA batteries. I elected to use rechargeable lithium ions as I have found that they work better in colder environments than their alkaline counterparts and are far less likely to leak even when left in the binocular for prolonged periods. It must be pointed out however, that the lid on the battery compartment must be securely fastened for the IS electronics to work. Indeed I got a bit of a fright during a night walk with the instrument, when the IS suddenly failed. When I got back home I realised that the lid was only loosely fastened, resulting in the batteries not connecting properly to the electrodes. Once tightened down, all was well with the IS system
Optical Evaluation
Whatever misgivings I might have had on the ergonomics of the Canon IS 18 x 50 UD, it more than makes up for them in terms of optical performance. The view is very good indeed; sharp, nice contrast, saturated colours, and a perfectly flat field, rendering excellent edge-to-edge clarity. Resistance to stray light is also well above average. Turning the instrument on a bright street light after dark showed very subdued internal reflections and no annoying diffraction artefacts owing to the high quality Porro II prisms inside. Off axis aberrations like pincushion distortion are very mild too. Looking at high-contrast targets showed excellent control of colour fringing in the centre of the field, but begins to show modest levels of lateral colour fringing outside the central 50 per cent of the field. Though it sports a small field of view of just 3.7 degrees, I never cultivated the impression that it was as narrow as it appears on paper. This was especially the case while keeping the rubber eyecups folded down, when the view felt quite immersive.
Notes from the field
Such a large and hefty binocular endowed with armouring that is not very grippy, requires a sturdy neck strap to avoid accidents. The dioptre compensation ring was adjusted while keeping the Canon IS 18 x 50 steady on a tripod. Close focus was estimated at just over 4 metres. The image stabilisation works very well, although it tends to overcorrect while looking through it, standing upright, leading to a slight blurring. I found re-engaging the stabilisation button helps to settle the image down. Stabilisation is much more consistent while leaning against a wall or a tree and, better still, while sitting down. These minor quirks are much less apparent under a dark night sky though, where the instrument was predominantly used.
That said, the Canon IS 18 x 50 UD proved to be an excellent long-range birding instrument, its powerful stabilisation coupled to its high magnification creating a lethal combination for teasing out small, timorous Warbler species from hedgerows in the distance. On one afternoon, I noticed a Buzzard being harassed by several Rooks, causing it to fly right over the house. Reaching for the big Canon glass, I managed to lock onto the bird, its anxious eyes staring right back at me and all the while seeing some incredible details of its plumage, quite beyond anything I had seen before. Though the apparition lasted but a few seconds- it was incredibly impressive, and left a lasting impression on me.
Made for Stargazing
With large objectives and a whopping 18x magnification, this big Canon glass is made for stargazing. As I explained before, I have cultivated a strong preference for smaller exit pupils since this ensures that the sharpest part of your eye lens accesses the image. That said, the small field of view(3.7 degrees), makes this instrument more suited to experienced observers. Those less familiar with the night sky might better consider the 15 x 50, with its wider field of view.
Starting with the Moon, the Canon IS 18 x 50 UD produces amazing levels of detail from slender crescent all the way to full phase. Crater fields are discerned in high resolution much more reminiscent of a low power telescopic view more than anything else. Placing the Moon in the centre of the field produces images that are essentially colour free. Moving a little off-axis does reveals some fringing but I didn’t find it distracting. Moving onto the deep sky, I enjoyed stunning views of the Double Cluster now positioned high in the autumn evening sky, flanked on either side by the lesser known clusters, Trumpler 2 and Stock 2 on the borders of Cassiopeia. Moving the binocular to a patch roughly midway between Algol and Gamma Andromedae, the open cluster M34 was very impressively resolved into a few dozen faint stars of the 8th magnitude of glory and fainter.
The Canon IS 18 x 50 produced arguably the most magnificent view of the enormous Alpha Persei Cluster I have personally witnessed, with its constituent stars filling the field from edge to edge.
Kemble’s Cascade in Camelopardalis filled the field from top to bottom. The great globular cluster in Hercules, M13, presented as distinctly granular. Moving into Lyra, I was able to clearly make out the Ring Nebula as a slightly defocused star.
The perennial favourite of stargazers – the Pleiades – was a sight for sore eyes in the Canon IS 18 x 50 UD, presenting as a maelstrom of young white and blue-white suns. This instrument afforded me the best view of the double star, Albireo I’ve enjoyed in a handheld binocular. Star colours are saturated and pristine. Turning the binocular to Herschel’s Garnet Star in Cepheus yielded a magnificent image, its intense red colour standing out like a beacon against the stellar hinterland. Observing the Andromeda Galaxy near the zenith produced a fantastic view, filling most of the field, its bright core and sprawling spiral arms extending nearly 3 angular degrees across. Its fainter companion galaxies – M32 and M110 – were also easy to pick off. The much more challenging M33 in Triangulum was also easy to see in the 18 x 50, presenting as an enormous, luminous Zeppelin in the sky! Finally, in the wee small hours of a late October night, I got my first opportunity to view Orion with the Canon IS 18 x 50 UD. The three brilliant white belt stars, pure as the driven snow, filled the field of view. Pressing the stabilisation button caused innumerable faint stars to come into view giving spectacular views of this lesser known star cluster: Collinder 70. Later on, I was able to observe the Sword Handle in all its glory, with the Orion Nebula showing the young Trapezium stars at its centre.
This provides the merest flavour of what you can enjoy with this big image stabilised glass under a dark night sky and I hope to use it regularly over the long nights of winter.
Conclusions
The Canon IS 18 x 50 UD is an excellent high-power binocular for both terrestrial and astronomical use, though it’s definitely a bit of a challenge to get the very most out of it. Only the coveted Zeiss 20 x 60 IS binocular goes deeper on the night sky.
Though I strongly suspect Canon’s 15 x 50 IS is more popular than the 18 x 50, owing to its larger field of view, the latter will resolve targets better during the day and in the night sky, where I personally use it most.
Highly recommended!
Dr Neil English discusses many more binoculars for recreational use in his latest book, Choosing & Using Binoculars.