About four years back, I alerted the community to an inexpensive series of binoculars – Svbony’s SV 202s – offering optical performance well above what I expected from their price class. Since then, thousands of units are now in the hands of an army of outdoor enthusiasts in Europe, the Far East, the Antipodean, and the United States . So when Svbony decided to give their SV 202 series a makeover, I was naturally curious to see what changes had occurred. I ordered up the 10 x 42 to put it through its paces, and the following is a summary of my findings.
A Great New Look
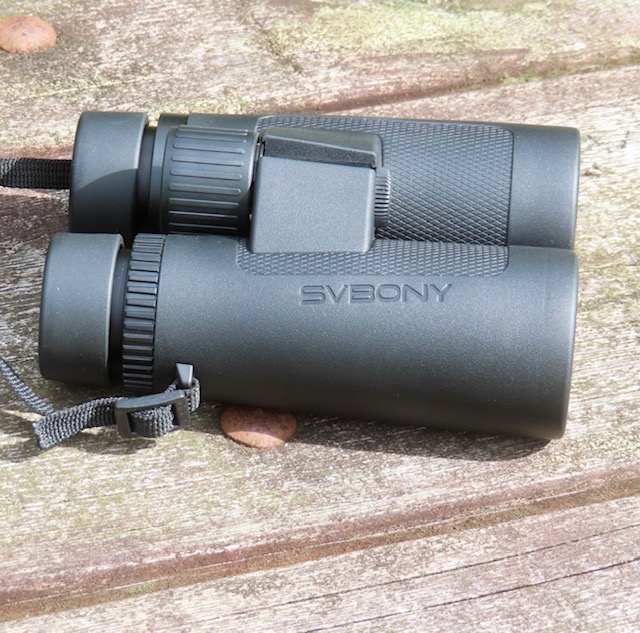
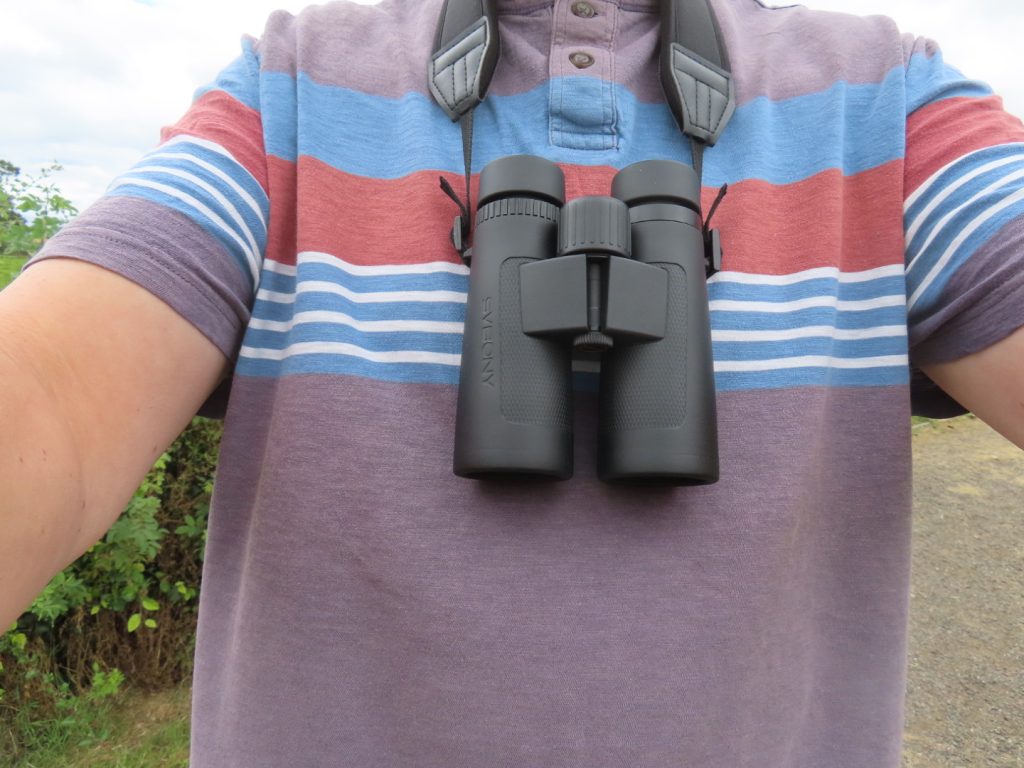
Although the neat package containing the instrument was the same as before, a cursory examination of the binocular showed some notable changes. For one thing, the rather tough armouring of the original SV202 had been replaced by a softer but thicker rubber substrate that offers a finer grip than the first generation models. In addition, the company’s name is now proudly displayed on the side of the binocular giving it a more classy look.
The next thing I noticed was its very light weight for a binocular in this aperture class. While the original 10 x 42 tipped the scales at just under 700g, the new SV202 weighed in at just 659g, making it arguably one of the lightest 10 x42s I’ve personally encountered!
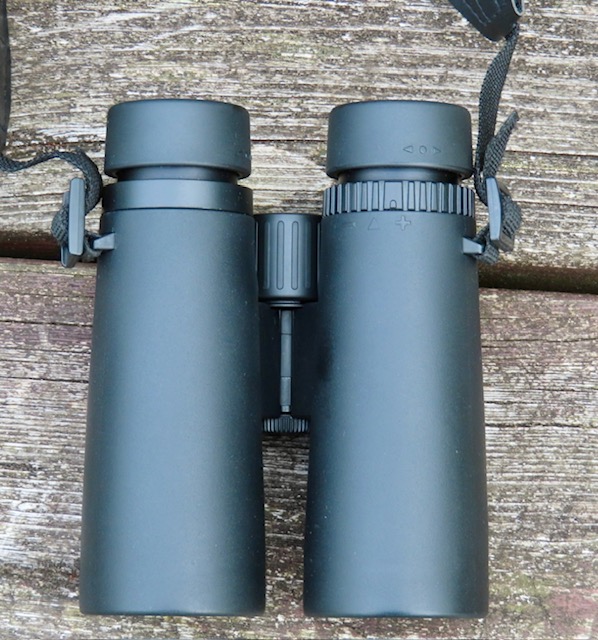
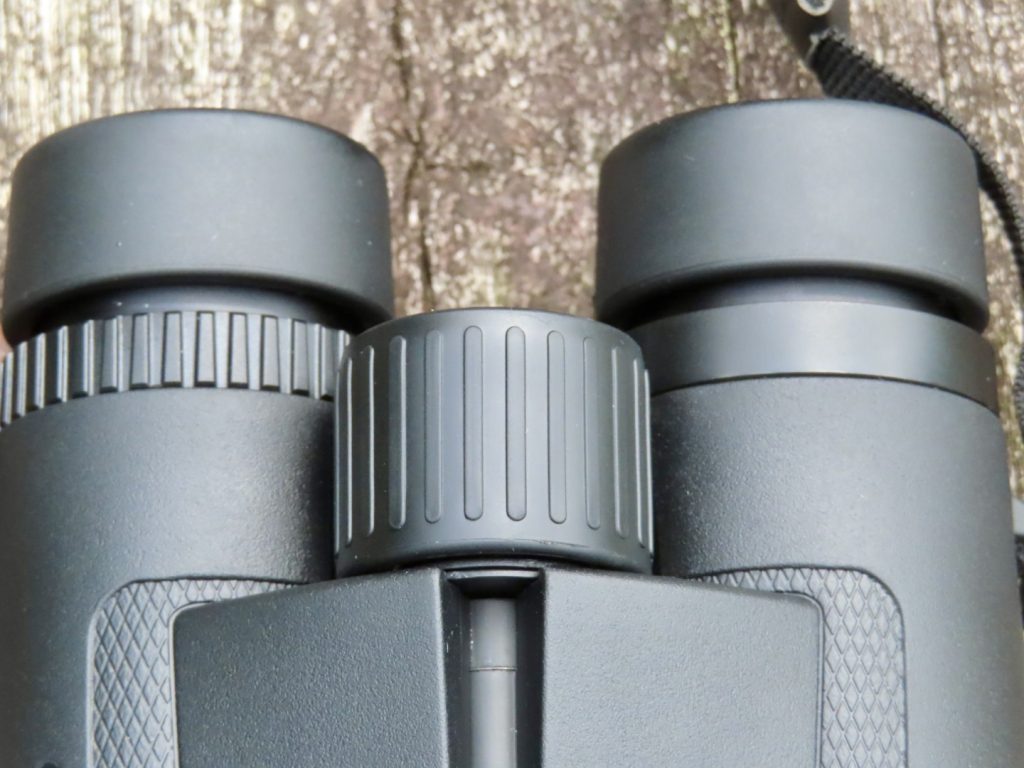
Another surprise hit me when I started moving the focus wheel; gone is the old metal focuser. Its replacement is covered with soft, indented rubber which is very smooth and responsive. My unit has zero free play or backlash: indeed it’s one of the best focusers I’ve seen in quite a while, certainly better than the original model. A little over two rotations anticlockwise takes you from closest focus to a little beyond infinity – good news for those who suffer from moderate myopia.
The right eye dioptre compensation ring moves smoothly but holds its position rigidly. Nothing fancy here: but it certainly does the job!
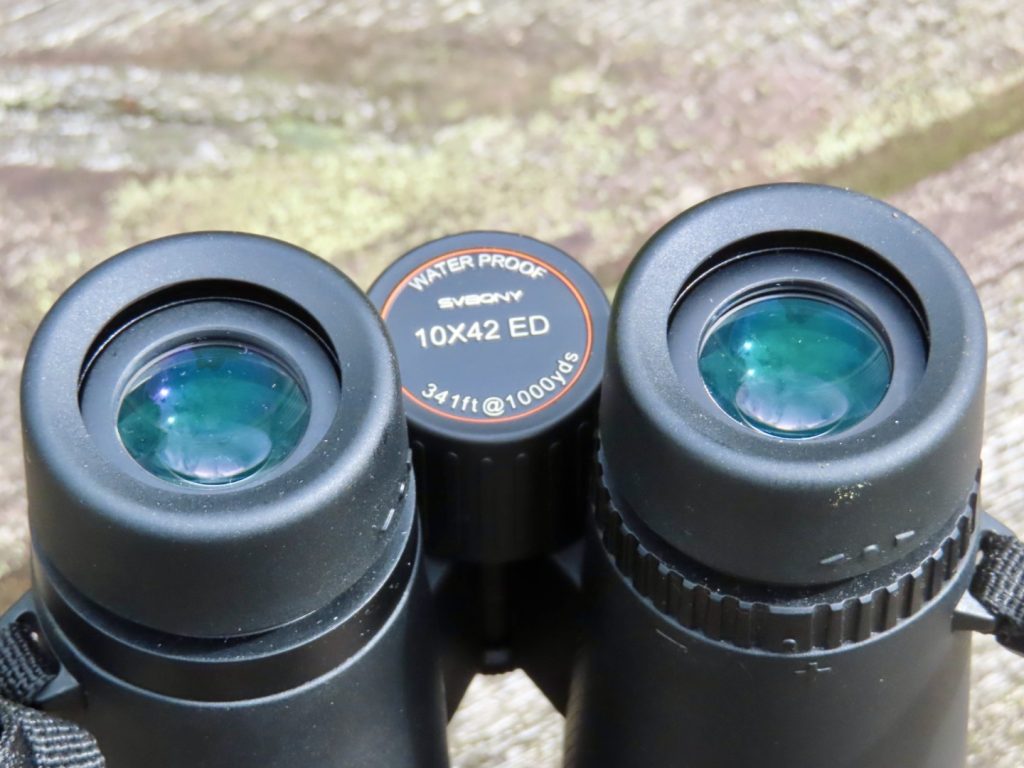
The twist-up eyecups have three positions and lock in place firmly with a moderately loud ‘click.’ They are, in fact, just as solid as the original models though, and actually a bit better built than on their flagship binocular – the SA205. Eye relief is fairly generous: I was comfortably able to view the entire field wearing my eye glasses.
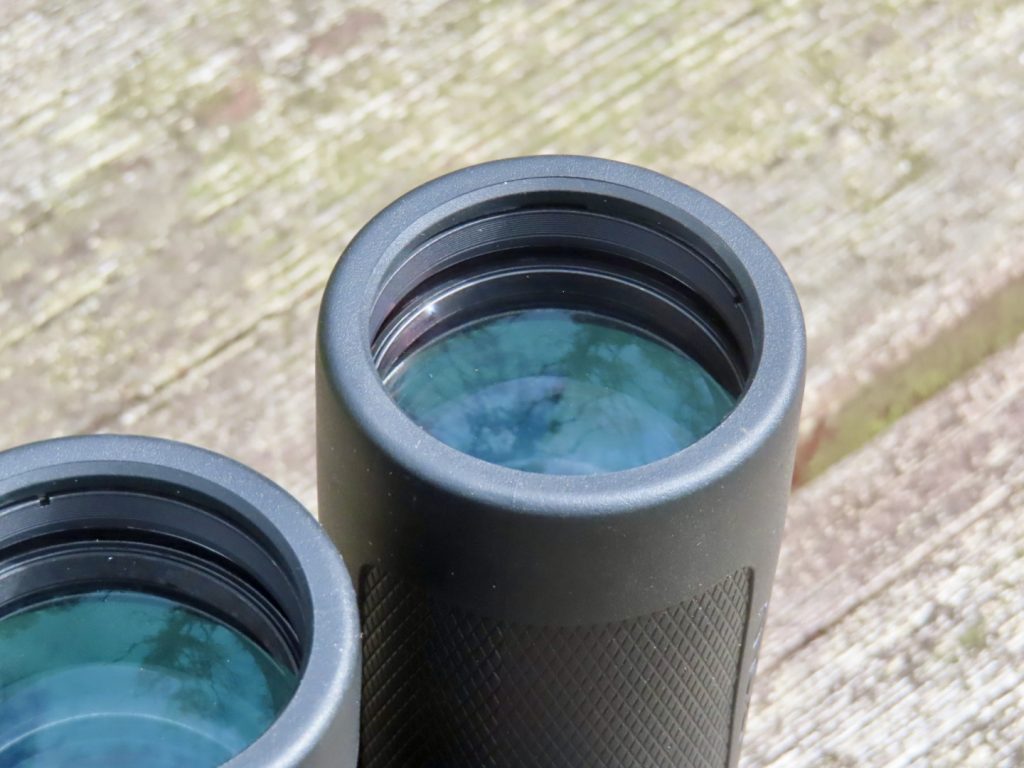
The next surprise came when I examined the coatings applied to both the objective and ocular lenses. Gone is the deep magenta bloom used on the earlier model SV202, replaced by more conventional tobacco coloured coatings that are noticeably less reflective than the original.
Like the first-generation models, the objectives are deeply recessed to protect the lenses from the elements as well as stray light.
In the hands the new SV202 ED binocular feels great: easy to grip and easy to wrap your hands round the barrels. And it’s very light weight- more like some heavier 32mm binos I’ve encountered – making it especially comfortable on long walks.
All in all, the ergonomic changes to the new SV202 ED were a very pleasant surprise and most certainly render the instrument more fun to use.
Optics
Examining the image of a bright beam of light from across my living room showed no significant diffraction spikes but did show a few annoying internal reflections. The same was true when I examined a bright street lamp after dark in the distance. This is definitely an inferior result to my findings with the original SV202, which showed far less in the way of internal reflections.
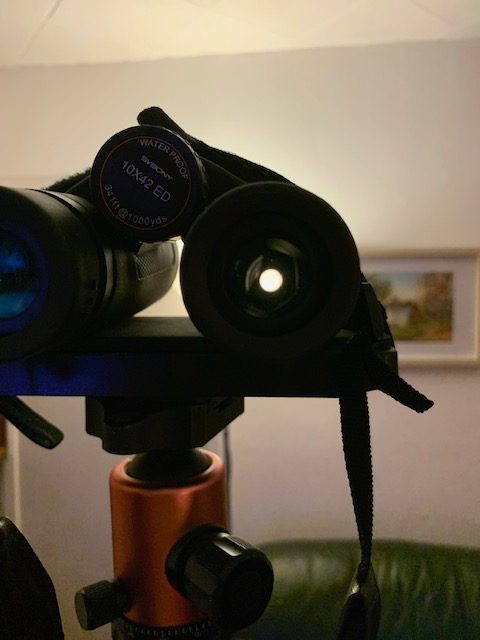
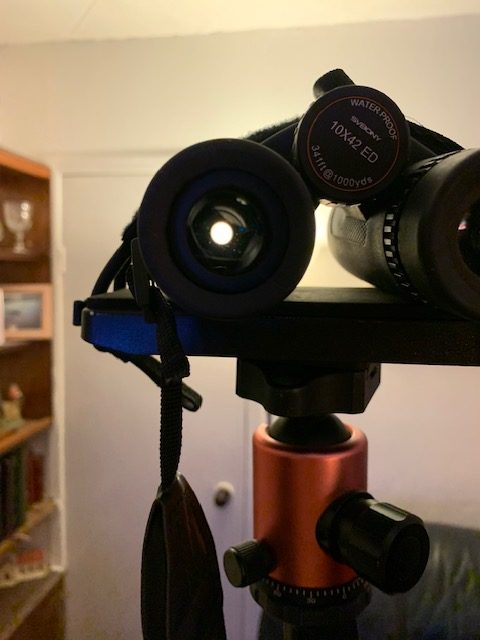
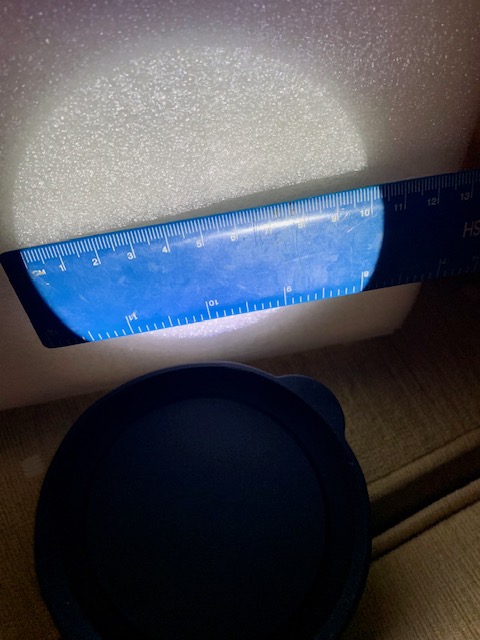
A clue to what was going on ‘underneath the bonnet’ as it were was revealed when I examined the exit pupils seen against a bright indoor lamp. As the images below show, there are significant light leaks immediately in the vicinity of the pupils which were responsible for the only negative finding I picked up in my daylight glassing tests.
The view through the SV202 10 x 42 ED is very good; bright, sharp, high contrast, with neutral but saturated colours. Suppression of chromatic aberration is also excellent. Indeed I was expecting significantly more given that this is a 10x instrument. Glassing through layers of leaves against a bright overcast sky showed up just a trace of lateral colour in the outer 15 per cent of the field. There is some moderate pincushion distortion though, which does help somewhat with comfortable panning. Glassing against the light or placing the sun at an oblique angle to my line of sight did throw up a bit of lens flare but that is probably the only personal issue I had with this unit. Edge of field sharpness was also very good: only a small amount of field curvature softens the image just inside the field stops.
Overall , the Mark II SV202 10 x 42 ED is very impressive when you consider the very reasonable price tag this instrument comes with.
Notes from the Field
I afforded the most comfortable and immersive views by extending the eyecups into the first locking position, as seen in the photographs. Close focus was found to be just over 2m, a significant improvement over the 2.5m advertised. The excellent focus wheel makes finding the sharpest possible view quick and easy. Conducting most of my daytime glassing using 8 x binoculars, shifting back to 10x shows a noticeably shallower depth of field, as you’d expect.
10 x 42 binos are very popular with hunters who need that extra bit of reach or those general observers who enjoy seeing fine details. I did find the instrument a little tricky to hold steady on the afternoon of August 4, when Storm Floris swept its way northeastward across the country, bringing with it inland gusts up to 60mph. A weightier instrument would definitely fare better under these conditions.
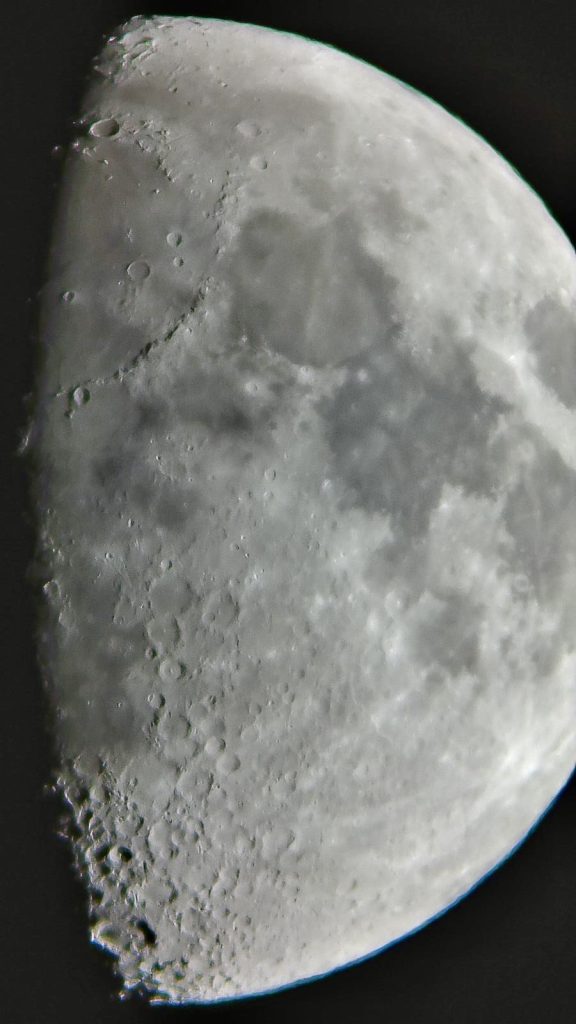
Turning the instrument on the August night sky generated impressive views of the starry heavens. The first quarter Moon was tack sharp and without colour fringing inside its generous sweet spot but a very modest amount of lateral colour creeps in: blue on one side of the field and yellowish-green on the other. I did pick up a few internal reflections though as reported earlier.
Star clusters look great in the Mark II 10 x 42ED and goes considerably deeper than any 8 x glass. Collimation is good. I enjoyed observing the Alpha Persei Cluster, the Double Cluster, the Andromeda Galaxy and its fainter satellites, M33 in Triangulum, and the Coathanger asterism in Vulpecula. Lying back in my zero gravity chair I enjoyed tracking down other smaller clusters, panning the Milky Way through Cygnus and Cassiopeia. Because field curvature is so mild, even stars at the edges of the field remain quite well focused – an impressive result for a binocular without field flatteners.
Conclusions & Recommendations
In many ways, the Mark II Svbony SV202 10 x 42 ED is an improvement over the original model, with better ergonomics, a wider field of view, less colour fringing, and lower weight. At its current retail price you’d be very hard pushed to get an instrument this good at twice the price. It remains a solid performer and one of the best bangs for buck on the market today.
Be sure to check it out!
Dr Neil English explores the fascinating world of binoculars in his detailed book, Choosing & Using Binoculars: A Guide for Stargazers, Birders and Outdoor Enthusiasts
For the last few years, I’ve been busy using Svbony’s SC001 imager which I’ve used on a few of their spotting scopes, and most recently with their flagship 100mm aperture SA401 26x-75x APO. As good as it is, it has its limitations. For one thing, the SC001 imager offers a fixed high-power magnification similar to a 6mm eyepiece. For some imagers, this represented too high a power to frame targets easily, especially if your intended target is mobile. Now Svbony has introduced a significantly more versatile camera: enter the SC002.
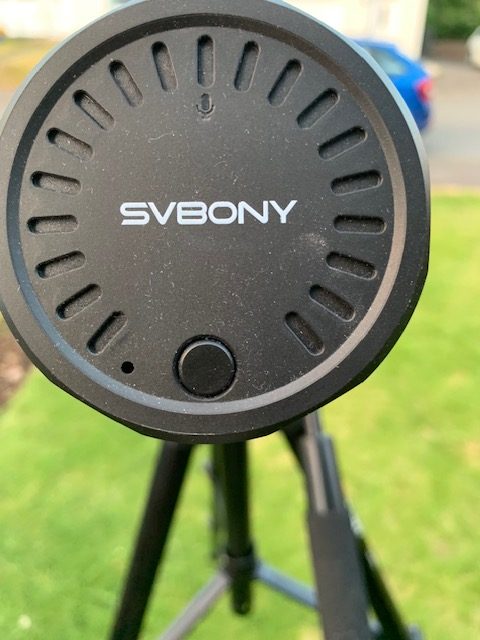
About the size of a smart speaker, the SC002, is very light so won’t cause any balancing issues with your optics. It consists of a 2 Megapixel webcam built into a larger ABS plastic structure that can be fitted securely to large zoom eyepieces found on spotting scopes and to regular eyepieces (37-56mm diameter). The SC002 can also be attached to binoculars!
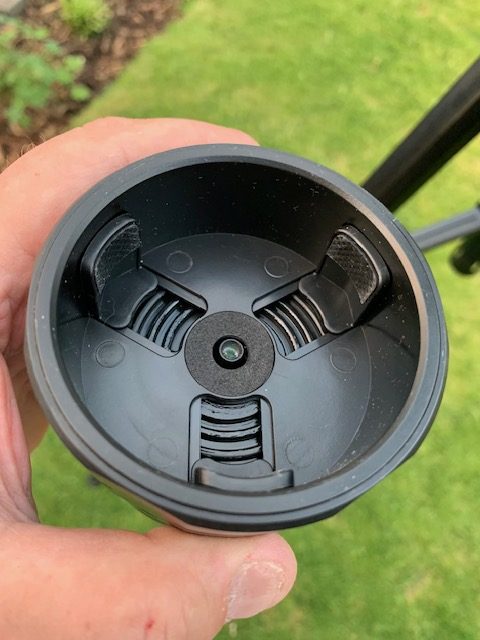
Its ability to mate to a wide variety of eyepieces is achieved by rotating the top half of the SC002 which causes three claws to grip the top of the eyepiece. It’s quick and simple, with no other adaptors required. After you download the SC002 App, the camera is switched on by pressing the button on the top of the device. The device has a built in WiFi connection that connects to your phone. As long as you’re within 10m of the imager, the signal is strong enough to operate the scope from your smart phone.
Unlike the SC001 imager, the SC002 offers a full screen but also 1x, 2x or 3x digital zoom. This allows the user to tweak the focus until it is as sharp as it can possibly be. The imager automatically captures the best images but only presents them at full-screen 1x mode. Another excellent feature of the SC002 imager is its ability to connect live to two smartphones simultaneously; one to take images and the other phone to preview the image. The SC002 can also capture live video for up to 2 hrs in 1080P and the data stored on the supplied 32GB memory card. Three shooting modes are available to the user: 1:1, 4:3 or 16:9.
Here are some sample images taken through the SA401100
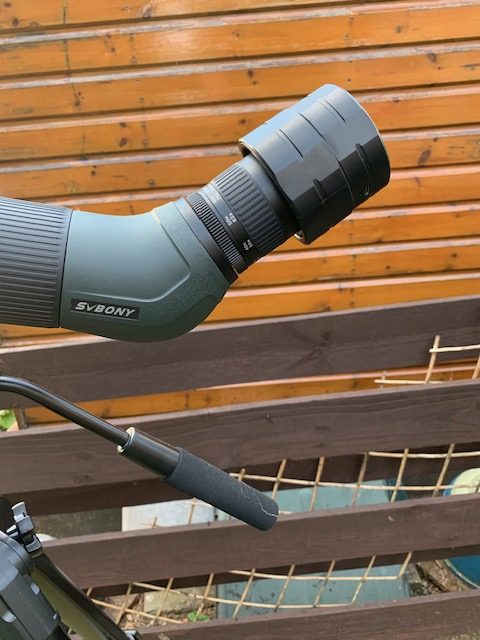
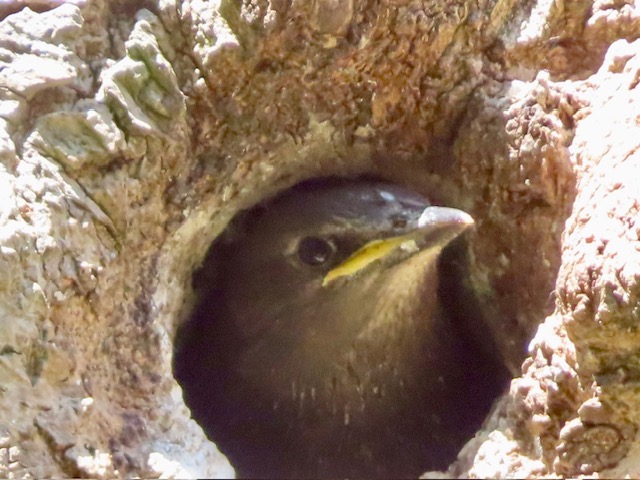
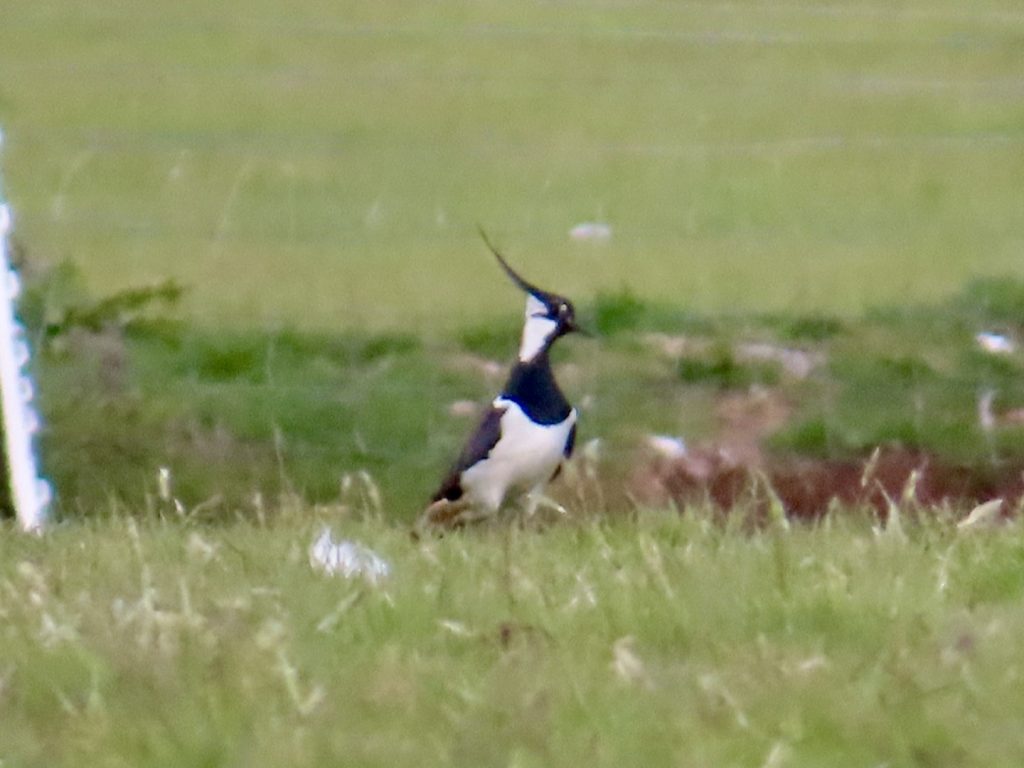
Next, some photos taken in the field with Svbony’s flagship flat-field ED binoculars: the very capable SA205 8 x 42:
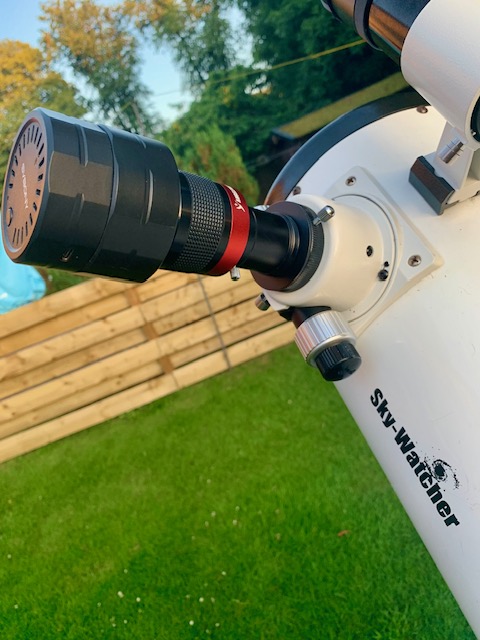
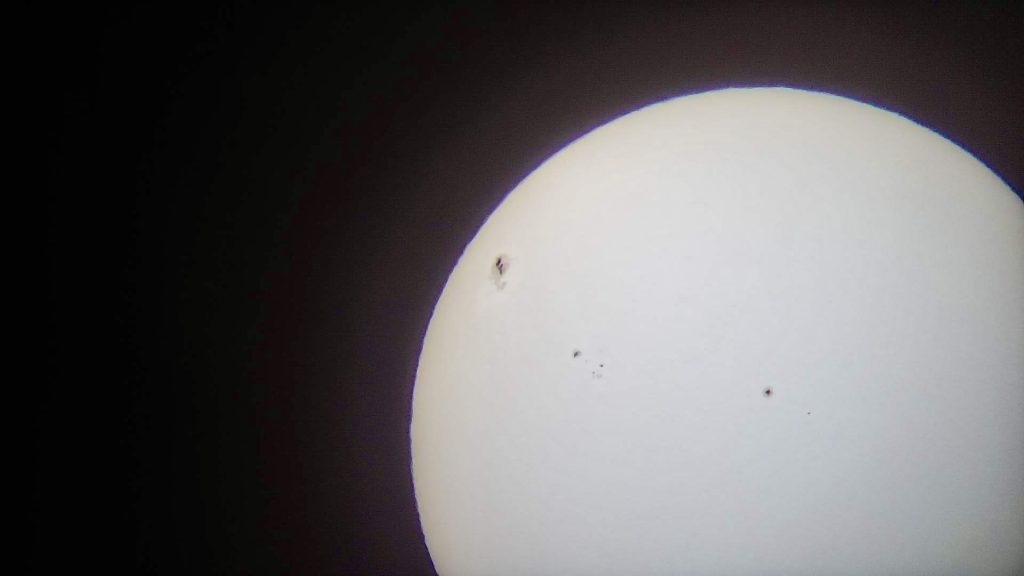
And finally, some astronomical shots taken through a telescope:
All in all, the new SC002 imager represents a significant advance on the SC001. The user can choose how much magnification they wish to employ to frame their photographic subjects, and the digital zoom options greatly assist in finding that perfect focus. Retailing for well under $100 and weighing only 140g, this simple yet ingeniously portable device will greatly enhance your imaging capabilities, not only with spotting scopes, but also monoculars, binoculars and astronomical telescopes alike.
Recommended!
Dr Neil English is the author of Choosing & Using Binoculars: a Guide for Stargazers, Birders and Outdoor Enthusiasts.
Chassis: Magnesium Alloy and Titanium covered in black Vulcanised Rubber.
Exit Pupil: 4mm
Eye Relief: 13.3mm
Field of View: 135mm @1000m(7.74 angular degrees).
ED Glass: Yes-Schott Fluorite
Other Notable Glass: Schott HT
Dioptre Compensation:+\- 4
Close Focus:2.1m advertised, 1.91m measured
Hydrophobic Coatings on Outer Lenses: Yes, AquaDura
Fogproof: Yes
Waterproof: Yes/5m
Accessories:Objective lens covers, rain guard, neoprene neck strap, lens cleaning cloth, padded soft case, test certificate, warranty card and user manual
Warranty: 10 Years
Weight: 535g advertised, 534g measured
Price(UK): £1499
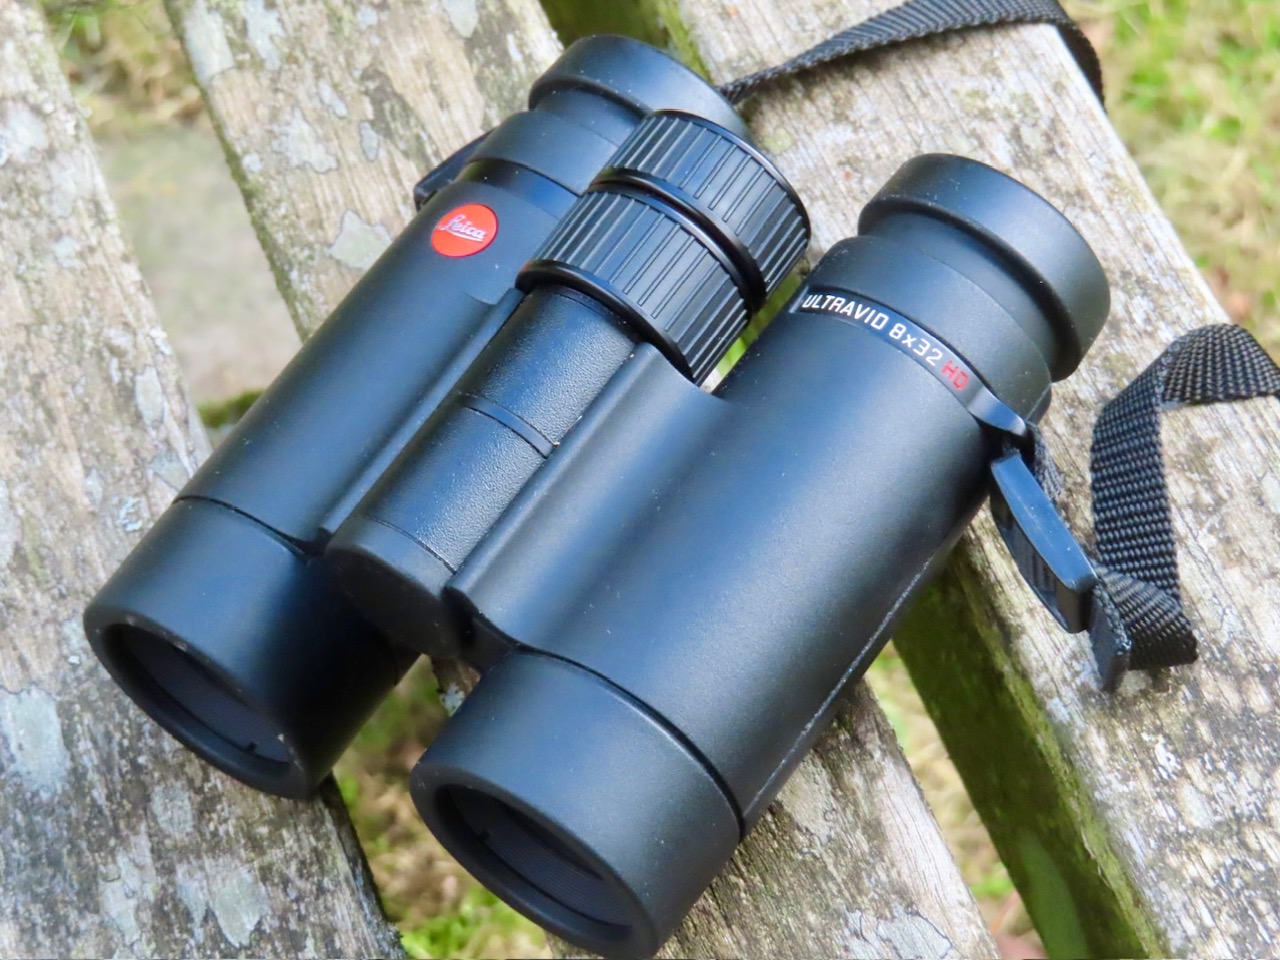
The Leica Ultravid series is one of the longest continuously manufactured binoculars by the prestigious German company, Leica. Introduced in the Black Rubber (BR)form back in 2003, the series was upgraded to the HD series in 2007, which featured Schott Fluorite glass for improved colour fidelity and Leica’s innovative AquaDura hydrophobic and anti-scratch coatings. Finally in 2015, the company introduced the latest version: the Ultravid HD+ series which incorporated Schott HT glass in the prisms which increased light transmission to an impressive 92-3 per cent. In all Leica offer the HD+ series in 8 and 10 x 32, 7, 8 and 10 x 42 and two larger models – the 10 and 12 x 50. This review will discuss the smallest HD + model; the 8 x 32.
My first experience with this series came a couple of years back when I had the pleasure of looking through the 10 x32 Ultravid (UV)HD+ observing birds out on the water of Loch Carron, just a few miles from my home. The owner was so impressed with the binocular that he bought a second 10 x 32 for his daughter. It was here that my concerns about the small size were put to rest, since I was able to hold them very comfortably in my medium-size hands.
The 8 x 32 is an amazingly small and compact model, only 11cm from the end to end with the eyecups kept down. Tipping the scales at 534g, it’s super light weight.
The focus wheel is disproportionately large, making it very easy to manoeuvre using one or two fingers. While there is some inertia getting it moving , focusing is very precise with no free play. This is an improvement over their entry-level model, the Trinovid HD 8 x 32, the focus wheel of which had a small amount of free play. Just over one full revolution clockwise brings you from closest focus to a little bit beyond infinity. The dioptre compensation is accessed by pulling up the top part of the focus wheel, turning the wheel and pushing it back in.
The eyecups can be used in three positions: fully retracted or pulled up through two click stops. Like I said many times before, Leica’s eyecups are amongst the best in the industry. They are supremely comfortable and click rigidly into place.
Eye relief is quite tight on the 8 x 32 though, especially for eye glass wearers. I did test them using my spectacles and I could just see the entire field but it’s certainly not a comfortable experience especially during prolonged field use. Luckily, I don’t wear glasses using my binoculars so it was really a non-issue for me.
Unlike the larger UVHD+ models, the underside of the barrels on the 32mm models have no thumb indents. Over the years, I’ve cultivated a strong disliking for these anyway, so not having them is a bonus in my books!
The objective lenses are nicely recessed with excellent knife-edge baffles to minimise glare when glassing against the light. The coatings are immaculate: giving a faint purple bloom when examined face on but present more of a tobacco hue when seen at more oblique angles.
In the hands, the little Leica UVHD+ 8 x 32 is very firmly held thanks to the textured black rubber armouring, though it’s a magnet for dust, pollen and other airborne matter. I can wrap my little fingers round the front of the barrels while using my ring- and middle-finger to do most of the focusing. It’s also a supremely handsome binocular with a strong retro accent I very much like.
Optics:
Looking at an intensely bright light source from across the room through the Leica UVHD+ showed no internal reflections but I did pick up a moderate diffraction spike. The same was true when I turned the binocular on a distant street lamp after dark.
Next I examined the exit pupils while the instrument was aimed towards an indoor room light. As you can see below the result was excellent: exemplary in fact! Just nice round pupils surrounded by complete darkness!
Credit where it’s due: the view has real ‘gestalt:’ beautiful, arresting: razor sharp, wonderfully contrasted, with vibrant colours. Chromatic aberration is absent in the centre but does show up as lateral colour in the outer part of the field. Being used to larger, flatter fields, I was half anticipating that the 7.74 degree field would be rather restrictive or ‘tunnelled,’ but I did not get that impression. The view is extremely relaxed, especially for a compact model like this.
The Leica UVHD+ 8 x 32 does have more pincushion distortion than I would have liked and the edge sharpness could be better. Finally, when glassing with bright sunshine directly behind me, I noted some annoying reflections off the ocular lens. Thankfully this can be remedied simply by placing a finger over the side of the eyecup.
Notes from the Field:
Make no mistake about it; the Leica UVHD+ 8 x 32 is a study in miniaturisation. A true marvel in both mechanical and optical engineering!
But it ain’t perfect.
Close focus was measured to be 1.91m, closer than the advertised 2.1m, but not nearly as impressive as the super close 0.95m I measured on the Trinovid HD 8 x 32. There are two aspects to the image of the UVHD+ that are noteworthy compared with my main binocular, the superb SRBC 8 x 42: colour saturation and resistance to glare of all kinds.
In the centre of the image, sharpness in both is quite comparable but the colours generated by the SRBC optical system are a little more neutral than in the UVHD+, the latter of which has a noticeably higher transmission to wavelengths in the 600-700nm range, which renders a warmer image. Where the UVHD+ betters the SRBC is in suppression of glare, both veiling and general glare when glassing against the light. And while an 8 x 32 is no match for a larger 8 x 42 of equal quality, I found the performance of the UVHD+ to be excellent in summer twilight, where the Schott HT glass boosts light transmission in the 400-500nm range, which allows the darker adapted eye to perceive objects in the blue part of the visual spectrum that little bit better. I refer the reader to Holger Merlitz’sThe Binocular Handbook page 10 for details.
Conducting some observations of the bright summer star, Vega, the little Leica glass showed perfect collimation and quite a flat field. Only in the outer 20 per cent of the field or so could I detect a bit of field curvature which could be focused out, but there remained a small amount of astigmatism right at the field stops.
Though I did not do a side by side comparison, I would rate the optical quality of the Leica UVHD+ to be higher than the Zeiss SFL I tested some time ago. It just has a more relaxed view compared with the Zeiss, with the warmer colours and superb glare suppression, pulling it ahead. But this is bound to be rather a subjective impression.
One thing’s for certain though, the Leica UVHD + is much more in keeping with a pocket glass philosophy than either of the current Alpha glasses offered by Swarovski or Zeiss, as exemplified by the design of the NL Pure and SF 8 x 32 models, respectively. These are considerably larger in comparison, and so can’t really be considered to be in the same portability class, at least size-wise. In contrast, the little UVHD+ certainly can fit in an average coat pocket.
Value for Money?
The Leica UVHD+ 8 x 32 is an expensive piece of kit that’s for sure. But when I compare it to the optically excellent SRBC 8 x 42, which retails for one third of the price of the Leica, it gives me serious grounds for pause in recommending it, especially as an auxiliary travel glass. In addition, with the soon introduction of smaller 32 mm class of SRBCs offering the same excellent quality optics in ultra-flat fields fully twice the size of the Leica UVHD+ and at a fraction of its cost, it may render these smaller glasses by Zeiss, Swarovski and Leica all but obsolete. In the end, you vote with your wallet.
Dr Neil English is author of Choosing & Using Binoculars: A Guide for Stargazers, Birders and Outdoor Enthusiasts.
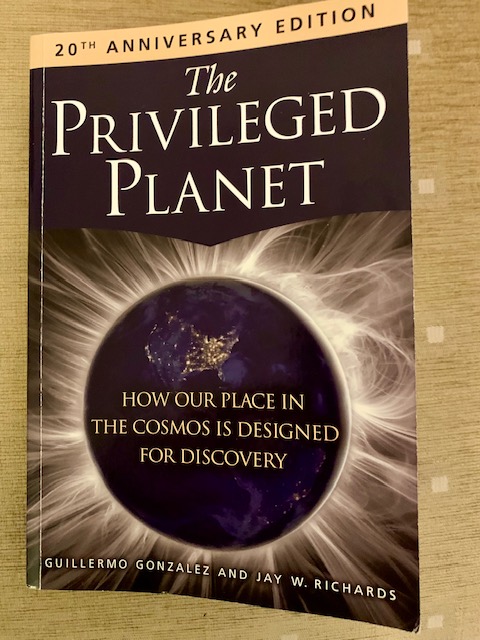
Title: The Privileged Planet (20th Anniversary Edition)
Published: 2004 & 2024
Authors: Guillermo Gonzalez & Jay W. Richards
Publisher: Regnery
434 pages
ISBN: 978-1-68451-702-2
Price: $35US
Is the Earth a unique abode of life or is life commonplace across the cosmos, with its myriad galaxies, stars and planets? Is the Earth a typical habitable planet or is it endowed with innumerable ‘just so’ features that has allowed life to flourish here for close on 4 billion years? Are we alone in the Universe?
These are big, blue sky questions for sure but the body of evidence hinting at the answers has stretched the ingenuity of our species to ever greater heights of technical sophistication, probing the cosmos at every conceivable scale in order to begin to glean the answers, and then only dimly.
Speculation regarding these questions has taken many twists and turns over the decades.
At the dawn of the 20th Century, most scientists would have argued that there is nothing special about the Earth and that the appearance of life was a scientific inevitability on many suitable worlds and across many epochs. The Universe they surmised, was infinitely old and large, so if life took hold here on Earth, why not on countless other worlds strewn across the heavens?
Some scientists even entertained the idea that our neighbouring planet Mars had vegetation as recently as the early 1950s, shored up by pseudosciences like Darwinian Evolution. In the 1980s, the popularised writings of planetary scientists like Carl Sagan prepped the general public for the expectation that we would one day discover other alien intelligences in our Milky Way galaxy or even beyond.
But In the last thirty years, we have made the most astonishing discoveries about the requirements for life that a new consensus is emerging; not only is the Universe fine tuned for life but the Earth appears to stand out like a proverbial sore thumb, even as we uncover tens of thousands of extrasolar planetary systems around nearby stars. In the pages of The Privileged Planet, astronomer Guillermo Gonzalez and philosopher Jay Richards, posit something even more profound: that the Earth is exquisitely designed for scientific discovery!
Drawing on an impressive range of scientific disciplines – cosmology, particle physics, planetary science, geology, astronomy and biology- the authors weave together a compelling argument that we live in an extraordinary place at an extraordinary time.
The Copernican Principle has been one of the unifying themes of modern science, which argues that there is nothing special about our place in the cosmos and our significance within it. Yet after presenting a wealth of new evidence from many scientific disciplines, the authors compellingly make the case that nearly everything about our planet, its unique composition, geology and hydrological cycle, our location within a very atypical solar system with a unique star at its centre, the presentation of perfect solar eclipses, and our place within the wider Milky Way Galaxy, puts humanity at an ideal place and time to discover the deep mysteries of the Universe. None of the great scientific achievements of our species, such as our discovery of the origin and expansion of the Universe, it’s great but finite age etc could have been achieved if we emerged earlier or later on the cosmic scene.
This enormous body of evidence is used to bolster a much more robust analysis of the so called Drake Equation, where estimates of the number of planets harbouring advanced technological civilisations in our galaxy is revised downwards to practically one; that is, our own world.
The book includes an extensive bibliography of scientific papers, and informed commentaries written by scholars in their respective fields. This deeply engaging and well-thought-out 2nd edition ought to appeal to a large cross-section of society from the religious, philosophic and scientific to the plane curious. Although the authors cover complex scientific concepts they are very well explained in ways a novice can understand. We may not be at the centre of the physical Universe but we are at the centre of its meaning and its purpose!
Highly Recommended!
Dr Neil English has a broad academic background in biochemistry, physics and astronomy. His highly acclaimed work, Chronicling the Golden Age of Astronomy, charts the four century history of visual astronomy, from Thomas Harriot to Sir Patrick Moore.
When it comes to introducing the wonders of the night sky to beginners, it’s very hard to beat a small refractor. Praised for their crisp, high-contrast views and almost complete lack of maintenance, even absolute newcomers can quickly engage with the night sky. Over the last few years, the newly established company, Svbony, has brought to market very high quality astronomical gear at prices that were considered unthinkable only a few years ago. As a seasoned amateur astronomer, and experienced reviewer of telescopes, I have used Svbony eyepieces and other accessories with my own telescopes and can vouch for their great bang for buck.
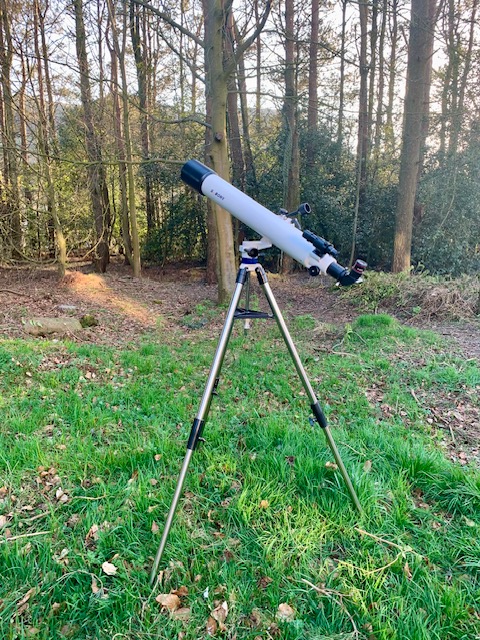
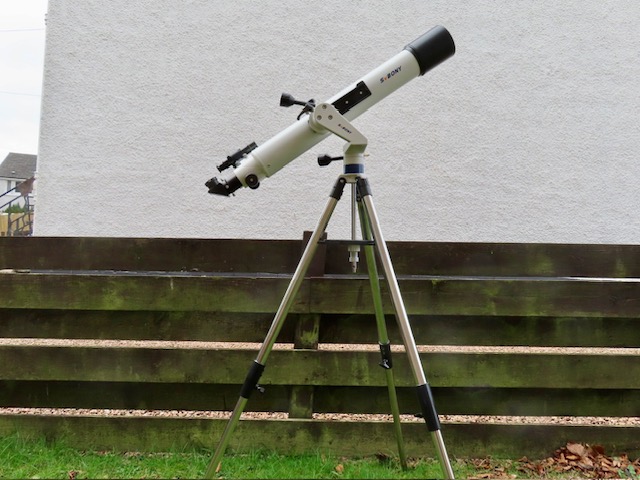
Svbony reached out to me to request an honest review of their new entry-level telescope; the SV520 telescope: a 90mm air spaced F/8.9 achromatic refractor on a dedicated altazimuth mount with slow motion controls on both axes. I agreed to do so, and what follows is a fairly detailed overview of its quality and capabilities.
The SV520 telescope, mount and accessories arrived in a well packed double box. Though the instruction manual is clear and comprehensive, I found it easy to assemble the mount and attach the telescope in just a few minutes.
Let’s take a closer look at the telescope mount first. Having used a Vixen Porta II altazimuth mount for nearly 15 years, I was delighted to see that the SV520 came with a very similarly designed unit. It can accept a wide range of small telescopes using a regular dovetail plate. Slow motion controls provide smooth and precise tracking on both axes. The legs of the tripod seem to be made of stainless steel and can be extended to increase the overall height of the telescope for taller users. The legs can be securely locked in place using three large thumbscrews. The accessory tray screws onto the long vertical bar that mates the mount to the tripod legs.
The set up is quite stable with the telescope mounted. After giving it a hefty shake, I found the dampening times to last for just a few seconds, which is more than adequate even when using high power eyepieces. Incidentally the mount can accommodate loads of up to 5 kilos.
Two eyepieces are provided with the optical rube assembly: a 25mm and 10mm Kelner delivering powers of 32x and 80x, respectively. A decent mirror diagonal is also included for comfortable 90 degree viewing. It is not threaded to accept filters though.
The finder was arguably the biggest disappointment in the SV 520 package: a very plasticky 5 x 24mm specification with a singlet objective lens. As you can imagine, it produces very strong colour fringing owing to its short and stubby focal length. But I was able to align it easily with the main telescope and it did serve its purposes as a basic finder scope. Indeed as bad as it is, I think it’s still infinitely better than a generic red dot finder all too often seen on amateur scopes these days.
The SV520 comes with a removable plastic dew shield, which reveals the lens cell underneath. The focuser is a single-speed rack and pinion design, which moves very smoothly and has enough focus travel to use quite a lot of accessories including diagonals, or mounting photographic gear. It can also be rigidly locked in place if need be.
Optical Testing
To be honest, I was expecting good performance from this 90mm f8.9 achromat based on many years experience of long focus 80mm refractors I’ve owned and used over the years. The colour correction ought to be decent: as good in fact as a 4 inch F/10. The two eyepieces supplied with the telescope – a 25mm and 10mm Kellner – deliver powers of 32x and 80x, respectively. The 25x views were very nice. Good on the Moon, star clusters and the brighter nebulae etc. The 10mm Kellner also provided nice views of the Sun using a full-aperture white light solar filter. The slow motion controls on the mount allowed trouble free tracking with dampening times of just a few seconds.
But when I turned the telescope on the stars at 80x, I could immediately see that something was amiss. They were astigmatic. Defocusing the image of Capella both inside and outside focus confirmed this clearly. I was unable to get a good image of Jupiter and double stars were horrid. Clearly there was something wrong with the telescope. Taking out the star diagonal and peering down the tube showed the focuser rail was not parallel with the optical axis. I did attempt a ‘home fix’ of sorts by removing the dew shield, loosening the retainer ring holding the objective lenses in place and gently wiggling the lenses to see if they would settle into the cell better. Unfortunately, there was no improvement.
Disappointed, I dispatched the telescope to Es Reid, a professional optical engineer based in Cambridge, to see if he could get the optics working better. He confirmed the astigmatism and also noted the objective’s over correction. He added thicker lens spacers and got the focuser to move parallel with the optical tube. When I got the telescope back, I conducted more observations: first a star test at 180x under good seeing conditions. The astigmatism was gone and the intra- and extra-focal Airy disk looked a lot better. Turning the telescope on Jupiter, by now well past its best seasonal position in the sky, showed a much improved image: a few bands were clearly seen. Turning the scope onto Castor in Gemini showed the A and B components with excellent definition at 200x.
Upgrading the diagonal to a dielectric type and using better eyepieces significantly increased the quality of the images of both deep sky objects and higher resolution targets, like the Moon and double stars. Indeed I was now able to press the magnification to 200x or more with good results.
Conclusions: I understand that Svbony marketed this telescope for beginners, and to some degree, it performed quite well so long as the magnification was not pushed higher than 80x. But even beginners appreciate decent views of the Moon at high powers and for stars to look like pinpoints of light at magnifications above 100x. I don’t know if I received a bad sample or whether this was just a typical example, but Svbony are capable of much better than this. If you’re willing to live with low powers than this would be an OK telescope but, as it was presented to me, I cannot recommend it for those who wish to push the envelope a little to tease out powers of 200x or a little higher.
Neil English is author of Choosing and Using a Refracting Telescope.
Over the last few years I’ve watched spotting scopes grow in size. Just a few years back, birders and nature watchers routinely used 60-80mm scopes to study their targets at distance, but recently, a new breed of super big spotters have been released onto the sports optics market, with apertures of 95mm, 100mm and even a 115mm now being routinely employed by enthusiasts who can now enjoy greater light gathering power and higher resolution images. Big spotting scopes employing ordinary crown & flint glass suffer badly from chromatic aberration at higher powers, making them practically unusable at their highest magnification settings(60x or so), necessitating the need for extra low dispersion elements to reduce colour fringing, and increase image sharpness and contrast. But as the aperture increases whilst retaining the typical fast focal ratios(<F/6) required of spotting scopes, chromatic aberration becomes very aggressive indeed, requiring much more attention to detail. Many of these scopes have triplet objectives with one element employing fluorite crystal to stave off colour fringing around high-contrast targets. Fluorite is very expensive though, is very brittle and slightly water soluble, characteristics that reduce its durability in the long run. Another approach is to use two ED elements, similar to that employed by some fast refractor astrographs.
In this review, I wish to showcase a new 4-element, dual ED APO spotting scope by the Hong Kong-based company, Svbony, embodied in their new flagship line of premium spotting scopes, the SA401 series. Two models are available; the smaller 85mm and the 100mm showcased in this review. Furthermore, both retail for well under £1000.
First impressions:
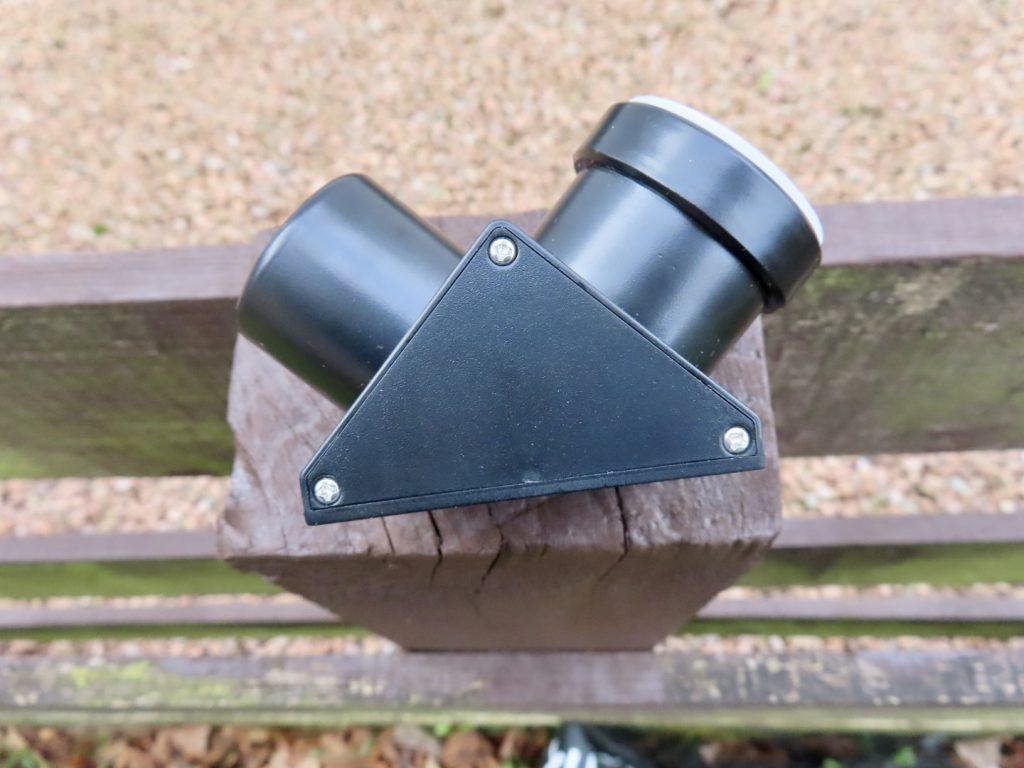
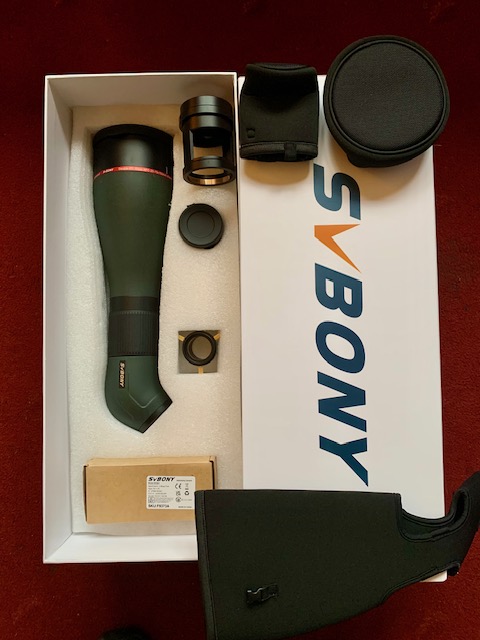
Typical of Svbony, the SA401 100mm APO scope arrived in packaging I can only describe as immaculate. Double boxed, the instrument was sturdily positioned inside its white foam casing, together with various accessories, including a SV 402 1.25” eyepiece adapter, a 2 mega pixel SC001 imaging camera, and a black scope jacket to protect it from the elements. Let’s take a closer look at the instrument.
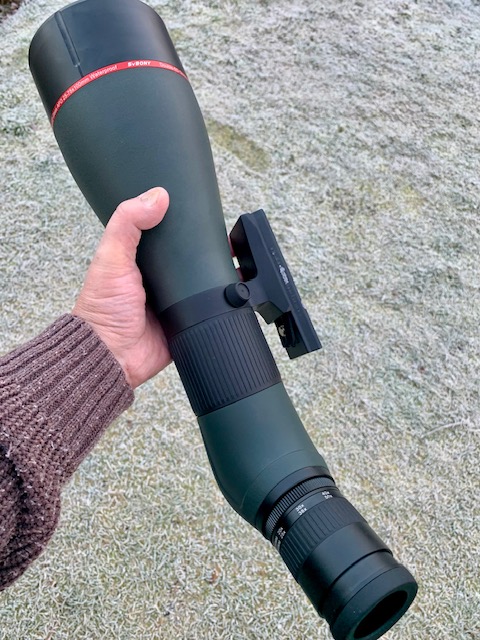
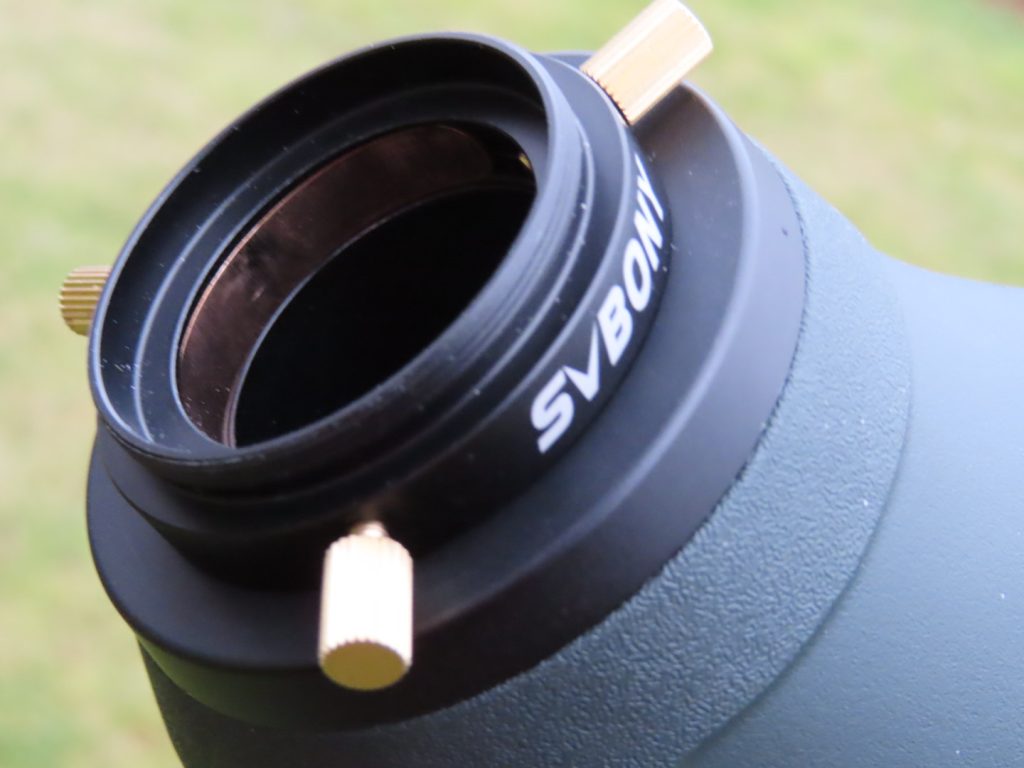
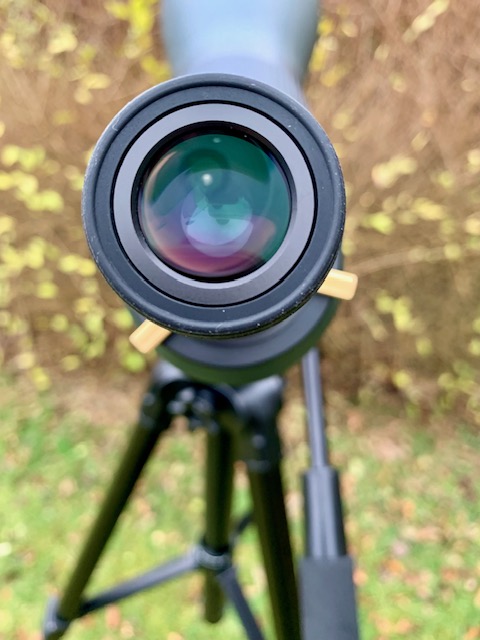
The magnesium alloy chassis of the SA401 100mm APO spotting scope is overlaid by a thick layer of forest green rubber armouring, with black extremities at the eyepiece and objective ends. The textured rubber single speed helical focuser is also finished in black. An attractive cherry-red ring positioned behind the retractable lens shade displays the essence of the SA401 design, employing two ED elements in its APO designation, and covering a magnification range of 25x to 75x.
The focused cone of light from the 4-element objective is reflected to the zoom eyepiece via a Porro prism using K9 optical glass(the optical equivalent of BK7) which is perfectly suitable for this F/5.6 instrument. In addition, K9 optical glass has a lower dispersion profile than BAK4, which helps a wider range of visible wavelengths to remain tightly focused before being magnified by the eyepiece.
Like their other spotting scopes, a large, round knob is located on the upper right of the chassis just ahead of the helical focuser. Once loosened, the built-in mounting bracket can be smoothly rotated through a full 360 degrees, which enables the user to achieve a comfortable viewing position irrespective of the location of the target.
The interior of the SA401 spotter is very clean and dust-free, as the photo below shows, with nicely machined baffles, and other blackened components to help reduce stray light and maximise image contrast.
Ergonomics:
The SA401 100mm APO 25x-75x tips the scales at 2.9kg, with the extra heft over other 100mm spotting scopes probably attributed to its 4-element objective. It feels really solid in the hand. Fit and finish are fantastic. The helical focuser moves smoothly and precisely allowing the user to bring any object beyond about 10m to a crystal clear focus.
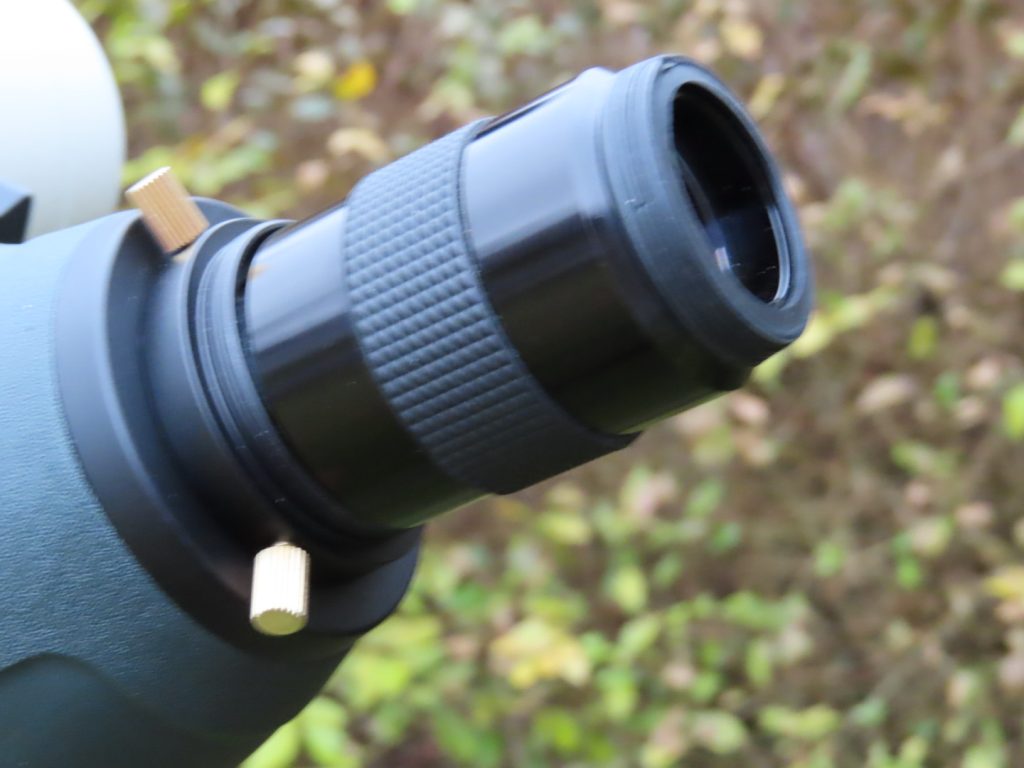
The zoom eyepiece has plenty of eye relief. Testing with glasses on, I was able to access the entire field throughout the full magnification range of the instrument.
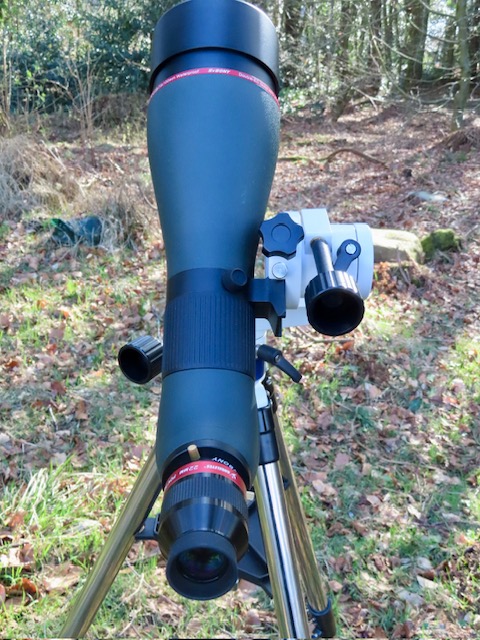
The zoom eyepiece can be removed from the instrument simply by unscrewing it. The user can then insert other eyepieces or the supplied SC001 imaging camera, by means of the SV406 adapter (also supplied), as shown in the photographs below:
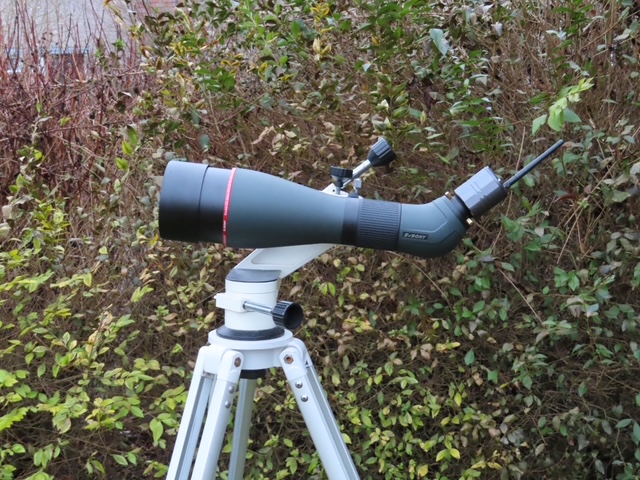
For most of my initial testing, I mounted the SA401 on my trusty Vixen Porta II altazimuth mount via a small dovetail plate seen attached to the instrument in the second photo above. This mount has slow motion controls on both axes, allowing me to quickly centre a target or track it. For more portable work away from my home I elected to use the lighter weight SV402 mount with its fluid panning head. More on this later.
That’s a reassuring result, as the whole point of using a large spotting scope like this is to avail of its additional light gathering power, especially in low light situations.
Bright Light Test: Not all people who buy and play around with spotting scopes will use them for nature studies. Some folk who live in high rise apartments like to get good views of the town or city in which they live, whether by day or by night. A spotting scope showing strong internal reflections from bright city lights would be off putting. To test this, I turned the SA401 on some bright street lights at various distances up to 100 yards away. I’m happy to report that there was very minimal reflections seen and only on the very brightest sources. This would be a good instrument to enjoy cityscapes after dark.
Optical Impressions:
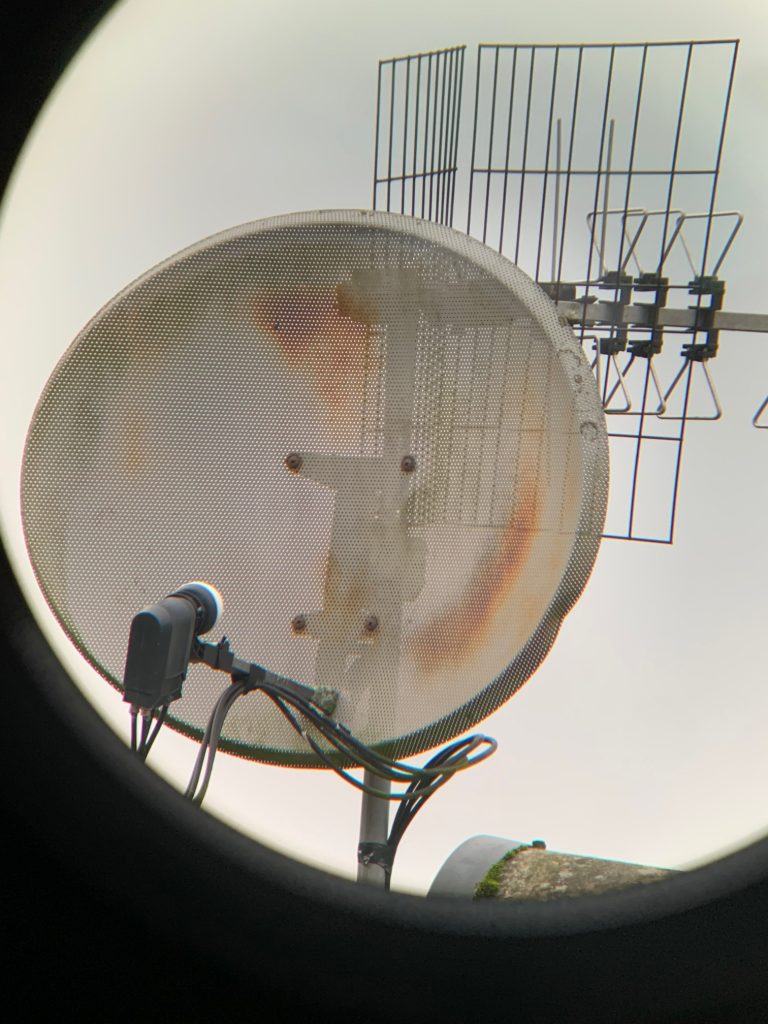
Arriving late in the afternoon on a dull winter’s day, I aimed it at some trees about 100 yards in the distance. Racking the zoom eyepiece throughout its 25x to 75x range, I was able to get a very sharp, crisp and bright image with excellent contrast at all magnifications. Edge-to-edge sharpness appeared excellent in my test unit. Colours were natural: not too warm or cold. The apparent field of view(AFOV) became quite noticeably wider as I moved up in magnification though. Moving back to 25x I felt the field was a little narrower than I expected based on my experience with other zoom eyepieces. Looking closely at some branches against a grey sky showed that the instrument displayed very minimal colour fringing at the 75x setting. I could immediately tell this was a noticeable step up in colour correction from the SA405 85mm scope(an ED triplet) I reviewed a couple of years ago. Some of this residual CA was coming from the eyepiece for sure. Over the next few days, I took a series of images with my IPhone just handheld to the eyepiece set at 75x to give the reader an impression of the degree of colour correction evident in the scope in various lighting conditions, drawing on the excellent work of Roger Vine who reviewed the Zeiss Harpia 95mm spotting scope. Let’s take a closer look:
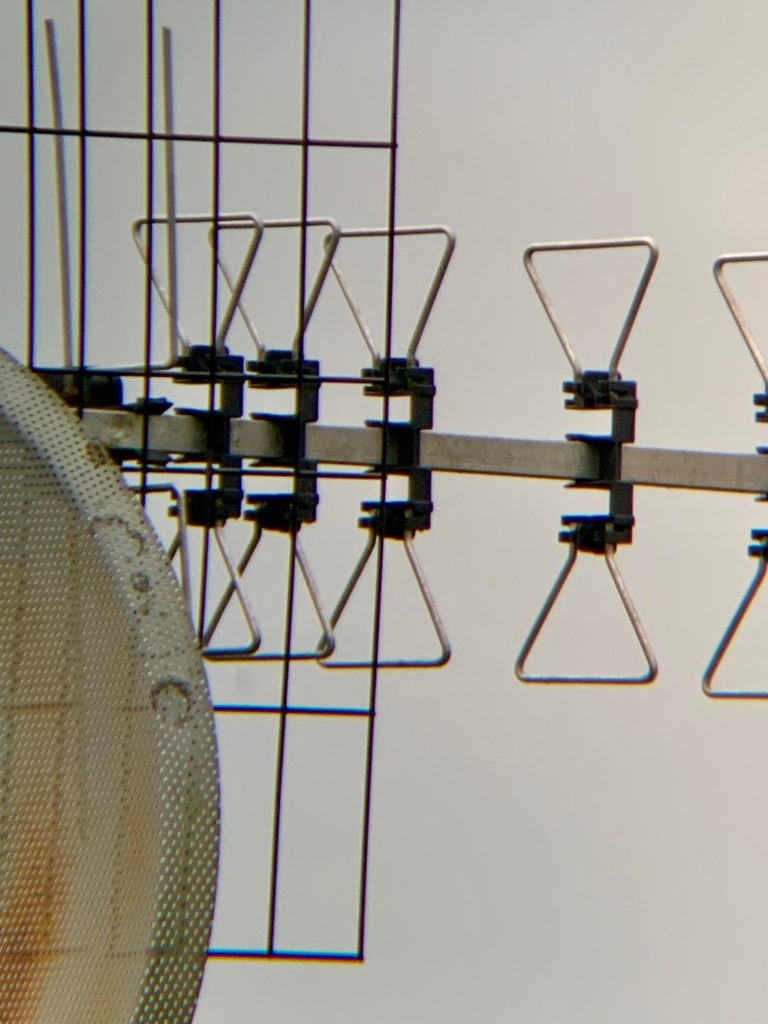
The above image zoomed in to look at the aerial:
And tree branches against a dull grey sky:
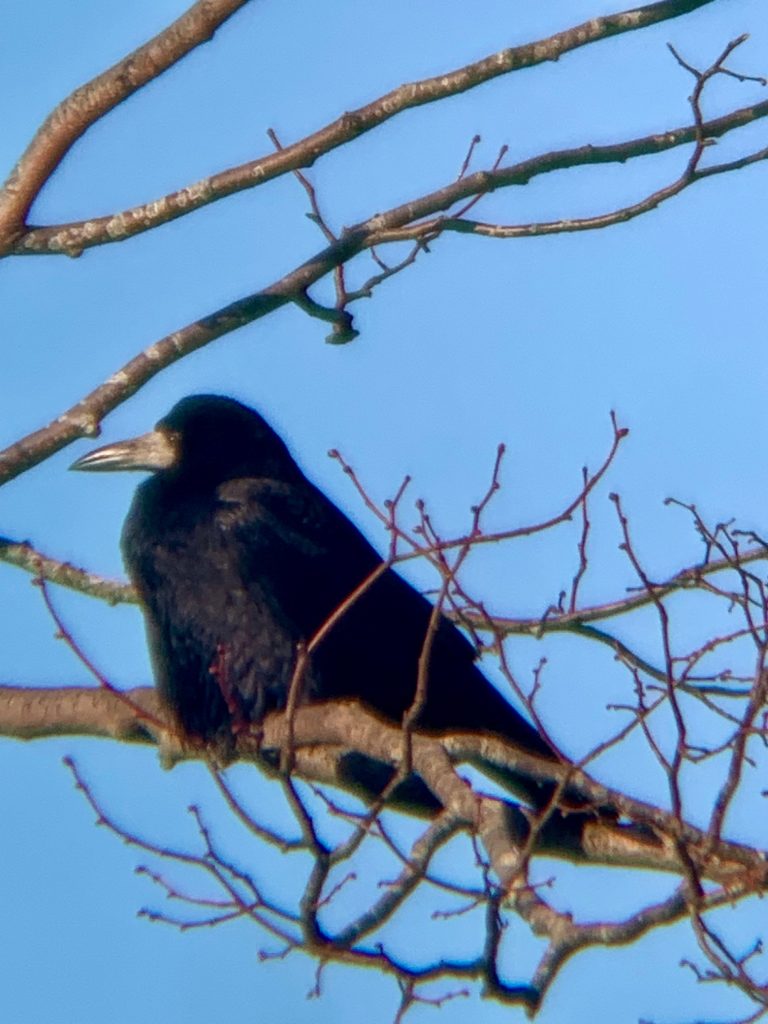
In the next two images, I present a view of a Rook perched high in a tree with the winter Sun behind me, followed by another Rook against a dull grey sky:
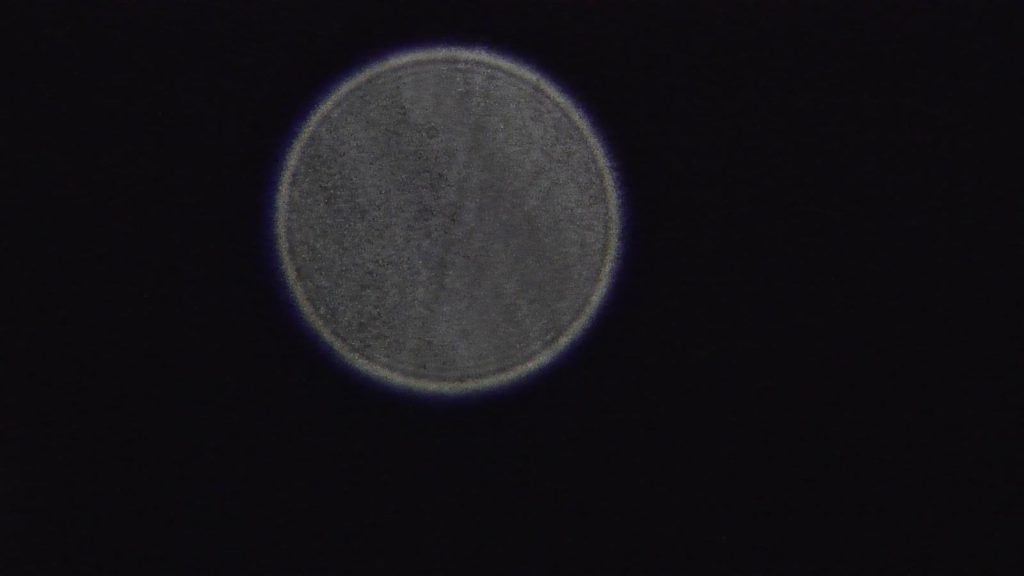
In one final test for chromatic aberration, I inserted the SC001 digital imaging camera into the optical train and pointed the properly acclimated scope at a waxing gibbous Moon. Here is a single shot I obtained:
Commentary on the Images
I hope the reader who carefully examines the images, which have not been processed in any significant way, will conclude, as I have, that colour fringing in the SA401 100mm spotting scope is extremely low or even insignificant. This residual secondary spectrum could easily be removed post processing of course. Reflecting on Mr Vine’s comments on Zeiss’ flagship spotting scope and his posted images, I would agree that even this very sophisticated (with a price tag to match!), shows significant lateral colour, even more I’d say, than the SA401 tested here. Vine also makes the point that observing a jet black Crow against a uniform grey background sky will show colour fringing even on a scope as sophisticated as the Zeiss Harpia. The reason is that high-end spotting scopes have far more complicated optical designs than regular ‘apochromatic’ astronomical refractors, and it shows when eliminating the last vestige of false colour in the image. What’s more, optical testing of high-end spotting scopes show they fall below that of high quality astronomical refractors, but work fine within the magnification range over which they were designed.
Vine likens the view through the Harpia to a Televue 85: a simple ED doublet, at the same magnification. I would add that this is very likely to be the case on any high end spotting scope advertised as ‘APO.’ If you want better apochromatic performance at powers beyond 60x, you’re going to have to move to a moderate focal length (>F/6) astronomical triplet ED refractor and put up with the world the wrong way round(read left-right reversed).
The reader will also take note of the edge performance of the SA401 spotting scope, as evidenced by the image of the trees, showing the sharpness right up to the field stops. That’s an impressive result, in my opinion, and quite in keeping with my initial visual report. The SA401 does not utilise a field flattener but its excellent edge sharpness is probably down to its smaller true field of view(1.77 degrees).
Further Optical Tests:
To further substantiate these comments I set up my Skywatcher Evostar ED 80- an 80mm F/7.5 FPL53 ED doublet APO using Schott optical glass – with the SA401 spotting scope to compare their colour correction on a high contrast target.The little Evostar is a proven standard in apochromatic performance. It shows only a trace of false colour on the highest contrast targets.
I took a handheld image with my IPhone at 75x on a telephone wire about 30 yards in dull, overcast conditions, at about 30m in the distance. Here are the results. The first image is taken through the Evostar 80ED and the second was shot with the SA401. The sky brightened just a little while taking the Evostar 80 ED image.
You can see that the colour correction is very comparable in both instruments. The decently slow F ratio of the ED doublet ensures a well corrected optic. Visually, I felt the Evostar ED had slightly better contrast and colour correction compared with the bigger SA401, though I did notice that the image was significantly brighter in the latter. The reader will note the left-right reversed image from the Evostar.
Under the Stars:
The collimation of the SA401 100mm spotting scope was perfect. I used the SC001 imager to get an image of the intra-focal Fraunhofer diffraction pattern of the bright star Capella, with limited results, as it’s not designed to take high resolution astronomical images. Nevertheless, you can see that the pattern is perfectly round, indicative of the proper squaring on of all the components in the optical train. A few of the outer diffraction rings are also in evidence:
With three outer planets on the sky at the time of writing I was keen to see how they appeared in the SA401. Saturn showed a beautiful yellow globe with the rings seen almost edge on at 75x. Mighty Jupiter, now exceptionally well positioned in the night sky at my northerly latitude, was magnificent at 75x. The creamy-white oblate sphere was tack sharp with no false colour, the planet crisscrossed by numerous belts and zones. I enjoyed several satellite eclipses over a period of weeks and I was impressed to be able to see the famous Great Red Spot at this relatively low power. Fiery Red Mars rising later in the constellation of Cancer, showed a tiny, crisp orange disk with no chromatic aberration that I could make out. The views I enjoyed at 75x inspired me to crank up the power to get a closer look.
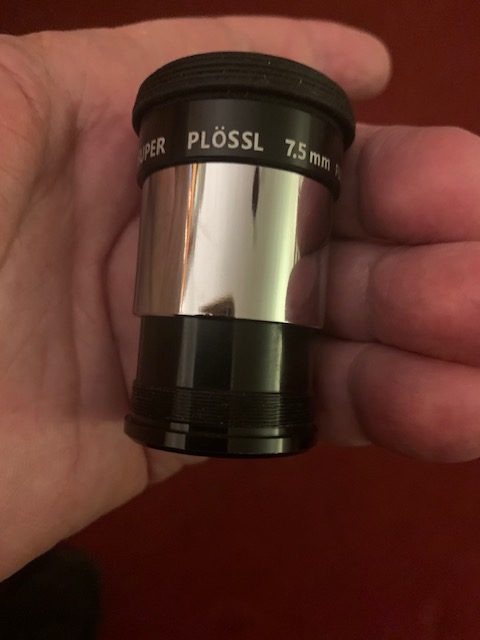
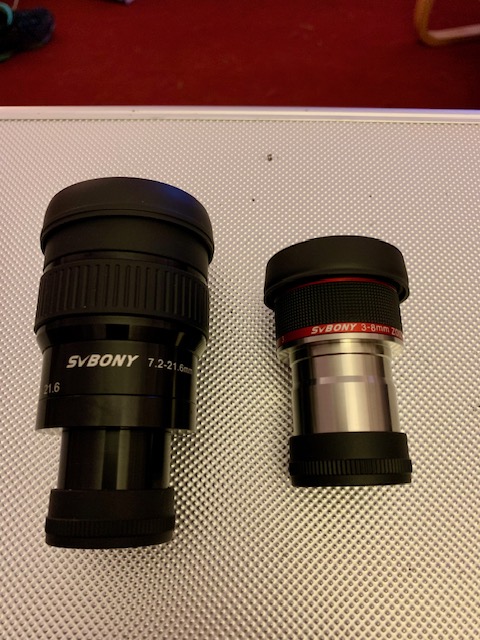
As mentioned earlier, the SA401 is capable of accepting 1.25” eyepieces, but not all those I tested were able to come to focus at infinity. While simple short focal length Plossls and orthoscopics worked superbly, one of my absolute favourites, like the exceptional Svbony SV215 3-8mm planetary zoom, did not focus at infinity. By unscrewing the lenses from my 2x and 3x Barlow lenses and placing them ahead of these eyepieces, I could boost the magnification further(up to 200x). Another winning combination was inserting these amplifying lenses ahead of the SV191 7.2-21.6mm zoom to give a useful range of magnifications.
Perhaps the best way to glean higher powers from the SA401 is to use Svbony’s Gold Series 6mm wide angle eyepiece with its 66 degree AFOV. It sports very generous eye relief – far more than any short focal length Plossl – generating a power of 93x. What’s more, when a 1.6x Barlow is screwed into the nose of this eyepiece, it delivers a power of 148x – plenty high enough for most any application. And yes, the configuration focuses at infinity!
The 6mm Gold Series also has a large and comfortable eye lens for easy eye placement.
Taking advantage of exceptional seeing conditions during the second week of December, when a huge high-pressure bubble over Scotland brought calm but gloriously clear sub-zero temperatures, I turned the instrument on these planets once again. Saturn at 150x looked even more magnificent with its largest satellite, Titan, easy to see. Jupiter showed very nice details at 139x – swirls, spots and festoons, racing their way across the planet as it rotated. The instrument stubbornly refused to show any significant secondary spectrum. On one night, I watched as a Galilean satellite appear as a tiny ‘pimple’ on the limb of the planet, growing larger as it rounded mighty Jove, before ‘pinching off’ to join the other moons in orbit. Wonderful! In the wee small hours of a freezing December night, I cranked the magnification up to 180x to take a closer look at Mars. Though the ruddy Martian disk remained small, I was clearly able to make out the Syrtis Major and a prominent northern polar ice cap. A word of advice would come in handy here. The complex optical design of this spotting scope needs some time to acclimate. Taking it out on a whim from a warm indoor environment to observe the planets at these high powers will likely disappoint. I recommend a good hour of prior acclimation to get the best out of this telescope.
The SA401 100mm spotting scope shows stars as beautiful pinpoints with no chromatic halos around the brightest luminaries. While I’ve been blown away with the views served up by a high-quality 15 x 70 binocular, the view of the Pleiades through the SA401 on a dark, moonless night, was quite simply a show stopper! The beautiful asterism filled the low-power field at 25x, with its constituent blue- white stars shining gloriously. I could even make out some hints of the reflection nebula around Merope. And while my main telescopes are all optimised Newtonians, the view through the SA401 brought back fond memories from my small refractor days, with its crisp, high-contrast views.
As a double star specialist, I was keen to see how the SA401 fared on a variety of these targets. Choosing a power of about 150x, I managed excellent splits of Castor A & B, Epsilon 1 & 2 Lyrae, Polaris A & B, and the spectacular triple system, Beta Monocerotis. Rigel proved more elusive, but on a night of very good seeing, I managed a convincing sighting of its faint close-in companion. I could have visited many more but star hopping is a lot more challenging without a finder scope. Sighting along the side of the tube just has its limits!
All in all, the SA401 proved to be an impressive performer under the stars. It would really benefit from having a simple finder though especially for astronomical applications or when using high powers during daylight. Perhaps a Rigel Quikfinder or some such?
Field Craft:
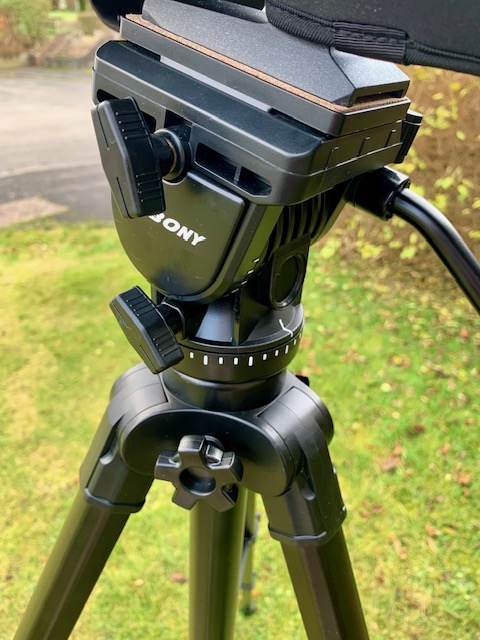
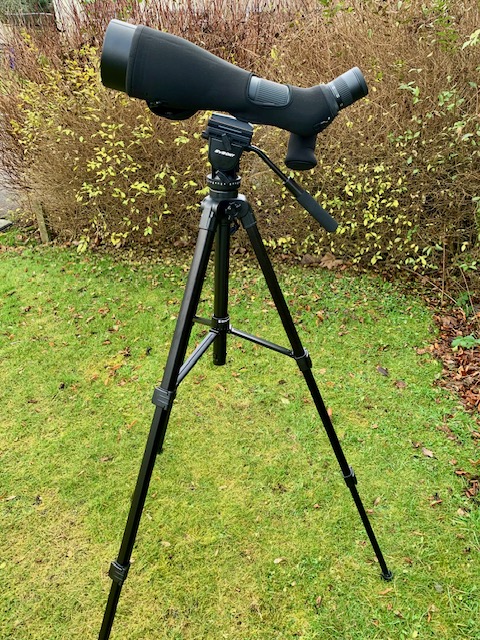
A large, high-quality spotting scope like the SA401 deserves a decent mount for mobile terrestrial observations. I was looking for a tripod light enough to carry on foot, but strong enough to accommodate the sizeable weight of this big 100mm instrument. I took a punt on Svbony’s SA402 tripod which has a number of attractive features, including its light weight(2.2 kilos) a hydraulic gimbal and large pan handle for easy manoeuvres both in azimuth and altitude.
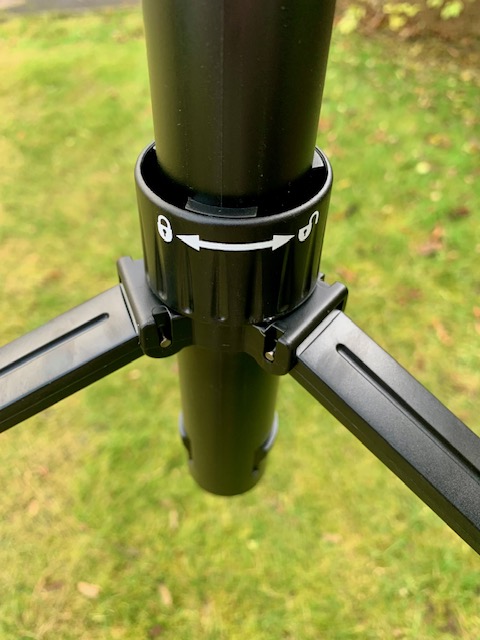
It comes with a quick-release bracket for rapid and easy mounting and dismounting of the spotting scope. The strong, extendable 30mm-diameter aluminium legs reach a height of about 65 inches: perfect for my standing observations and imaging applications. Fully retracted, it stands just 27 inches above the level ground.
The sturdy head can support weights up to 6 kilos. One other nice feature of the SA402 mount is the ability to lock the leg spreaders in place. The base of the legs also have decent rubber pads to add extra grip. Though I would not recommend the SA402 for astronomical observations, owing to its lack of slow motion, fine controls, it proved ideal for using the scope during the day.
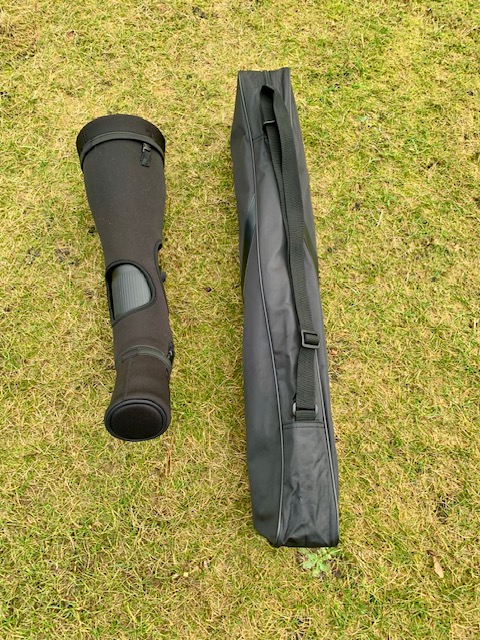
The black neoprene jacket fits snugly around the telescope and provides extra protection of the optics against the elements.
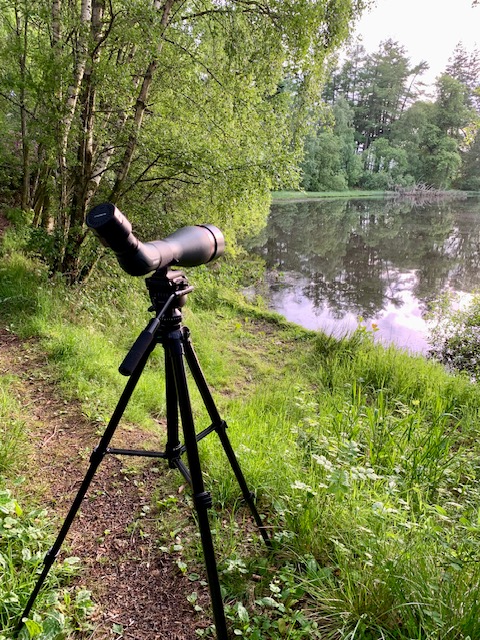
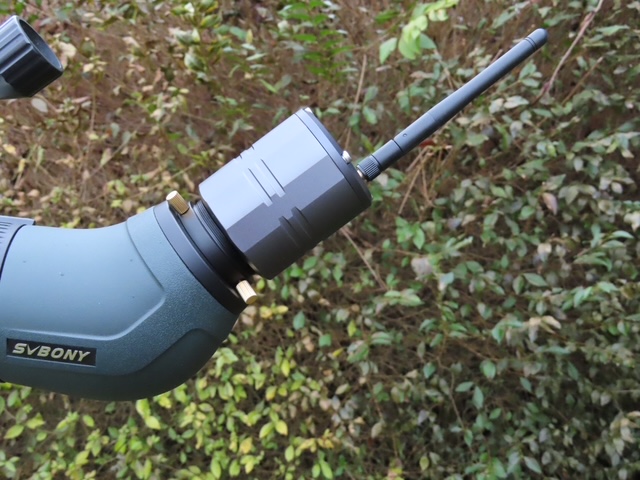
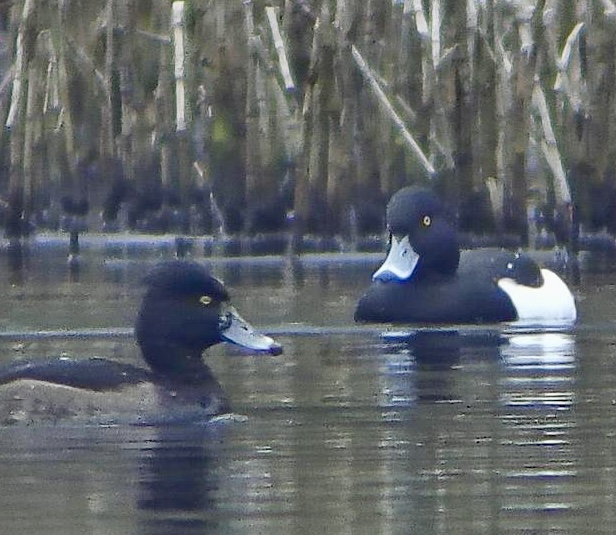
Placing the scope on the SV402 mount, it made sense to swap out the zoom eyepiece on the SA401 for the SV191 7.2-21.6mm using the supplied adapter as the same adapter was used to mount the SC001 imager. Carrying the entire set up on my shoulders, I walked a half a mile up to my local pond to capture some images of the wildlife out on the water.
All the images were shot on a dull,overcast mid-January day with some light rain showers complicating matters. Nevertheless, the SA401 is weather sealed against the elements and coped well under the circumstances. For scale, all the subjects captured were located at about 100m in the distance. The images all underwent some basic IPhone processing after capture.
Conclusions & Recommendations:
The SA401 25-75x 100mm APO is a powerful and versatile spotting scope with excellent, pin sharp optics and robust ergonomics. As well as its optimised daylight performance, it can also be used to explore the night sky. Chromatic aberration is very low and edge-of-field performance impressive. To get anything better, I suspect you’d have to spend at least twice as much again. Svbony offer these scopes in a variety of packages, with the tripod, SC001 imager, or DSLR adapter depending on your requirements.
Finally, it’ll pay the reader to have a look at two other reviews I found on the SA401 for comparison:
Review A: Taken Directly from Amazon
This is my first spotting scope outside the alpha scopes from Zeiss, Swarovski and Leica, I have always bought secondhand because I couldn’t afford them new and wanting a 100mm aperture there was no Way I could afford any of the three alpha brands I have already have the Swarovski 80hd and zeiss diascope 85fl both 15 years old,After reading Neil English review on the svbony sa405 spotting scope and I already have many of svbony eyepieces and their 503 Telescope I decided on their top of the range 100mm sa401 spotting This is stunning spotting scope with performance way above its price range and easily outperforms many 80mm ed spotting scopes,it is brighter than my swarovski and Zeiss diascope. The only 100mm I had used was the 100mm celestron Regal ed and the sybony is clearly superior by quite a margin. This sybony 100 ED easily outperform many 80mm ed scopes,I have tried many mid price spotting scopes and always been disappointed but this svbony is the exception it absolutely blew me away and I don’t get impressed easily. Now for the negative:the eyepiece is only average and shows some chromatic aberration but this is only due to the eyepiece and and not the spotting scope,I have to modify it to accept astronomy eyepieces and I can honestly say it outperform the Swarovski/Zeiss although I have an adapter for the Zeiss to use astronomy eyepieces the sybony still beats it I would like to compare it to the lasted Zeiss diascope but it’s priced beyond my reach. I have updated my review from 4 stars to 5 stars due to the focus being tight to turn and the average eyepiece but the focus have loosen up and I can use astronomy eyepiece. To sum up this should set the standard for spotting scopes up to £1,400 those photos were with the pentax 12mm astro eyepiece fitted to the Svbony SA401 100mm spotting scope
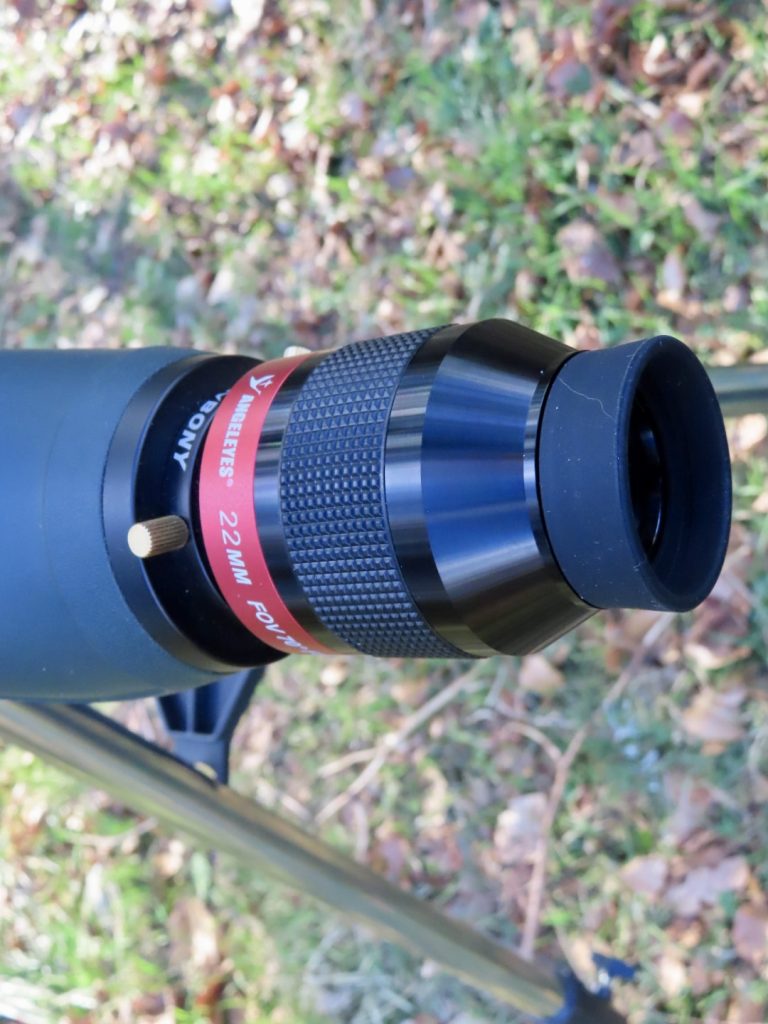
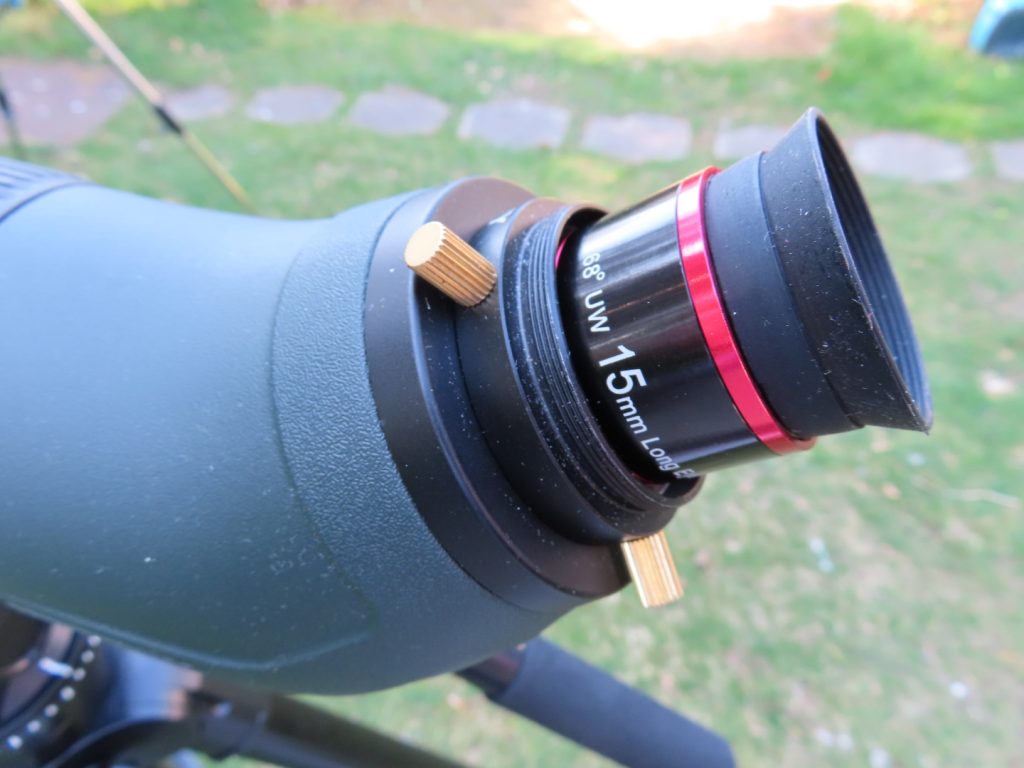
I’ve been experimenting with a few more eyepieces that can be coupled to the instrument. Taking a punt on an ANGELEYES branded 22mm ultra wide angle, I was really impressed with the much wider field of view delivered by this 1.25” eyepiece. On paper this 70 degree AFOV ought to deliver a power of 25x in a 2.8 degree field but the limited diameter of the eyepiece port on the spotting scope reduced this field to somewhere nearer 2.3 degrees. Still, this is a huge improvement over using the dedicated zoom. I use it mostly as a rich field eyepiece to enjoy the glories of the night sky.
In addition I’ve found the red-label Svbony 15mm eyepiece with its 68 degree AFOV to be an excellent, economical mid power eyepiece delivering a magnification of 37x in a great 1.8 degree field.
I believe both these eyepieces will greatly enhance the viewing experience with the beautiful SA401 100mm APO spotter. Check them out if you get a chance!
Dr Neil English explores many more bargains in his latest book, Choosing & Using Binoculars: a Guide for Stargazers, Birders and Outdoor Enthusiasts.
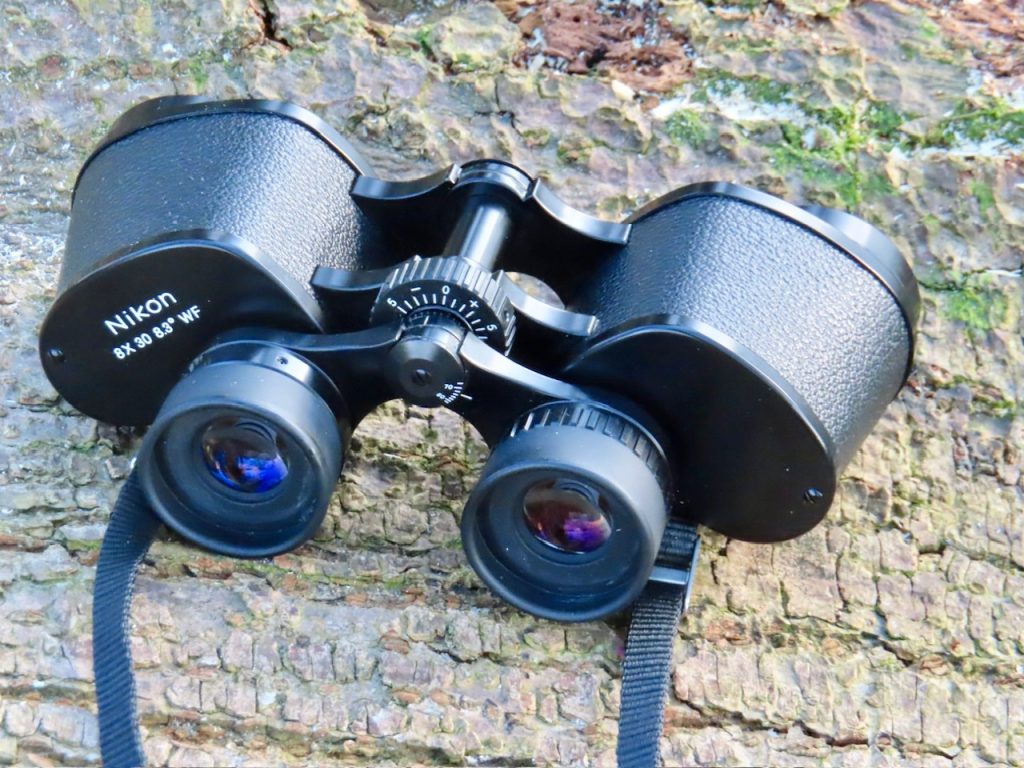
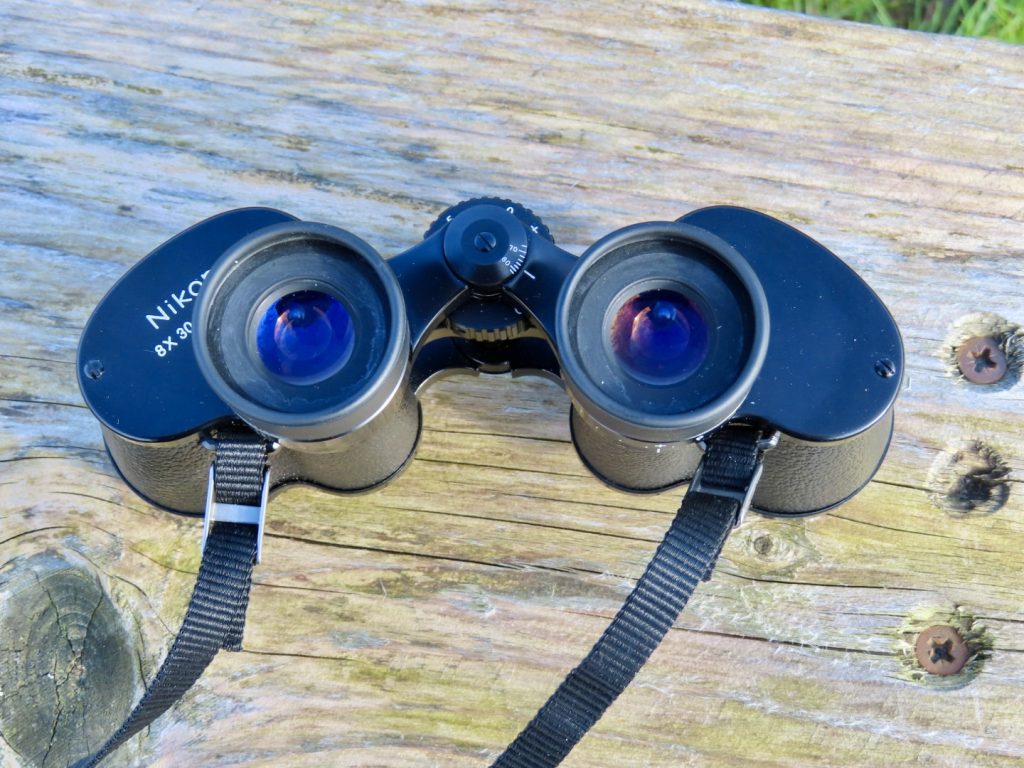
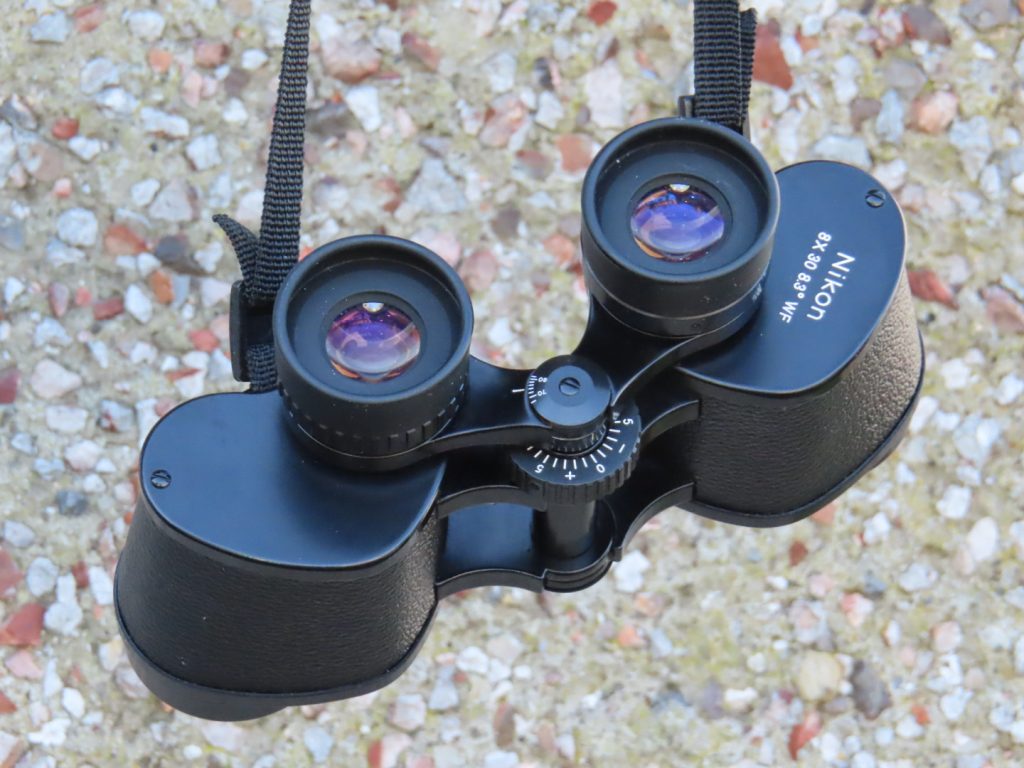
Want a really great binocular that exudes class and pedigree? A binocular that delivers in spades optically but won’t break the bank? Then look no further than this late model Nikon E 8 x 30!
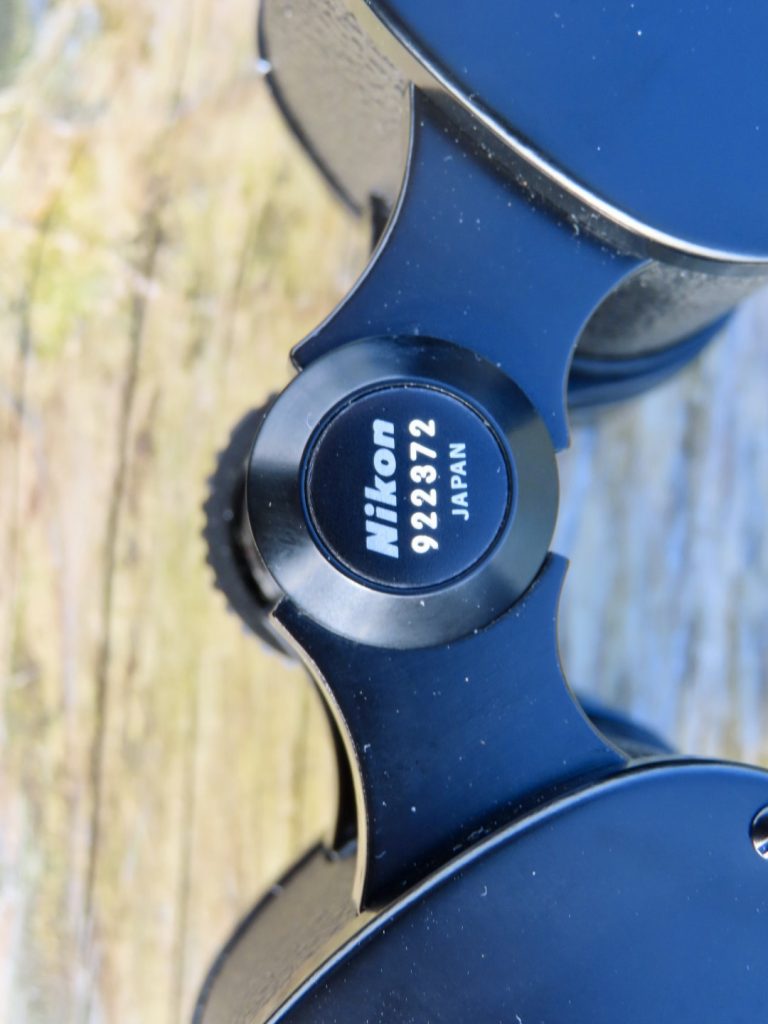
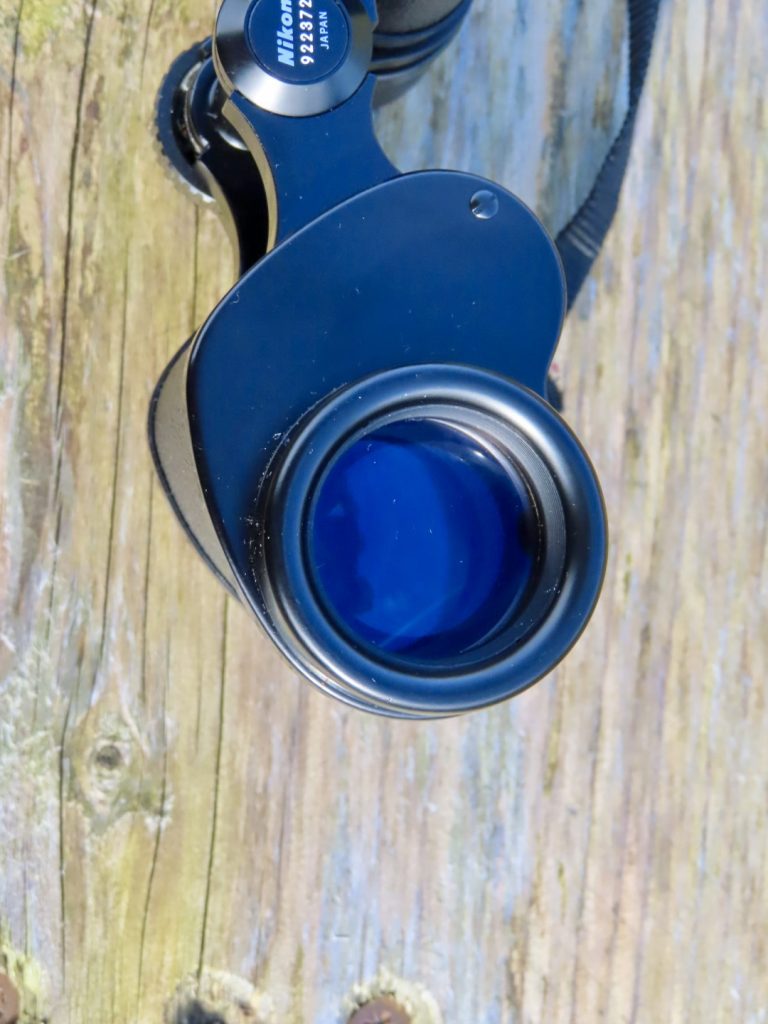
I picked this up from EBay for about £150 plus import duties from Japan, so about £200 all in. It’s in absolutely mint condition despite being about 40 years old based on its late serial number(#922372). Indeed, when I examined the original receipts I got with the instrument, I could see that it was originally made in 1985:
These models had an advanced single coating on all glass surfaces including the prisms. The Model E was updated in the late 1980s to the Criterion model Es (discussed in my 2024 book, Choosing & Using Binoculars)which had full multi coatings. These are easy to distinguish from each other by the colour of the bloom of the ocular and objective lenses: the older Es having a purple tint while the newer Criterion models possessing a greenish bloom.
Mechanically, the Nikon E is beautifully built, in a robust magnesium alloy housing. Indeed, having tested it extensively on field trips, it is arguably true that the build quality of these classic E series was a little higher than the later Criterion and even the most recent EII incarnations.
My unit has a smooth focuser that exhibits a fair amount of friction. And while it’s harder to turn than the most recent EII model, it will likely last longer than the latter because the plastic is tougher than the softer synthetic rubber found on more recent models.
Optically, the Nikon E 8 x 30 sports a wide 8.3 degree true field- very large for its time and still very generous by today’s standards. The view is extremely comfortable and immersive – maybe a little more comfortable even than the venerable EII. It’s a very sharp optic with a great big sweet spot. Contrast is excellent with very good control of colour fringing. The outer field shows moderate pincushion distortion to minimise the dreaded rolling ball effect. Colour tone is ever so slightly yellowish which is not at all distracting to my eyes.Close focus is a very decent 2.5 metres.
I did pick up a few internal reflections aiming the binocular at some bright light sources after dark though, and on the Moon, but they were far less injurious than I had expected given its single coated specification. Performance against the light is also impressive.
Having compared it to a late model E. Leitz Binuxit 8 x 30, also in pristine condition, and dating from about 1960, it is clear to see the improvement in light transmission in the Nikon E. Coating technology had very clearly evolved for the better in that quarter of a century!
In short, I was very pleasantly surprised by this classic 8 x 30 from the Japanese optics giant. If you’re on a budget and want a piece of optical and mechanical excellence from yesteryear, but can still deliver beautifully clear and sharp views, I’d strongly recommend this model. It’s likely that the later model Es had better coatings than the earlier versions so be on the look out for units with serial numbers from the 700,000-950,000 range. I guarantee you’ll be impressed!
Read more about great modern classic glass in my book, Choosing & Using Binoculars: A Guide for Stargazers, Birders and Outdoor Enthusiasts.
When it comes to large, high-power binoculars, Oberwerk is a name that trips off the tongue. For a quarter of a century, its founder, Kevin Busarow, has been servicing the astronomical community with a swathe of innovative products that deliver excellent value for money. One of the most admirable attributes of Oberwerk is their commitment to developing their optical wares as new technologies become available.
The original Oberwerk Ultra models had good achromatic optics, full sized prisms and housed in a robust, weatherproof chassis. Fast forward a decade and the same series now possesses extra-low dispersion objectives and field-flattening optics with significantly improved eye relief for eyeglass wearers.
Another point of significance is Oberwerk’s commitment to the Porro I prism design, which has several advantages over larger aperture roof prism models. For one thing, because the eyepieces of roof models are aligned with their objectives, their minimum IPD becomes progressively larger as the aperture exceeds 50mm. A 70mm roof would probably have an IPD near 70mm meaning that many users, yours truly included, could not bring the barrels close enough together to merge the images. That’s not an issue for Porro I prism designs, the objectives of which have large offsets to allow the majority of human faces to engage with them.
In addition, larger roof prism binoculars of high optical quality are more expensive than a well executed Porro I model of equal quality.
Having tested hundreds of binocular models – both roof and Porro – particularly under the stars- I have cultivated a strong preference for Porro prism models in larger apertures. Stars present as tinier pinpoints without the commonly seen diffraction spikes all too often witnessed in many roof prism models.
So when Oberwerk launched their new ED Ultra Series of Porro I system binoculars, I became particularly intrigued by one model: the 15 x 56, for reasons I shall elaborate on later. What follows is a detailed review of this instrument, based on a couple of months of experience during daylight hours, but also after dark.
A Closer Look at the Oberwerk ED Ultra 15 x 56
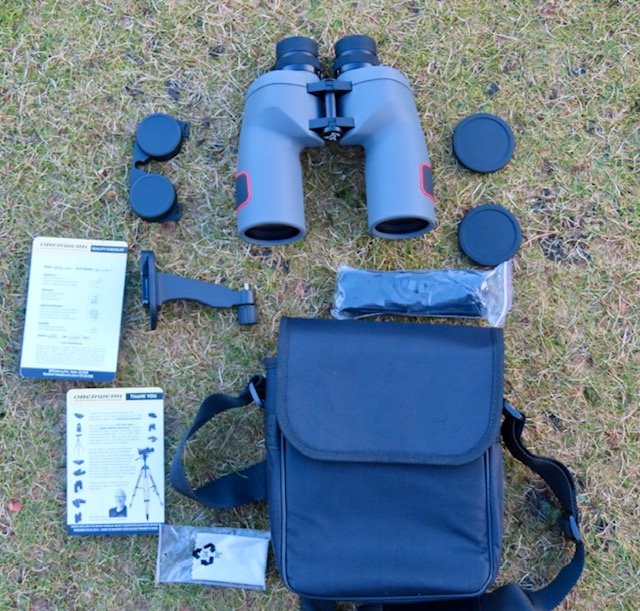
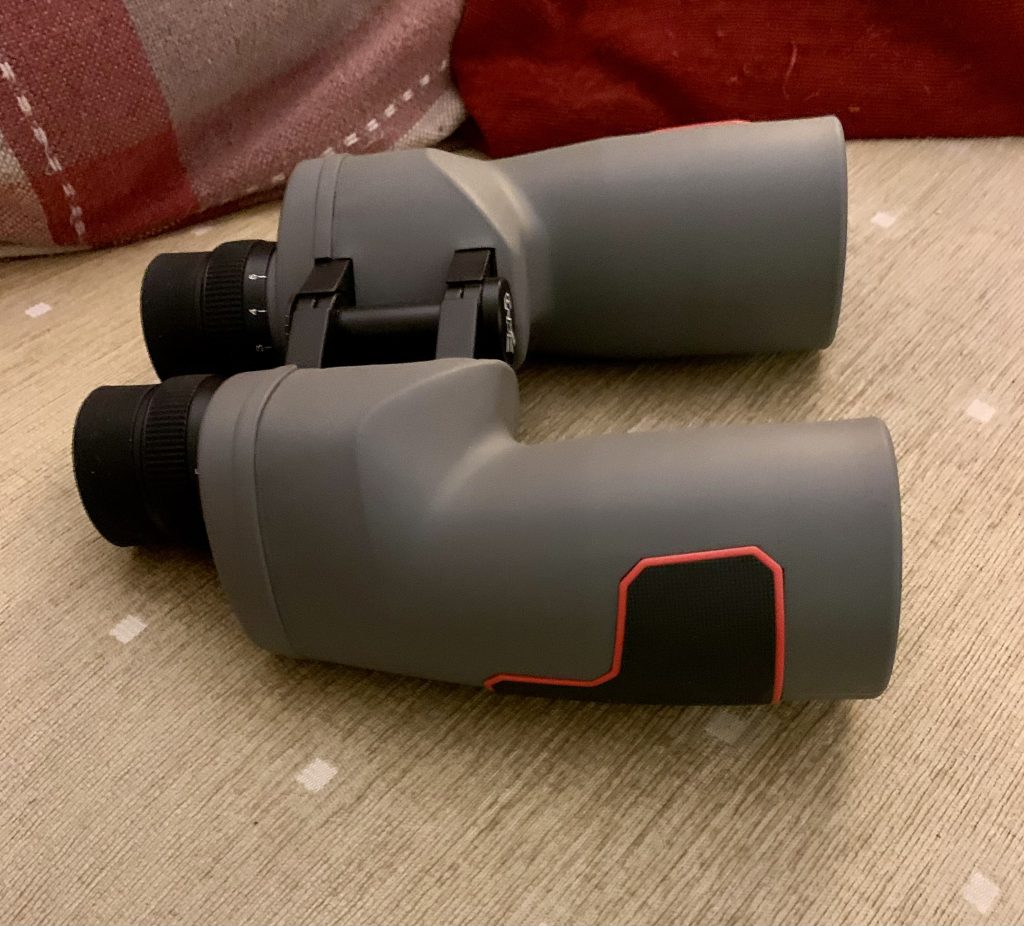
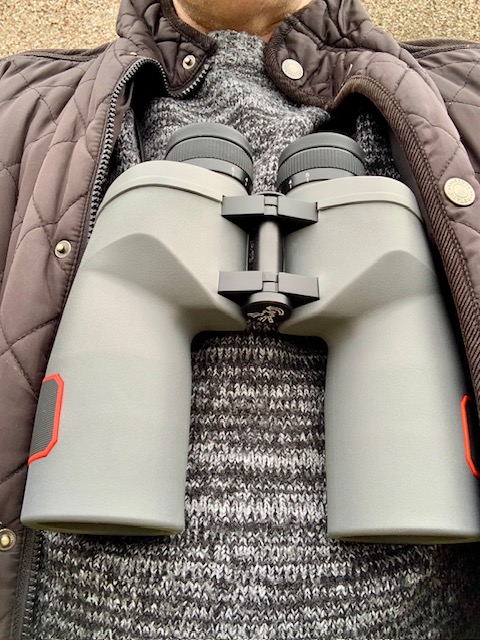
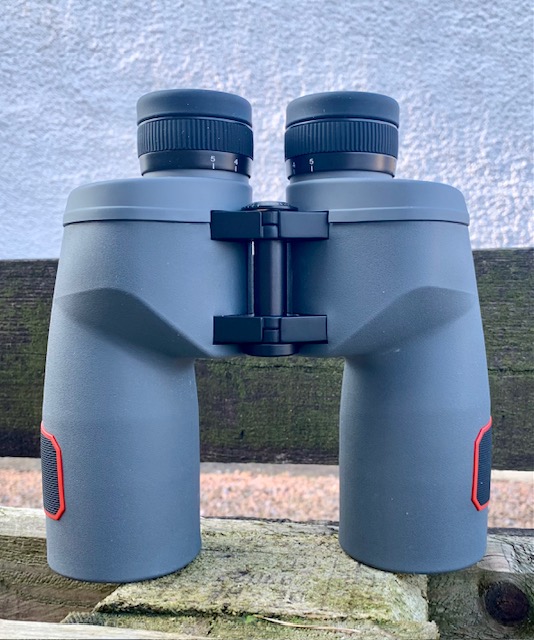
The Oberwerk ED Ultra is an exceptionally handsome and beefy binocular, tipping the scales at 1.48kg. The tough magnesium alloy chassis is overlaid by an attractive grey textured rubber armouring, with black and red accents placed at the sides of the barrels.
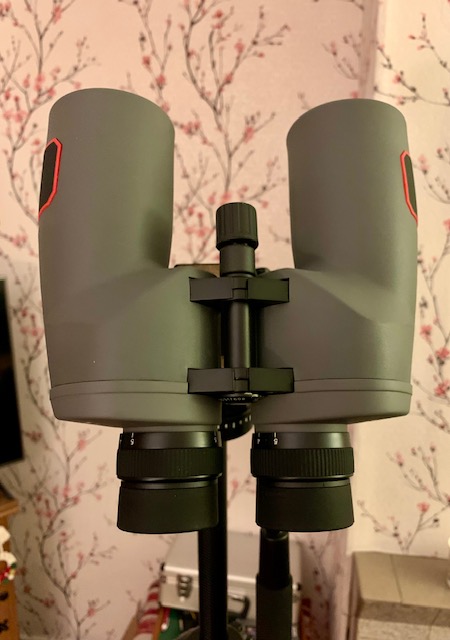
The eyepieces are focused individually and are clearly marked with their +\- 5 dioptre compensations. They rotate smoothly and accurately, maintaining their positions well. The eyecups are fashioned from black rubber and have plenty of useable eye relief. Folded down, I was able to easily engage with the entire field using spectacles. Indeed I later found that while I do not use eyeglasses while looking through binoculars, I strongly preferred using the 15 x 56 with the eyecups folded down, as shown below:
While it is certainly true that Porro prism binoculars are more prone to being whacked out of alignment, these new Ultra ED models possess a 3-point floating plate housing for the full-size BaK 4 prisms at the heart of the instruments. That’s very reassuring, as this will almost certainly mean these models will hold precise collimation indefinitely.
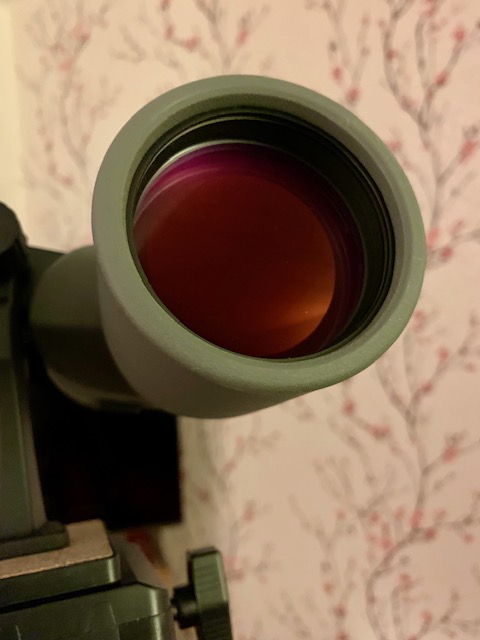
Both the objective and eyepiece lenses exude attractive pink coloured anti-reflection coatings, very similar in fact to their excellent SE series instruments.
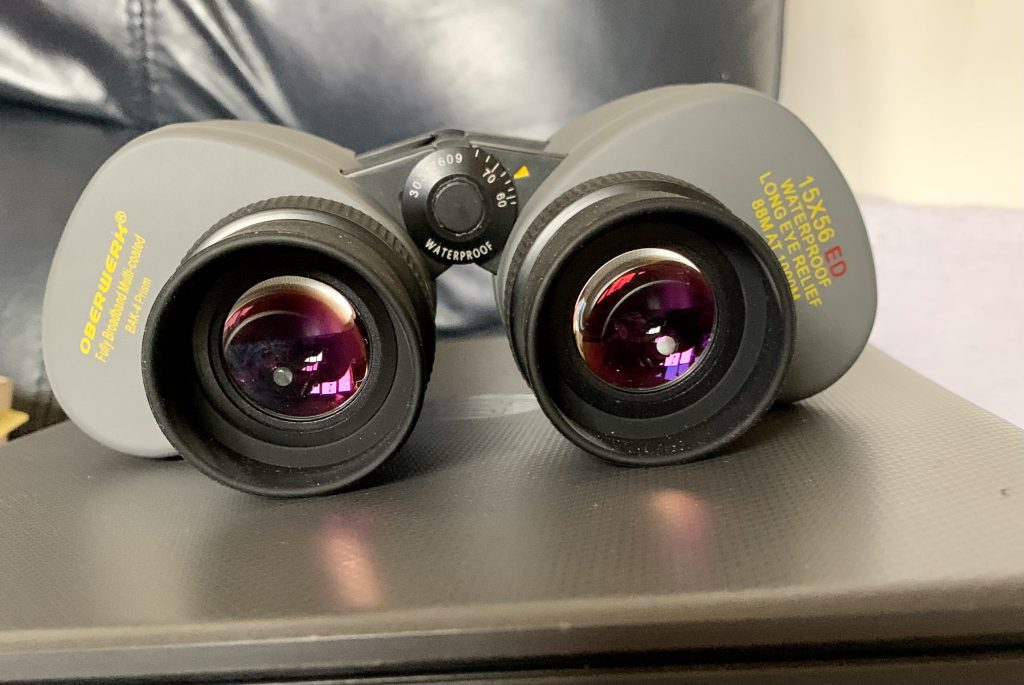
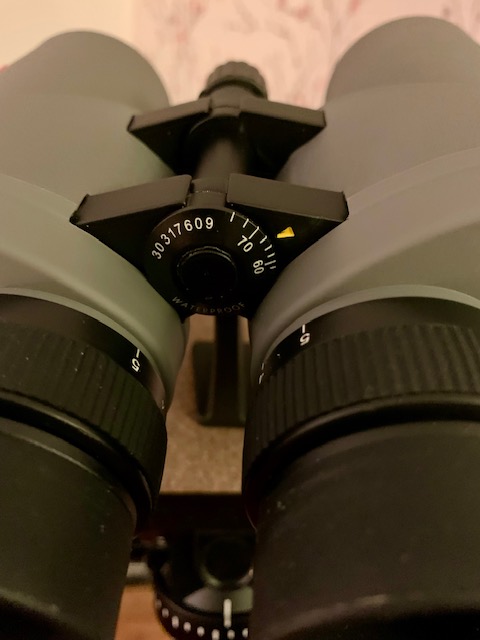
Another neat feature of the 15 x 56 ED Ultra is the easy to read interpupillary distance measure on the bridge which is of great assistance in maintaining the optimal spacing of the eyepieces with one’s eyes.
The central hinge is fashioned from strong metal, rendering adjustments very smooth and precise. Once set, it’s sufficiently rigid to hold its position precisely.
Mounting Options: The interesting thing about a 15 x 56 configuration is that it’s neither lightweight or overly heavy. That means it can be enjoyed handheld or mounted. I used a simple, Rick Young harness to transport the instrument while exploring the rural landscape near my home. A binocular harness distributes the weight of the binoculars more evenly across your body, reducing strain on your arms and hands. This allows for a more stable hold, especially during prolonged use.
In addition, there’s less chance for hand tremors or involuntary movements to affect what you’re viewing. This is particularly beneficial for observing distant or moving objects. What’s more, using a harness can encourage better posture, as it allows the user to maintain a more relaxed position while viewing. Proper posture can also help in reducing fatigue, which in turn helps maintain steady vision. All in all, these ergonomic features collectively help stabilise viewing through the Oberwerk ED Ultra 15 x 56.
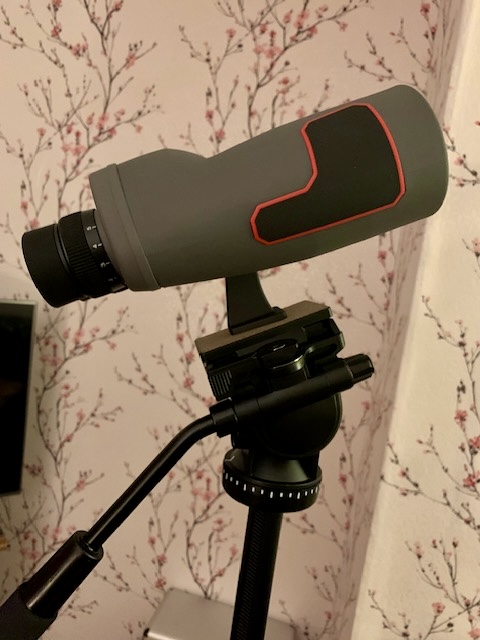
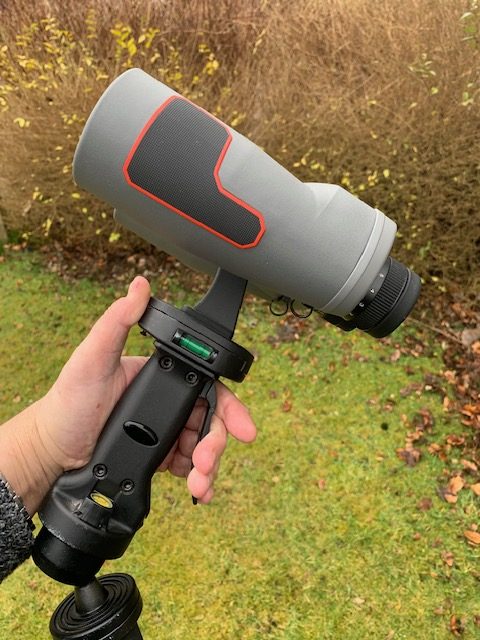
Another option is to mount the binocular on a sturdy photographic tripod via the supplied bracket. While this is a good way to obtain steady views for terrestrial viewing, I found it rather inconvenient for astronomical observing, preferring instead a sturdy monopod. I elected to use Oberwerk’s excellent Series 2000 monopod with its trigger grip head for easy adjusting both in altitude and azimuth.
Optics:
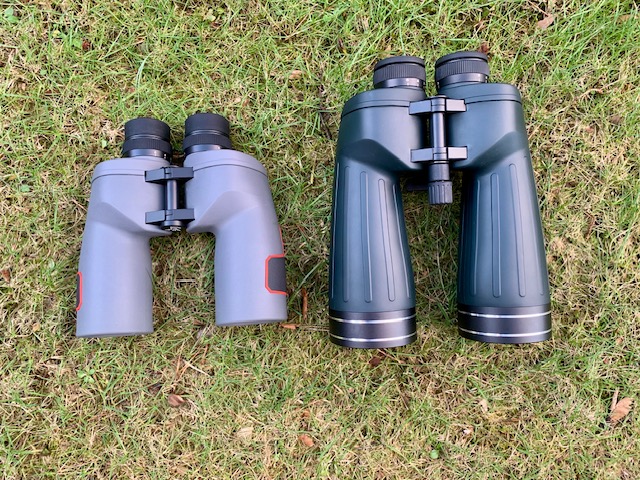
The Oberwerk 15 x 56 ED Ultra is of unquestionable optical quality. It displays a very sharp, high-contrast and colour-pure image all the way from the centre to the field stops. Collimation of the barrels was spot on. Chromatic aberration is vanishingly low across the vast majority of the expansive 70-degree apparent field of view, with only the outer extremities showing up a little lateral colour. The extent to which chromatic aberration has been suppressed was immediately apparent when I compared it to the view through a tripod-mounted 15 x 70 Helios Apollo, which showed much higher levels of colour fringing on the same terrestrial targets. The addition of an FK-61 low dispersion objective element sure works wonders reducing blue/violet fringing to an absolute minimum.
As well as great edge sharpness from the field-flatteners, the Oberwerk 15 x 56 ED Ultra has very low pincushion distortion in the outer field, which should endear it those who like to study architectural features on buildings. At this high magnification, the 15 x 56 serves up a powerful 3-D effect in the middle distance owing to the large separation of the objectives, increasing the spatial information received by the eye.
Pointing the instrument at a bright street light after dark revealed only very slight internal reflections in the Oberwerk 15 x 56 ED Ultra. It also performed very well against natural light, with excellent control of glare.
Notes from the Field:
I measured close focus with a laser rangefinder at 17.4 metres: just a little longer than advertised. The instrument feels great in my medium sized hands. For extra hand-held stabilisation, I found holding the end of the barrels near the objective lenses to afford the most relaxing views.
The extra reach of a 15x glass came in very handy in the identification of smaller birds at my local pond. On one occasion, I glassed a Common Teal( not so common around these parts), and a Little Grebe which were easily identified with the pin sharp, high-magnification views served up by the Oberwerk ED Ultra.
I also found this glass ideal for monitoring a Grey Heron nest in a conifer tree just beyond my back garden. To get a good view, I needed to set up about 150 yards away and the 15x afforded me a perfect perspective far enough away so as not to disturb them. On another afternoon walk along a quiet country road, I chanced upon a small bird, perched on a prominent branch of a hedgerow about 30 metres in the distance. At first glance, I thought it was a Sparrow, but once I tweaked the focus on the eyepieces on the Oberwerk ED Ultra 15 x 56, I was enthralled to discover that this was a species I had never laid eyes on before: a beautiful Reed Bunting, in all its glory!
A large and powerful glass such as the Oberwerk 15 x 56 ED Ultra really comes into its own monitoring expansive, open waters. I took the instrument over to Balmaha, on the shores of Loch Lomond, one bright morning, to scan the waters for wildlife. Sure enough, I soon chanced upon a small group of noisy Greylag Geese as they took to flight, low, over the waters. I used my monopod to obtain a rock steady view as they made their approach, passing us by about 50 metres out from the shore. Further glassing of the loch showed up some Whooper Swans, leisurely swimming near one of the islands. The excellent optical quality and generously wide field of view made their identification easy with their long, elegant necks and bright yellow bills gleaming in the weak, late winter sunlight.
I can report one minor niggle with the Oberwerk ED Ultra: the rain guard is a nightmare to put on while the rubber eyecups are folded down. As a result, I used a better fitting guard during all my field work. Adventures Under the Stars:
I chose the Oberwerk ED Ultra 15 x 56 not only for its excellent daylight performance, but also to explore its potential under the starry heavens. My previous experience with other 15x and 20x glasses with 70mm or 80mm objectives had whet my appetite for observing many of the showpiece objects of the winter sky. And it didn’t disappoint!
First a few words about the specifications of the instrument. My extensive prior experiences with a Nikon EII 10 x 35 convinced me that celestial objects look their best with smaller exits pupils. The sky background is darker in these sub-4mm exit pupils but the extra aperture of the 15 x 56 gathers plenty of starlight, making open clusters sparkle beautifully against the night sky. Furthermore, the complete absence of even slight diffraction spikes in this high-quality Porro prism binocular produces comely, pinpoint stars that are most endearing to the eye. As I explained in my book, Choosing and Using Binoculars, another advantage of smaller exit pupils is that they use the best part of your eye to image the subject.
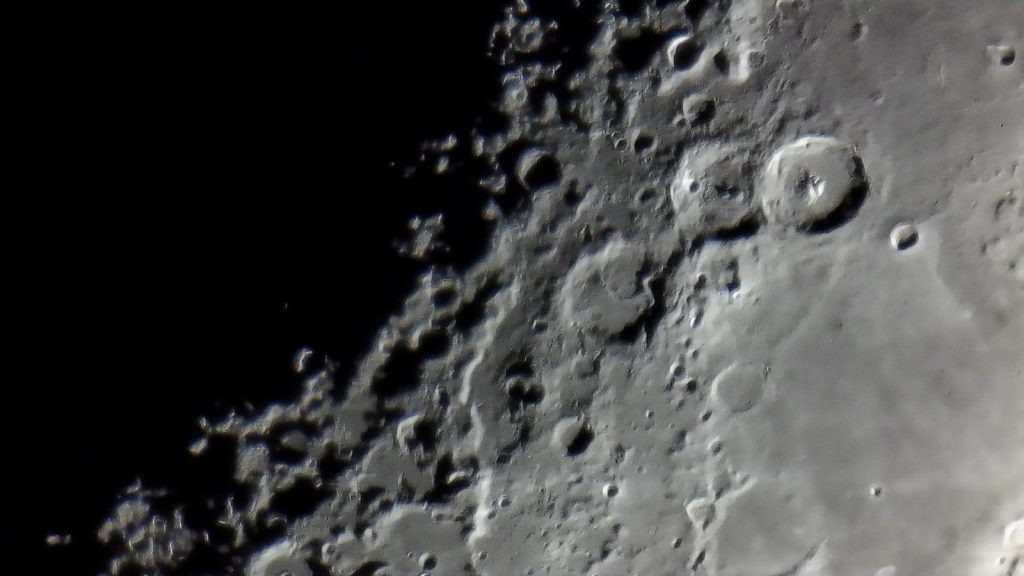
My first target was the Moon. I’m delighted to say I’ve observed it through much of its waxing phases, from slender crescent, all the way to its brilliant fullness. The view through the ED Ultra is superb: clean, crisp and with absolutely no colour aberration in the centre of the field. Only by moving the Moon to the edges of the field of view did I see some very modest lateral colour: blue nearest the centre and yellow furthest from the centre.
Indeed, lunar details, particularly leading up to first quarter phase, were arguably the finest I’ve ever seen in a larger aperture binocular!
There is a modest drop in illumination near the field edges but the image remains tack sharp even at the field stops. Jupiter is also a great test for false colour fringing and I was relieved to see that its tiny creamy white disk showed none across much of the field of view.
Exploring darker skies with no Moon on the sky, I tested how well Arcturus looked as I moved it from the centre of the field to the edge. The field flattening optics built into the eyepieces certainly were doing their job, as the bright orange star remained tightly focused throughout.
I enjoyed wonderful views of the Belt Stars of Orion and the magnificent Sword Handle, the generous AFOV of the ED Ultra presenting exceptionally relaxing and immersive vistas. The views served up by the Ultra ED take you well beyond the performance level of a 10 x 50. The Pleiades and main parts of the Hyades were glorious, sinking into the western skies during late winter. With the constellation of Cancer now at the meridian, I enjoyed framing the beautiful Beehive cluster at the heart of Praesepe, which was just framed by the 4.7 degree true field of the binocular.
I cherished many spell-binding evenings lying back in a zero gravity chair, handholding the instrument, studying the Perseus Double Cluster and the blizzard of stars surrounding Alpha Persei. Kemble’s Cascade in Camelopardalis approached the zenith in early February. Now orientated north to south, its visually stunning linear array of suns dominated the field of the ED Ultra, with room to spare.
Bright Messier open clusters were impressively rendered in the 15 x 56 too: M35 in Gemini was well resolved, as were M36, 37 and 38 across the belly of Auriga. With the arrival of Leo near the meridian late on March evenings, the ED Ultra made light work of picking up the Spring galaxies of M95, 96 and 105 in the same field of view. The generous light gathering power of this instrument was also able to easily glass the bright galaxy pair – M65 & 66 some 8 degrees further to the east.
One final reason I settled on a 15 x 56 format is that it serves up far more aesthetically pleasing views of the twilit heavens. From mid-May through mid-July, there is no true darkness at my far northerly latitude(56 degrees north). Having a smaller exit pupil renders the background sky darker, allowing the summer stars to be viewed with more contrast and thereby enhancing the views. I ‘discovered’ this while using a 10 x 35 Nikon Porro, and very much look forward to seeing what this much larger and more powerful glass will do during my summer vacations.
Conclusions & Recommendations:
The Oberwerk Ultra ED 15 x 56 has proven to be an exceptionally versatile performer in my experience, being of great utility both in daylight applications and under the stars. While a monopod or tripod can be employed to obtain the most stable views, it’s also small enough to be enjoyed hand-held for extended periods of time.
The Oberwerk Ultra ED series takes Porro prism binocular design to new heights of optical performance, with excellent colour correction, wider fields of view, much improved contrast and thoroughly immersive flat field technology. These advances are also coupled with superior ergonomics with their robust, magnesium alloy chassis, improved 3-point floating plate prism housings and sealed, gas-purged interiors. I’m especially pleased to see that Oberwerk now back these instruments up with an extended 5-year warranty too, which will only serve to improve consumer confidence. I would heartily recommend the 15 x 56 Ultra ED to outdoor enthusiasts and amateur astronomers alike, keen to get the best bang for their hard-earned bucks, and which likely compares favourably to the best roof prism models on the market, but for a fraction of their high retail prices.
What’s not to like?
Dr Neil English discusses many more binocular models from all genres in his new book, Choosing & Using Binoculars.
Having throughly enjoyed a world-class 10 x 50 binocular for stargazing, in the embodiment of the Sky Rover Banner Cloud, for some time now, I began to wonder what a step up in aperture and magnification might do for studying my favourite deep sky objects. I’ve had some limited experience with Celestron’s entry-level large binocular: the SkyMaster 15 x 70. This basic instrument revealed some showpiece objects in the night sky such as, the Pleiades and the Orion Nebula in amazing detail: far more, in fact, than any 10 x 50 could show. But it had its drawbacks. For one thing, only the central 50 per cent of the field was acceptably sharp. The build quality wasn’t the most robust either. Long term use would likely result in the barrels losing collimation, and I was also conscious that the binocular was not operating at its advertised aperture of 70mm – more like 63mm in fact.
That led me to try out a number of other models to assess their optics and build quality. The first model I tested was the Celestron SkyMaster Pro 15 x70. Retailing for £215, or twice as much as the entry-level SkyMaster model, it sports a much more robust build quality. Performing a flashlight test, by directing torch light through the eyepiece and measuring the diameter of the circle of light projected out from the objective indicated that it was indeed operating at its full 70mm aperture. However, after mounting the instrument on a sturdy Oberwerk 2000 monopod with its excellent trigger grip ball and socket mount, my impressions of its optical performance strongly suggested that it had the same optics as the basic non/pro model. Stars viewed within the inner 50 per cent of the field of view were crisp and sharp but showed the same distortions as the entry level SkyMaster 15 x 70 model in the outer portion of the field. This was disappointing to me as I did expect an improvement in optical performance for this price hike.
I was also less than impressed by the supplied soft carry case, which I judged woefully inadequate to store the instrument for the long term. This class of instrument definitely deserves a proper carry case if it’s going to be used regularly.
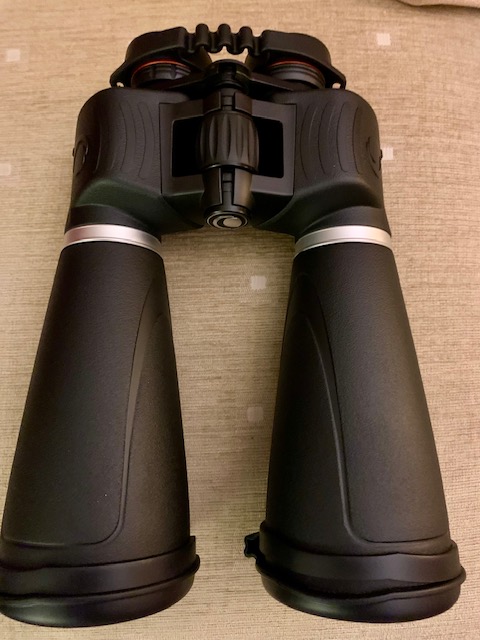
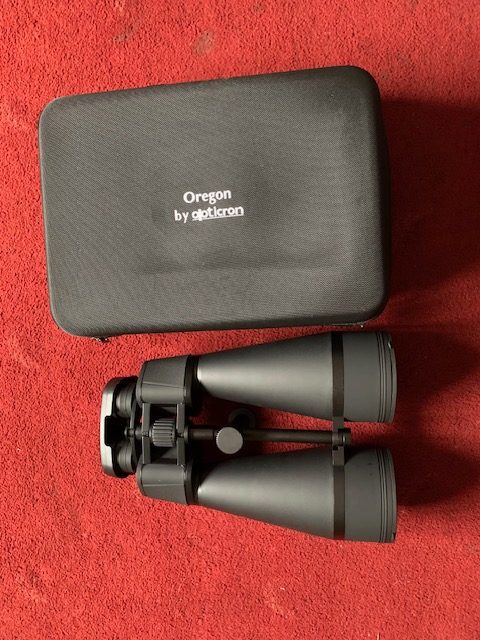
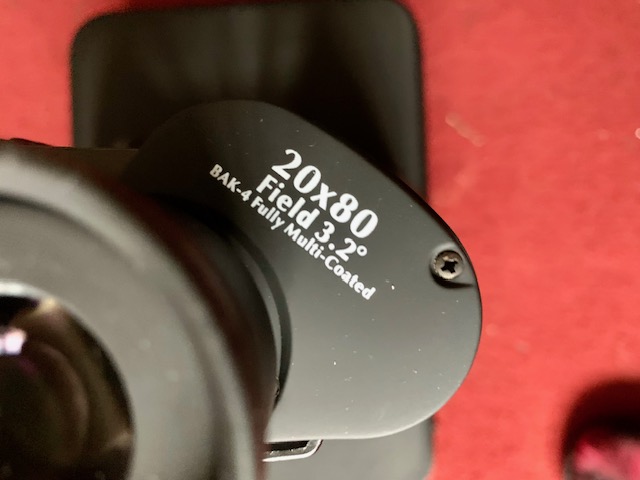
Next, I bought in the Opticron Oregon 20 x 80. Retailing for just £159, I was delighted to see that the instrument came in a sturdy, black foam-lined case. I was also surprised by its relatively light weight, tipping the scales at 2.2 kilos. The focus wheel was very smooth and responsive with no free play. Conducting the same torch light test showed that it too was not operating at its full 80mm aperture but only at 74mm, a result in keeping with astro binocular author, Stephen Tonkin, who measured his unit at about 75mm.
Optically, the unit I acquired performed very well indeed. Even though it has a smaller field of view than the lower power Celestrons at just 3.2 degrees, it showed a much larger sweet spot, with 80 per cent of the field displaying pin sharp stars and even at the edges, stars remained acceptably well presented. Indeed, this 20 x 80 showed me arguably the finest view of the Andromeda Galaxy(M31) I have yet seen in any telescope or binocular. The big 80mm Opticron Oregon represents excellent bang for buck, and is recommended for those on a strict budget. For me though, it raised the same issues I had with the entry-level SkyMaster 15 x 70: under sized prisms and overly light build quality. Still, I was in two minds about letting it go: the views I had of M31, M33, the Sword handle of Orion and the Pleiades, were superb! That extra magnification and smaller exit pupil presented lovely, dark sky hinterlands with sparkling starlight filling the field of view.
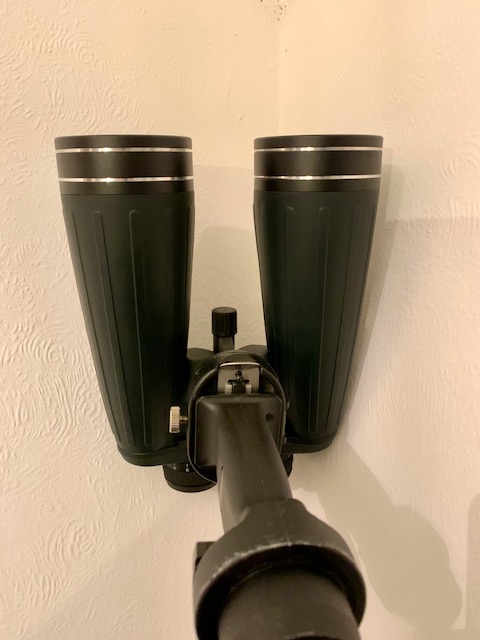
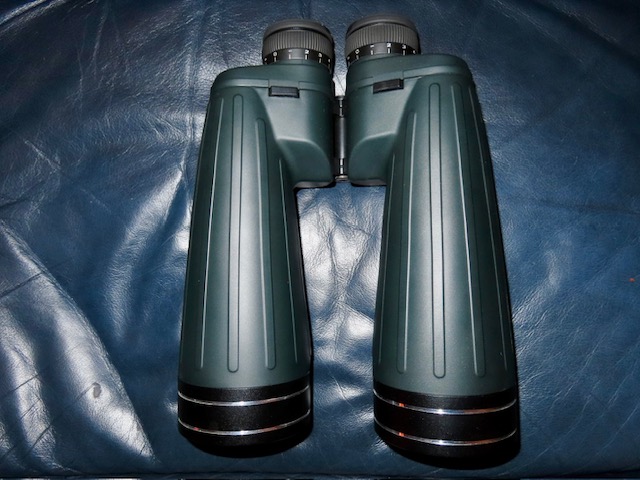
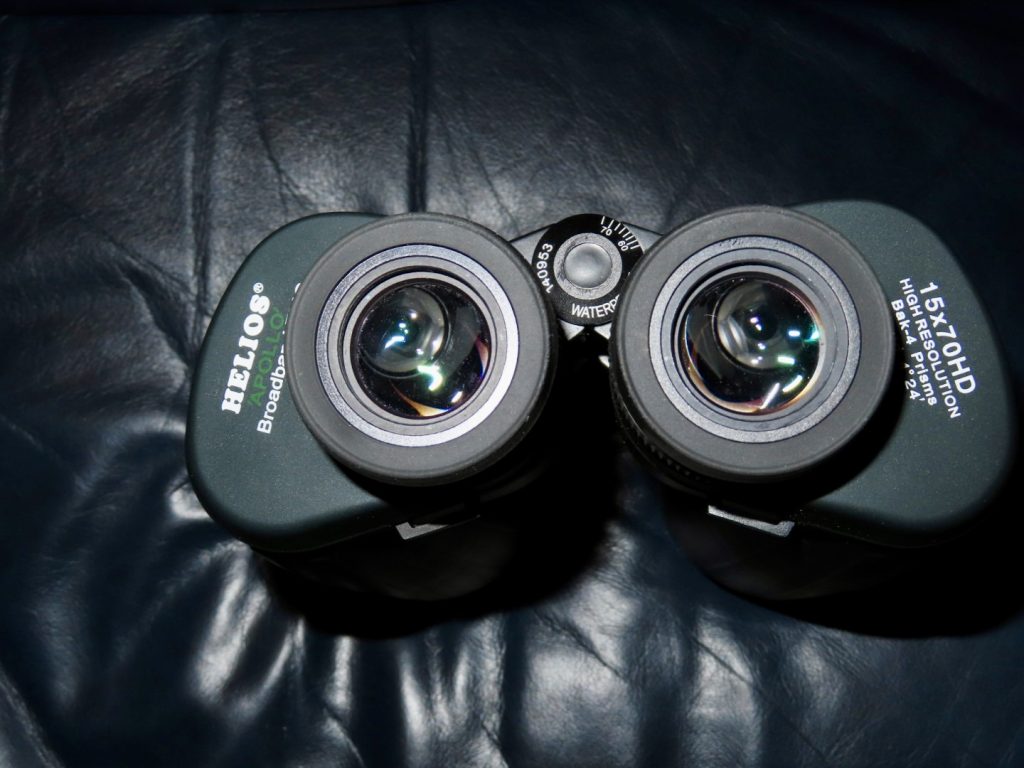
Mindful of acquiring high quality optics and a robust build quality, I chanced upon a lightly used Helios Apollo 15 x 70 for a good price and pulled the trigger on it. When it arrived in its custom aluminium hard case, I was mightily impressed by its excellent build quality. This is one chunky binocular weighing in at 2.45 kilos. It has a thick rubber armouring and a fully broadband optical specification. The significantly increase in bulk is attributed to its full size prisms, which deliver extremely bright and sharp images across its 4.4 degree field. Further research indicated that its light transmission is a whopping 94 percent!
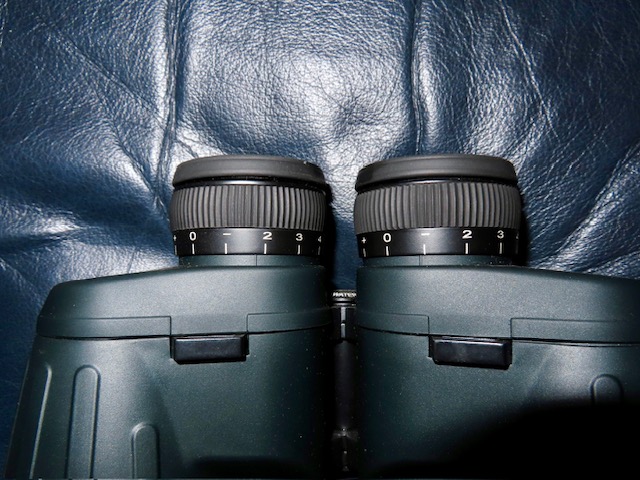
Unlike the usual centre-focus of the aforementioned binoculars from Celestron and Opricron, the now-discontinued Helios Apollo 15 x 70 comes with individually focusing(IF), eyepieces, which take a bit of getting used to! But with practice it becomes second nature.
.
Having to individually focus each eyepiece makes watching wildlife in the near and middle distance quite challenging but for fixed targets it’s not a big issue. The Helios excels at studying targets over long ranges where substantial changes in position can be enjoyed without refocusing. Optically, it’s a good step up from either the Celestron or the Opticron, showing more punchy, higher contrast images with noticeably better control of chromatic aberration.
The Helios Apollo really struts its stuff under the stars though, where all targets are effectively at infinity. That said, there is a slight difference in best focus when observing celestial targets at low and high altitude. I quickly found that I could achieve a workable compromise here simply by setting the focus on stars situated at mid-altitudes. Views of the showpiece celestial objects are very impressive in the Helios Apollo. It serves up the same 4.4 degree field as the Celestron but exhibits a much larger sweet-spot. That said, performance beyond about 70 per cent of the way from the centre falls off very quickly, so much so that stars at the field stops are quite distorted. Still, I found the quality of the views noticeably superior to the Celestron and I enjoyed many hours studying the Beehive Cluster, the Open Clusters, M35 , M36, M37, M38, the Sword Handle and Belt Stars of Orion. Kemble’s Cascade is beautifully presented within its modest field. The Double Cluster is a mesmerising sight high overhead on a dark winter’s night. Centring Alpha Persei in the field of this big binocular reveals a blizzard of stars shining across the cold, dark of interstellar space. You can spend countless hours panning the winter Milky Way from Monoceros in the south to Cygnus low in the north.
Having said all that, all these binoculars have their limitations. For one thing, chromatic aberration can prove bothersome to more than a few individuals. Having enjoyed a new breed of ultra flat field binoculars with ED glass prescriptions in smaller apertures, I can immediately see why a wider, flatter field would appeal to many observers of the night sky. Thankfully, there are welcome signs that this market, once the preserve of premium, so-called ‘Alpha’ brands, is now experiencing revolutionary new models from Sky Rover and Oberwerk, for example, which incorporate extra low dispersion glass and field flattening optics, can now be purchased at prices that won’t break the bank. And based on my experiences with this trio of binoculars, I can readily see one of these new models having a permanent home in my binocular arsenal.
Watch this space!
Read more about binoculars of all genres in my latest book, Choosing & Using Binoculars: A Guide for Stargazers, Birders and Outdoor Enthusiasts.
For the past few years I’ve been using a very good 10 x 50 Opticron Porro prism binocular, which has served me well as a longer range terrestrial magnifier and also for conducting astronomical observations. I chose this instrument for its great build quality and bright and sharp optics. It’s small field of view(5.3 degrees), was enough to frame nearly all the celestial objects I visit throughout the observing year. This size of field also pretty much guaranteed a fairly flat field from edge to edge, keeping stellar images tight and sharp no matter where they’re placed within the field. Back in May however, I bought in an amazing new high-performance roof prism binocular: the Sky Rover Banner Cloud(SRBC) 10 x 50 for review, and its quality literally stunned me. This instrument sported an ultra-flat field, fully double the size of my old 10 x 50 and with excellent colour correction. And while I was able to demonstrate its daylight capabilities in Part I( see the preamble above), I was unable to evaluate its night sky performance owing to the encroach of summer twilight which graces the Scottish landscape between May and the end of July, during which time there is no proper darkness, with only the brightest stars visible in the heavens.
A Trip to Italy
During early July, our family took off on vacation to northern Italy, basing ourselves in a small commune called Revine Lago, Sottacroda, in the foothills of the great Dolomite Mountain Range, and right in the heart of the Prosecco wine cultivation region of northeastern Italy.
With a climate of hot summers and frequent rain, the area is lush with vegetation. I brought along the 10 x 50 as well as its smaller sibling, the 8 x 42 SRBC, to do some daytime birding and visual astronomy after dark. It was also an ideal environment to test the hardiness of these instruments as they were exposed to dust and intense summer heat, where daytime temperatures soared to well above 40C in direct sunlight. I can report that both instruments coped admirably in these hotter, dustier conditions.
While most of my birding was conducted with the smaller 8 x 42 glass, I also found myself using the larger 10 x 50 SRBC quite a bit at my local birding patch, overlooking Marine Lago, a small freshwater lake just a kilometre’s walk from our holiday home. For example, while the 8 x 42 frequently picked up some birds fishing the lake far from shore, it was difficult to make a reliable identification, as they remained small in the huge field of view of the 8 x 42, I was able to use the higher power of the 10 x 50 instrument to tease out more detail. And it paid off! These turned out to be Great Crested Grebes, a species I’ve never personally encountered before.
Both the 8 x 42 and 10 x 50 are extremely stable in my hands. I can hold the 8 x 42 almost rock steady owing to its long barrels and excellent inertia. The 10 x 50 is marginally less stable, of course, more due to the magnification than the weight. My own experiences with lower mass models has definitely shown me that they are less stable at any given power. And if it’s a windy day, I’ll always opt for a heavier glass. This is a very overlooked phenomenon in my opinion, as many folk mistakingly opt for smaller, lighter glasses that are easier to transport. But in my book, optimal inertia overrides such concerns under most conditions.
In early July in northern Italy, sundown occurs shortly after 9 PM local time, although full darkness doesn’t come until after 11 PM. Venturing out about 10:30PM to assess sky conditions, I was greeted by a truly amazing sight: fireflies! Apparently, this location provides the exact hot and humid micro environment for their thriving. I stood in sheer amazement as they flashed in front of my eyes, flying off to gather in nearby bushes. By 11:30 PM they had vanished!
Sky conditions were not as dark as I’d have liked though: a solid Bortle 4, a little bit brighter than my skies in rural central Scotland. Nonetheless, I made full use of the true darkness beginning with Sagittarius and Scorpius well placed in the south around local Midnight. These constellations are too low in the sky at my far northerly latitude of 56 degrees north, so I relished the opportunity to preferentially observe them, together with some selected targets in Ophiuchus. Sitting comfortably in a reclining chair I used the 10 x 50 hand-held to drink up the views. The instrument picked up the rich river of Milky Way starlight coursing through Sagittarius, looking ‘downtown’ as it were, into the centre of our galaxy. Sweeping northwest of the constellation’s brightest luminary, I moved the glass over the Teapot asterism and then on to the Spout, placing Lambda Sagittarii on the eastern edge of my binocular portal, where the 10 x 50 SRBC’s great field of view allowed me to make out the tidy globular cluster M28, and further west, the soft, ghostly light from both the Lagoon(M17) and Trifid Nebulae(M20), with the bright open cluster M21 above them to the north. A delightful view if ever I’ve experienced one!
Moving further west into Scorpius, I centred the bright ruddy star, Antares, and immediately picked up the faint glow of the magnificent globular cluster M4. Spanning an area roughly the size of the full Moon, it’s the closest cluster of its kind to the solar system – a mere 7,200 light years from the solar system. Most of them are situated far out in the halo of our galaxy. Just to the north of Antares, I could see the comely triple system Rho Ophiuchi, arranged in a neat little triangle. I forsook looking further south towards the celestial gems in the Scorpion’s tail owing to the encroach of a light dome from Vittorio Venito, about six miles to the south of our commune.
Positioning my binocular field between northern Sagittarius and northern Scorpius, I examined the region of sky around Theta Ophiuchi, when I quickly chanced on the pretty binocular double 36 Ophiuchi, with its golden primary and fainter white secondary. In the opulent 7.5 degree field of the 10 x 50 SRBC, I picked up the faint glow of yet another summer globular cluster – M19 off to its west. Ophiuchus has many resplendent globular clusters. Centring Marfik and panning slightly in a southeastward direction I was able to bag two more in the same field: M12 and M10 – both about 12 billion years old! Splendid!
The great river of stars of the summer Milky Way was plainly visible overhead and, sitting back in a recliner, I aimed the 10 x 50 SRBC at Sadr in the heart of Cygnus. The view was stunning! Myriad stars of various degrees of glory filled the field, remaining sharp pinpoints from edge to edge. The dust obscured region immediately around Sadr provided some gorgeous contrast surrounded by a blizzard of faint stars. I had to have a quick look at the fetching colours of O^1 and O^2 Cygni. Their beautiful hues stood out starkly against a coal black sky.
In the following days, we hooked up with my family to attend my nephew’s wedding in the grounds of the beautiful medieval fortress of Castello San Salvatore on the afternoon of July 9.
A beautiful crescent Moon greeted us in the sky after sunset. Once we got home, I fetched the 10 x 50 for a quick peek. And I wasn’t disappointed: she was marble white with no colour fringing in the centre of the field, the vast southern highlands bristling with craters. It was a fine ending to a most beautiful day!
After a few days in Venice, we returned home to the cool of Scotland. It was a great experience but ultimately too hot for my liking. Both SRBCs coped admirably though in the intense Italian heat, serving up delightful views by day and by night.
Astronomical Forays under Scottish Skies
While the 10 x 50 SRBC is good to go for short, hand-held astronomical viewing, it certainly benefits from stabilisation using either a tripod or monopod, neither of which were available to me on the Italy trip. For all of my observations here in Scotland, I opted to use the extremely robust and well designed Oberwerk Series 2000 monopod, with a trigger grip mechanism built into the ball & socket mount, which enables the user to alter both the altitude and azimuth movements very easily. At its full extension, it allows six footers like me to observe targets fairly comfortably, even when they are situated near the zenith. This kind of stabilisation rig greatly facilitates studying astronomical targets for longer periods, reducing fatigue and revealing fainter objects within its vast field of view.
Beginning my observations in mid-August, with the return to true dark skies to our latitude, the circumpolar constellations of Cassiopeia and Perseus are already well placed high in the eastern sky after midnight.
The Milky Way runs richly through Cassiopeia and the 10 x 50 revealed stunning panoramic views within its generous field. To put this somewhat in perspective, the SRBC field is much wider than the 6.6 degree field of the Swarovski EL 10 x 50 and it’s even a tad wider than the newly-launched NL Pure 10 x 52(7.4 degrees)! Couple this with an ultra-flat field and excellent control of chromatic aberration and you can begin to appreciate just how compelling the views are through this instrument.
My first sweep through Cassiopeia with the 10 x 50 really thrilled me. Starting at Ruchbah, sparkling in its striking blue-white light, revealed a few beautiful star clusters in the same field of view, most notably M103, with the Owl(or ET) cluster(NGC 457) off to its south southeast. Several other fainter clusters showed up in the same starfield. After admiring the prominent orange colour of Schedar, I followed a line through to Caph where I picked up the prominent misty patch of M52 about 6 degrees off to its northeast. About 3 degrees south of Caph, the same field easily picked up the open cluster NGC 7789 spanning the size of the full Moon. Some observers have remarked that it looks like the head of a tailless comet. I certainly can’t argue with that description! Scanning the area between Gamma Cassiopeiae and Caph easily picked up the smaller star clusters NGC 129 and 225 in a rich background of Milky Way stars.
Before leaving Cassiopeia, I noticed the bright star, Capella, had reached a decent altitude in the northeast. Then aiming the 10 x 50 at a spot roughly mid-way between Epsilon Cassiopeiae(the fainter star marking the tip of the Wonky W) and Capella, I was quickly able to bag Kemble’s Cascade in Camelopardalis- a remarkable line of about 15 faint stars extending over 2.5 degrees, with a single brighter star marking its centre(almost!). The cascade ends by bifurcating into two distinct starry patches, one of which is marked by a compact 6th magnitude open cluster, NGC 1502. Doubtless, the great light gathering power and huge field of view of the instrument greatly facilitates finding this showpiece object easily and quickly.
By October, Perseus is very well placed for observation high in the eastern sky. Pointing the 10 x 50 SRBC at Alpha Persei(Mirfak) serves up a view par excellence. The entire field is peppered with bright stars. Roughly half of the two dozen or so members lie within a mere 2 degrees of Alpha Persei, with the remaining members fanning out in stunning swirls and streams of starlight. Many of the members of this loose open cluster are youthful, hot white stars, yet the excellent colour correction of the SRBC picks up members with a different hues; orange, yellow and creamy white.
Moving up the sky to a spot roughly midway between Perseus and Cassiopeia the naked eye easily picks out a misty patch that is transformed into yet another visual treat in the 10 x 50: the famous Double Cluster. Steadied on the monopod, the instrument presents this cluster in all its glory but the eye is also drawn to a prominent curving chain of stars moving off northward ending in the enchanting Stock 2 open cluster. The Double Cluster and its rich Milly Way hinterland is arguably one of the most beautiful sights in all the heavens!
Placing Algol, the Demon star, on the eastern side of the field of view, you’ll see the bright open cluster, M34 off to the west. The SRBC resolves about a dozen of the brighter members of this condensed cluster well, with the remaining constituents creating a misty backdrop easily covering the size of the full Moon.
This time of year the constellation of Cepheus looms large high in the northwest and I couldn’t resist the temptation to have a look at one of the most fascinating and colourful stars in the heavens: Mu Cephei, or Herschel’s Garnet Star. By aiming at a patch of sky between Alpha and Zeta Cephei, the large field of view of the view of the 10 x 50 SRBC very quickly picked up its unmistakable deep red hue. It’s a stunning sight in this instrument – glowing across the light years, like the dying embers of coal fire. About one binocular field off to the northeast of Mu Cephei towards Cassiopeia, the binocular showed me the faint but exceedingly rich star cluster Trumpler 37, which spans an area roughly 3 full Moon diameters in area. It’is a lovely sight in the 10 x 50 on a dark, October night.
Moving round the autumn sky, the Andromeda Galaxy M31 and its satellites, M32 to its south and M110 further away to its north are fine sights in the SRBC. More challenging is M33 in Triangulum. But it proved easy pickings for this wide angle 10 x 50, simply by placing Alpha Trianguli towards the eastern end of the field when the ghostly glow of this face-on spiral galaxy appears to its west, and with plenty of room to spare.
Waiting until the wee small hours of a dark moonless night, Taurus, Orion and Gemini begin to dominate the eastern sky. Mighty Jupiter rises early with the stars of Taurus and shines like a bright, distant lantern with its steady, creamy white light. The stabilised 10 x 50 easily shows the ephemeral dance of its four large Galilean moons, constantly shifting their positions hour by hour, as they orbit the giant planet. Mars rises later, its dimmer but unmistakable ruddy hue seen just under Wasat in the midsection of the Twins.
Auriga, the celestial Charioteer, is also very well placed at these ungodly hours of an October night. The three Messier open clusters, M36, M37 and M38 show up beautifully in the SRBC, within the same field of view, with M36 being partially resolved into stars.
The Hyades and Pleiades are spectacular objects in the 10 x 50. The horns of the celestial Bull fit comfortably within its large field, and I was delighted to see the lovely open cluster, NGC 1674 to the eastern edge of the same field, something quite beyond the capability of my old 10 x 50 Porro.
Orion holds many treasures for the dedicated star gazer, but you’ll have to wait until about 4.00 AM this time of year before it approaches the meridian. The Belt Stars and its surrounding cluster, Collinder 70, is a spectacular sight on a night of good transparency, with the familiar Snake asterism showing up prominently.
Further south, the Sword Handle of Orion is a sight for sore eyes steadied on a monopod, but I also enjoyed studying the lovely group of stars in the north of the constellation- Meissa – a neat little Pythagorean triangle of brighter stars, with a delicate line of three fainter suns linking Lambda Orionis to Phi^1. Incidentally, Meissa lies just north of a line joining bright red Betelgeuse and Bellatrix, which are conveniently separated by 7.55 angular degrees of dark sky. This was a good test to measure the true field size of the 10 x 50 SRBC and, sure enough, they were just too far apart to fit inside the field.
Finally, at about 4:30 AM, looking east of Orion, Gemini loomed large, with Mars, a bright ‘nova’ decorating its mid-section. I took the opportunity to seek out the wonderful open cluster M35, clearly fan-shaped, with many of its stars resolved, framed by two beautiful orange stars, Mu & Eta Geminorum, pointing the way in the same field of view. Such an enchanting sight!
Conclusions
The above observations are but a small selection of celestial objects I visited over the last few months with the 10 x 50 SRBC. Incidentally, a new and thorough review of its 12 x 50 sibling has also been published and is well worth a look!
Starting too early in the evening shows up countless artificial satellites: many dozens seen on a typical evening, with sometimes two or three seen crossing through the same field! As the night progresses, those orbiting at lower altitudes disappear first, with those placed in higher orbits fading out last. Temperatures ranged from a balmy 25C on the warmest nights to a few degrees below zero on the coolest.
Throughout these vigils, the SRBC performed flawlessly, with no change in the kinematics of the focus wheel and no fogging up of the eyepieces and objective lenses due in part to the excellent hydrophobic coatings applied to the exterior lenses. It’s been a joyous experience looking through such high quality light cups, their enormous fields making it much easier to find the more elusive objects visited. Alas, I have as yet not been lucky enough to bag the new comet gracing our western skies after sunset, but I hope to finally glimpse this icy interloper from the Oort Cloud, before it disappears into the cold dark of interstellar space.
Wish me good luck won’t you!
Update December 6 2024: I did manage to see Comet Tsuchinshan on the evening of October 14 and again on October 17 using the 10 x 50 SRBC. Past its prime I know, but still well worth the effort! Mars moved from Gemini into Cancer on October 20, and in the wee small hours of a very blustery December 6, it was observed just over two degrees north of the celebrated Beehive Cluster. A glorious sight to see right now. It should inch a little closer to the Beehive in the hours to come!
Neil English has been observing the night sky from the tender age of eleven, and has written 8 books about these experiences.